31.10.10

Pumpkin Pie with Streusel Topping


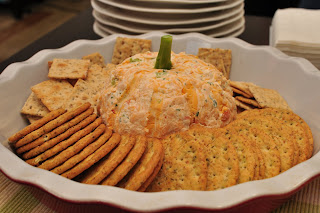
Happy Halloween! Hope you are having a spooktacular night. :) Tonight is my last post about anything pumpkin for a while, so rest assured, if you're getting a little sick of the halloween and pumpkin theme, it will be over as of tomorrow!

I made this pumpkin pie for Thanksgiving and it was a huge hit! The crust is made with whole wheat flour which really adds a depth of flavour and texture to the pie in a very unexpected way. The streusel topping adds a tasty crunch to the pie as well and was enjoyed by everyone - even the non-pumpkin pie eaters.
Whole Wheat Pie Crust
Recipe from Anna Olson
Ingredients:
  • 1/2 cup plus 3 tbsp all-purpose flour
  • 1/2 cup whole wheat flour
  • 2 tsp sugar
  • 1/2 tsp salt
  • 1/2 cup cool, unsalted butter
  • 2 tbsp whisked whole egg
  • 1 tbsp cold water
  • 1 tsp white vinegar or lemon juice

Method:

  1. In a food processor (or by hand) combine both flours, sugar and salt. Cut butter into small chunks and add to the flour, mixing until the mixture is crumbly. Whisk egg, water and vinegar together and add to the flour mixture. Mix until dough comes together. Shape dough into a disk, wrap in plastic and refrigerate at least one hour.
  2. On a lightly floured surface, knead the pie dough slightly to soften, then roll out the dough into a circle just under 1/4 inch thick. Dust a nine inch pie plate with flour and place rolled pastry in the dish. Crimp the edges to make them look pretty. Chill the pie shell while preparing the filling.

Pumpkin Pie with Streusel Topping

Recipe from The Guy Can't Cook

Ingredients:

  • 1 1/2 cups canned pumpkin
  • 3 large eggs
  • 1/2 cup packed brown sugar
  • 2 tbsp cognac or bourban
  • 1 tsp ground cinnamon
  • 1/4 tsp ground cloves
  • 1/4 tsp grated nutmeg
  • 1/2 tsp ground ginger
  • 1/2 cup whipping cream
  • 1/2 cup whole milk
  • 1/4 tsp salt
  • 1/4 cup packed brown sugar
  • 2 tbsp all-purpose flour
  • 2 tbsp unsalted butter, softened
  • 1/4 cup finely chopped pecans

Method:

  1. Preheat oven to 350F. Whisk together pumpkin, eggs, first brown sugar amount, cognac, cinnamon, cloves, nutmeg, ginger, cream, milk and salt in a large mixing bowl. If you want a really fluffy pie, separate the eggs. Add yolks to batter, then in a separate bowl beat the whites until they form stiff peaks. Gently fold the egg whites into the pumpkin mixture.
  2. In a small bowl, combine all the topping ingredients. Mix with your hands until butter is incorporated with the sugar and flour and the mixture is crumbly. Set aside.
  3. Pour filling into prepared pie shell. Bake for 40 minutes, then sprinkle with topping and continue to bake 15 minutes longer, until center is set and topping is browned (this time took about 20 minutes longer for my pie, so keep an eye on your pie and make sure the center is set before you take it out of the oven). Remove from oven and cool thoroughly before slicing.
  4. Serve wedges of pie with a dallop of sweetened whipped cream or a small scoop of vanilla ice cream. A few slices of candied ginger make a nifty garnish too!

Well, thats the last of the pumpkin recipes for a while. For those of you in the USA, you can try this pie recipe out for your Thanksgiving, which I believe is coming up in a couple of weeks!

Happy Baking my Friends!

30.10.10

4 Layer Pumpkin Cake


Since it's halloween weekend, I thought another post or two about some yummy things to do with pumpkin would be fitting. This cake received rave reviews from friends and family and I have to agree it is delicious. I didn't initially want to make it for a couple of reasons... but the main one being that it uses a package of cake mix. I don't like cake mix - I think its full of processed garbage that doesn't really belong in any one's mouth and I don't particularly like the taste of it. But after some convincing on behalf of my sister I decided I would try it out.


It really doesn't save you any time, but the recipe has so many other good things in it that you really forget you've put something from a box into the mix. So if you're skeptical after reading the recipe, take my word for it - it's delicious. This cake is even better after it sits for a night or two - be sure to make it a day ahead.
Luscious 4 Layer Pumpkin Cake
Recipe from Kraft Canada
Ingredients:
  • 1 pkg. (2-layer size) yellow cake mix
  • 1 can (14 fl oz/398 mL) pumpkin, divided
  • 1/2 cup milk
  • 1/3 cup oil
  • 4 eggs
  • 1-1/2 tsp. pumpkin pie spice, divided
  • 1 pkg. (250 g) Philadelphia Brick Cream Cheese, softened
  • 1 cup icing sugar
  • 3 cups thawed Cool Whip Whipped Topping
  • 1/2 cup caramel ice cream topping
  • 1/2 cup chopped toasted pecans

Method:

  1. Heat oven to 350F. Grease and flour two 9-inch cake pans (I used parchment in the bottoms on the pans instead of flouring them). Beat cake mix, 1 cup pumpkin, milk, oil, eggs and and one tsp of the pumpkin pie spice in a large bowl until well blended. Pour into the prepared pans.
  2. Bake 28-30 minutes, or until a toothpick inserted into center of cake comes out clean. Cool cakes in pans for 10 minutes. Remove from pans to wire racks and cool completely.
  3. Beat cream cheese in a small bowl until creamy. Add sugar, remaining pumpkin, and remaining spice. Mix well. Gently stir in cool whip.
  4. Cut each layer of the cake in half horizontally. Spread cream cheese frosting between layers. Do not frost top layer. Drizzle cake with caramel sauce just before serving and sprinkle with toasted pecans. Refrigerate leftovers.

This is definitely a great way to use up any leftover pumpkin! Tastes delicious and the ingredients are really basic. I hope you enjoy it and I promise, after this weekend, no more pumpkin desserts for a while!!!! Happy Halloween Everyone!

26.10.10

The Daring Bakers October 2010 Challenge - Doughnuts!


Well, its that time again - time to post up the October 2010 Daring Bakers Challenge! And a challenge it was. The October 2010 Daring Bakers challenge was hosted by Lori of Butter Me Up. Lori chose to challenge DBers to make doughnuts. She used several sources for her recipes including Alton Brown, Nancy Silverton, Kate Neumann and Epicurious. It was my first time deep frying anything and I was so happy to have my good friend D there to help. It was nice to have two sets of hands as there was a lot of multi-tasking involved!


I chose to make two kinds of doughnuts - pumpkin cake doughnuts and a yeasted doughnut recipe called bombolini. The bombolini were filled with either lemon curd or raspberry jelly (both courtesy of D). Both types of doughnut were absolutely delicious and were devoured eagerly by hubby's friends who were at our place for games night while all this craziness was going on!


I'm not going to repeat the recipes here as I did not do anything significantly different from the original recipe and it would make for an awfully long post! So, you can find the pumpkin doughnut recipe here and the bombolini recipe here. This post will mainly be about photos! We got some great photos and these recipes literally made loads of doughnuts. I would highly recommend both recipes and the cinnamon sugar that the pumpkin doughnuts are rolled in is absolutely magical!


I've always been afraid of deep frying - mainly out of the fear of being burnt by the hot oil splashing up at me. But I feel like I really conquerred that fear during this challenge! The one thing I found very challenging was the temperature fluctuations... not sure if it is because I have a gas range or what, but I was adjusting the temperature of the burner every few minutes to maintain the recommended deep frying temperature. Any tips from you experienced deep fryers out there or do most of you have the same problem? Either way, we didn't have any doughnut disasters - they all turned out beautifully and D & I made a great team. I deep fried the doughnuts while she tossed the hot doughnuts in the cinnamon sugar mixture. We definitely had an assembly line going!


I hope you enjoy the photos of our adventure! D is joining the DBs for the November challenge and is really excited. Thanks for stopping by my blog to check it out and thank you to Lori for such a fantastic challenge! I'm already looking forward to next month's challenge!

Happy Baking my Friends!

Halloween Appetizers!


Can you believe that Halloween is this weekend already? Time just seems to be flying by. It seems like just yesterday it was a sunny summer afternoon. Now the temperatures have dropped, the mornings are frosty and the leaves are falling. A lot of families have really fun traditions for Halloween - some have a big halloween party and dress up in extravagent costumes, some carve pumpkins, and yet others set up a haunted house and hand out candy to neighborhood children. Growing up we didn't really celebrate Halloween and I always felt so left out. My favorite part of Halloween is the beautiful orange pumpkins so now that we are on our own, we have decided to start our own traditions! My hubby and I have started hosting an annual pumpkin carving party. We have our friends over, go to the pumpkin patch and pick our pumpkins, then come back to the house for carving and of course lots of food.

This year I made some really fun Halloween themed appetizers - Spider Web Dip and a "Pumpkin" Cheese Ball. They were so cute and deliciously festive. Since I'm posting a couple of recipes I'll keep my post short! Hopefully you are inspired to try these recipes out for your Halloween party this weekend! :D

Halloween Spider Web Dip

Ingredients:

  • 1 tbsp vegetable oil
  • 1 onion chopped
  • 4 cloves garlic, minced
  • 1/4 tsp each salt and pepper
  • 1 540mL pinto or white kidney beans, drained and rinsed
  • 2 avocados
  • 1/4 light mayonnaise
  • 2 tbsp lime juice
  • 2 cups salsa
  • 1/2 cup light sour cream
  • 2 black olives, halved and pitted

Method:

  1. In a skillet, heat oil over medium heat; fry onion, half of the garlic, the salt & pepper until softened, about 5 minutes. Add beans; cook over medium-low heat until hot, about 5 minutes. Using a potato masher or fork, mash until almost smooth; let cool.
  2. Meanwhile, cut each avocado in half and pit; using spoon, scoop flesh into bowl. Mash until smooth; stir in mayonnaise, lime juice and remaining garlic.
  3. Evenly spread bean mixture in 8-inch pie plate or serving dish. Spread salsa, then avocado mixture evenly over top.
  4. Spoon sour cream into plastic bag; cut off tip of 1 corner. Pipe in concentric circles over top. From centre to rim, pull knife through sour cream at even intervals to form web pattern. In center, place 2 olive halves end to end to form spider body. Cut out remaining olive halves into 8 slivers; arrange around body for legs.

"Pumpkin" Cheese Ball

Recipe from Everyday Favorites by Canadian Living


Ingredients:

  • 1 pkg cream cheese, softened (250g)
  • 2 cups shredded orange old cheddar cheese
  • 2 tbsp each diced onion, carrot and celery
  • 1 tbsp minced fresh parsley
  • 1 tsp prepared horseradish
  • 1 broccoli stem (3 inches), peeled

Method:

  1. In large bowl, beat cream cheese until smooth; stir in cheddar cheese, onion, carrot, celery, parsley and horseradish. Form into ball; wrap in plastic wrap. Refrigerate until firm, about 1 hour (or up to 3 days).
  2. Unwrap ball and flatten slightly; insert broccoli stem at top to resemble pumpkin stem. Using handle of wooden spoon, draw verticle ridges at even intervals to resemble pumpkin.
  3. Serve with crackers, and celery sticks.

Stay tuned tomorrow for my post about the October 2010 Daring Bakers Challenge! Its a good one.

Happy Cooking my Friends!

25.10.10

Tandoori BBQ Chicken


Save-on foods has these great bottled indian curry sauces in their ethnic foods aisle. Not only are they 1/2 the price of the brand name sauces (i.e. Patak's) they are absolutely delicious. I did something a little special with this one - I marinated the chicken in a yogurt marinade for a couple of hours prior to cooking it. It really enhanced the flavour. I then used this bottled sauce as the sauce for my cooked chicken. Simple and delicious.

Serve this chicken with a big pot of basmati rice and some naan bread and you have yourself a delicious meal.

First step: marinate the chicken for a couple of hours in the marinade recipe below:

Spicy Indian Chicken - Tikka Marinade

Recipe adapted from He Cooks She Cooks

Combine all of the following ingredients in a large bowl, add chicken and marinade in the fridge for a couple of hours. Then broil the chicken in the oven until it is cooked through.

  • 1 cup of yogurt
  • 1/2 TB of ground cumin
  • 1/2 TB of ground coriander
  • 1/2 TB of chili powder
  • 1/2 TB of kosher salt
  • 1 teaspoon cinnamon
  • 2 cloves of garlic diced
  • 1 TB of diced ginger
  • Pinch of cayenne pepper
  • 4 chicken breasts cut into bite size pieces

Step two: throw the cooked chiken into a large stir fry pan and empty a whole bottle of Western Family Classics - Tandoori BBQ Cooking Sauce onto the chicken. Heat through and stir well to coat all pieces of chicken. If desired, add a handful or two of frozen peas at the very end and cook until they're heated through. And voila - you have yourself a delicious and authentic tasting indian meal that is just as good as take out. If you want to feel like you're at the restaurant, sprinkle the finished dish with some chopped cilantro, brew up some milky chai tea and you're set.

I hope you enjoy this recipe and appreciate its weeknight simplicity. Happy Cooking my Friends!

22.10.10

Weekend Wines V


Happy Friday everyone! I'm pretty excited about the weekend and I'm sure you are too. Since its the weekend I'll tell you about a great bottle of wine we tried the other day. It is a 2008 Chardonnay from Burrowing Owl Estate Winery. This chardonnay was rather unique tasting, but is was delicious. The tasting notes from the wine maker are below:


Vibrant citrus fruit with the finest layers of lemon chalk and toffee melded
together in amazing length. An Outspoken yet sophisticated wine with a fine
mineral grip. The perfect balance; restrained stone fruit aromas and flavors
soften pithy grapefruit acidity. All meshed together by well integrated oak.

You can pick this wine up for about $25 per bottle or you can order online on their website. This is a delicious wine that most white wine drinkers will be able to appreciate. Grab a bottle to bring to a dinner party or family gathering this weekend - you'll love it.


Cheers!

21.10.10

Potato Soup with Bacon and Cheddar


Well, I think fall is officially here! We've had our first couple of frosts here in the lower mainland and its definitely starting to cool off. I've taken my scarves out of my closet and been wearing them most mornings to keep warm. I really love this time of year when the temperatures just start to drop, the days are crisp and sunny, and you can see the beautiful orange pumpkins in the fields when you drive by. It is absolutely beautiful. With fall come changes in cusine type too - we shift from fresh and light to heavier and warm dishes to compliment the weather. Since we're starting to see fall, I thought I would share a recipe for a deliciously hearty potato soup topped with bacon and cheddar cheese. I also have a recipe for cheddar cheese biscuits to go with the soup that I'm going to share with you.


I like Anna Olson's heading for this recipe in her cookbook Fresh:


"A good potato soup can warm you even on the coldest day, especially when its
topped with bacon and cheddar, just like a baked potato."


Potato Soup with Bacon & Cheddar
Recipe from Fresh p. 136

Ingredients:

  • 4 strips bacon, diced
  • 1 1/2 cups chopped leeks, white and light green parts only
  • 1 1/2 lb yukon gold potatoes, peeled and diced
  • 5 cups chicken stock
  • 1 tbsp chopped fresh thyme
  • 1 cup full-fat sour cream
  • salt & pepper to taste
  • 1 cup grated old cheddar
  • 2 tbsp chopped fresh chives or finely chopped green onion, for serving

Method:

  1. In a large pot, cook the bacon over medium heat until crisp. Remove the bacon and set aside. Reduce the heat to medium-low and cook the leeks in the bacon fat until soft, about 5 minutes. Add the potatoes, chicken stock, and thyme. Cover the pot loosely, and simmer until the potatoes are tender, about 20 minutes. Remove from the heat and puree. Strain the soup through a sieve and return the pot to medium heat. Stir in the sour cream and season to taste.
  2. Serve the bowls of soup garnished with grated cheddar, the reserved bacon, and a sprinkle of chives or green onions.

This soup is absolutely divine and I love how simple the ingredients are! Try it with these cheddar cheese biscuits and you're set!

Cheddar Cheese Biscuits

Recipe adapted from Better Home & Gardens New Cook Book

Ingredients:

  • 2 cups all purpose flour
  • 4 tsp baking powder
  • 2 tsp sugar
  • 1/2 tsp cream of tartar
  • 1/2 teaspoon salt
  • 1/2 cup shortening
  • 2/3 cup milk
  • 1 cup grated old cheddar cheese (or whatever cheese you like)

Method:

  1. Stir together flour, baking powder, sugar, cream of tartar, and salt. Cut in shortening til mixture resembles coarse crumbs. Toss cheese with flour mixture. Make a well in the center, add milk all at once. Stir just until dough clings together.
  2. Turn dough out onto lightly floured counter and knead gently for 10-12 strokes. Roll or pat dough out to 1/2 inch thickness. Cut with a 2 1/2 inch biscuit cutter, dipping cutter into flour between cuts. Transfer to ungreased baking sheet. Bake in 450F oven for 10-12 minutes until golden. Serve warm.


This is a delicious and comforting meal that will take the edge off the cold fall days! It doesn't really get much better than home made soup and biscuits - definitely the ultimate comfort food.

Happy Cooking my Friends!

20.10.10

Sirena Gelato Cafe - Fairhaven, WA


A few weeks ago I went with my sister to keep her company on a weekend trip to Bellingham Bay in Washington. She was headed down there to run the Bellingham Bay 1/2 Marathon (Go Sister!!). We went down a day early to do some sightseeing in the area, as the only place we'd ever seen in Bellingham was the mall and the airport! It is really a beautiful area and definitely worth checking out. We visited the neighboring town of Fairhaven. It was lovely - we wandered around the historic area of town, browsing in little boutique stores and window shopping. We stopped in at an awesome gelato cafe called Sirena. It was packed in there so we thought it must be good and we were not disappointed!


Sirena offers 20 flavours of fresh made-in-store gelato every day! They have a flavour rotation of 50 flavours!! Wow! And they all looked delicious! It was really hard to choose which ones to try. Their gelato is made with milk instead of heavy cream which results in it being considerably lower in fat than regular ice cream - their in-store comparison notes that it has 4-8% fat content while many commercial brand ice creams contain up to 18% fat! They also serve various types of sorbets which contain less than 1% fat in each serving. How exciting! A delicious dessert that you don't have to feel guilty about (unless you eat a whole tub of it in one sitting!!).


Check out their webpage for a really interesting history of gelato and various other tidbits. One such tidbit is that the Italians have been making gelato for over 2,000 years - surely that is why their gelato is so decadently perfect! I hope that if you're ever in the area you'll check it out. Its worth the trip.

17.10.10

Pinnacle Whipped Vodka

Since its the weekend, I thought one alcohol-related post was in order! My sister's good friend told her about this whipped cream flavoured vodka that was only available in the USA and so last time we were in the US we went on a bit of a goose chase to find this vodka. It was totally worth it - it was soooooo decadent tasting. Annndddd we just received a tip from one of my sister's co-workers that the vodka is actually available in Canada now - it was spotted at a government liquor store in Langley! YAY!

We placed 1 chilled oz of the whipped vodka in a martini glass and topped it up with rootbeer and it tasted amazing. There are soooo many recipes for this type of vodka and you can check them out if you click here. You can also check out the Pinnacle Vodka website by clicking here - they have some really yummy looking vodka flavours. Check it out to see if they're available in your area. :)
Thanks for stopping by to check out my blog! Hopefully you'll be back.
Cheers!

16.10.10

Spelt Crust Pizza with Artichokes & Mushrooms


When I originally looked at this recipe I was a little thrown off by the idea of spelt flour in pizza dough. Honestly? What kind of health nut does that? haha. I was definitely wrong; spelt flour is delicious and now I want to put it in everything. It just adds this depth of flavour and texture to the crust while still allowing the crust to be delicate and crisp. Love it! I would highly recommend this recipe to anyone looking to jazz up their usual pizza and make it a little gourmet. You have to have a little gourmet on the weekend!

The recipe is from my Anna Olson cookbook Fresh (surprise, surprise!) and honestly, I have not been disappointed by anything out of this cookbook. Everything has been delicious and none of the recipes use processed or pre-packaged "convenience foods". And that is definitely a good thing these days because in my opinion, peopele eat far too many pre-packaged, store-bought foods that really aren't good for them. So try out this recipe - it will be ready before you wait for delivery pizza and it tastes 100x better! :)

Spelt Crust Pizza with Artichokes & Mushrooms
Recipe adapted from Anna Olson's cookbook Fresh, p 105


Ingredients:
  • 3/4 cup tepid water
  • 2 1/4 tsp (1 pkg) instant dry yeast
  • 1 cup all purpose flour
  • 1 cup spelt flour
  • 3 tbsp olive oil
  • 1 tsp salt

  • 2 tbsp olive oil
  • 1/2 lb cremini mushrooms, sliced
  • 2 cloves garlic, minced
  • 1-14oz jar marinated artichokes
  • 1 tsp lemon zest
  • salt & pepper
  • 1/4 cup basil pesto
  • 3 tbsp sour cream (not low-fat)
  • cornmeal for sprinkling
  • 8-12 slices proscuitto ham
  • 2 oz parmesan
  • 1/3 cup loosely packed fresh basil leaves

Method:

  1. For the dough, stir together the water & yeast, then stir in the flours, olive oil, and salt until the dough becomes difficult to work with a wooden spoon. Turn it out onto a lightly floured surface and knead for just 1 minute, until it feels elastic. Place the dough in a lightly oiled bowl, cover with plastic wrap, and let rest at room temperature for 30 minutes.
  2. Meanwhile, prepare the toppings. In a large saute pan over medium heat add the olive oil. Add mushrooms and saute them until tender, about 5 minutes. Add the garlic and stir. Add the artichokes and lemon zest, warm through, and season to taste. In a small bowl, stir together the pesto and sour cream.
  3. Preheat the oven to 500F. Place baking trays or pizza stones in the oven.
  4. Divide the dough into 2 pieces and, on a lightly floured surface, roll out each piece as thinly as possible to about 9 inches across (I made mine into rectangles to fit my baking trays). Remove the hot pans from the oven and sprinkle it lightly with cornmeal. Please the first rolled crust on the pan and spread it all over with a thin layer of the pesto mixture. Arrange 1/2 the prosciutto on top, spoon over half the mushroom-artichoke filling, and bake for 10-15 minutes, until the pizza is golden at the edges. Slide pizza off the pan and repeat with the second crust.
  5. Grate parmesan over the cooked pizzas with a vegetable peeler, and top with the basil leaves immediately before serving.

This pizza is amazing! I hope you enjoy it as much as I did. :) You can also put about 1 cup of arugula leaves onto the pizza immediately before serving too, but I didn't.

Happy Cooking my Friends!