Showing posts with label mint. Show all posts

28.7.13

Blueberry Mint Sparklers

 
Hey Friends! How is your summer going so far? I can't believe we're already at the end of July! Time is flying faster than ever it seems. Summer here has been unusually hot, sunny and dry! Which has been an amazing change. In the midst of this unusual heat though, I along with many others I know have been searching for delicious, refreshing summer beverages to make that are easy and don't take too long to whip up! (because when you're thirsty and in need of a drink, you don't want to wait all day)
 
Last weekend my sister and I were browsing through the July/August 2013 issue of Everyday with Rachael Ray and we found Blueberry Tarragon Sparklers - they looked delicious and sounded super easy to whip up. So we decided to give them a try.
 
I headed off to the grocery store with a very short list of ingredients to purchase and when I got to the produce section to look for tarragon, the fellow working in the store politely informed me they hadn't carried fresh tarragon in oh, about ten years. Say what?? So quick thinking coupled with my strong desire not to have to try every grocery store in the area resulted in me picking up a container of fresh mint instead. What a success!! These drinks were lovely!
 
Without further delay, here's the yummy recipe.
 
Blueberry Mint Sparklers
minimally adapted from Everyday with Rachael Ray
 
Ingredients:
  • 1/2 cup fresh blueberries
  • 1/4 cup honey
  • 2 tbsp. fresh mint leaves
  • ice
  • 1 bottle sparkling white wine (I used Yellow Tail Bubbles)
Method:
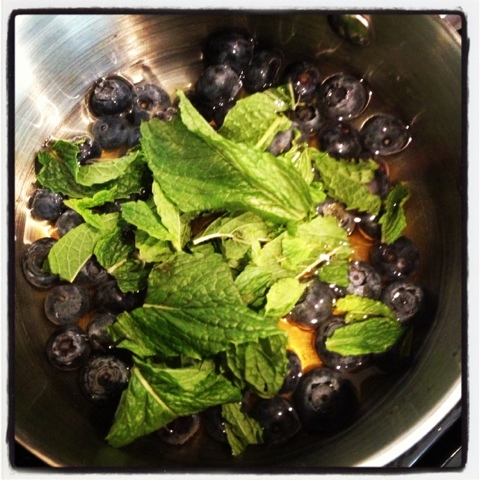
  1. In a small saucepan, bring blueberries, honey, mint and 1/4 cup water to a boil over medium-high heat. Stir until honey dissolves, about 3 minutes. Remove from heat and muddle blueberries and let stand for 20 minutes. Strain and place in refrigerator until chilled.
  2. To serve, spoon 1-2 tbsp. of blueberry syrup into 4 glasses. Add ice, then pour sparkling wine over top. Stir. Garnish with more fresh mint and blueberries.
Super easy, refreshing and delicious!
 
Cheers to the rest of our summer being just as fantastic as the first half.

7.2.12

Crazy Cooking Challenge: The Ultimate Chocolate Cake!


Surpise!! I've joined yet another cooking and baking challenge group. I love these things!! You get to try new things with a supportive and encouraging group of fellow bloggers. You learn new things and get to have fun doing it. This time the challenge is the Crazy Cooking Challenge hosted by Tina of Mom's Crazy Cooking. She posts some amazing things on her blog, so I knew the challenges would be great too.
Photobucket

The Crazy Cooking Challenge is a new dish each month of which each participant can make their own rendition of for the challenge. For example, some of the past challenges have been Macaroni & Cheese, Fudge, Mashed Potatoes and Chocolate Chip Cookies. YUM!! This month the challenge was to make the ultimate chocolate cake. It didn't matter what we did to the cake (i.e. icing, decorating, filling, recipe), but it had to be chocolate and it had to be cake. How fun right?!

I was on Pinterest (I love followers, so feel free to follow the link and follow me on Pinterest) the other day and I saw this cake - Mint Chocolate Chip Cake. Ummmmmm thats so my favorite kind of ice cream!!! So, it was settled, I was totally making that for the Crazy Cooking Challenge. I found this recipe on Raspberri Cupcakes (along with dozens of other amazing looking recipes). She had adapted the chocolate cake recipe from David Lebovitz's Devil's Food Cake, so I knew it was going to be delicious.
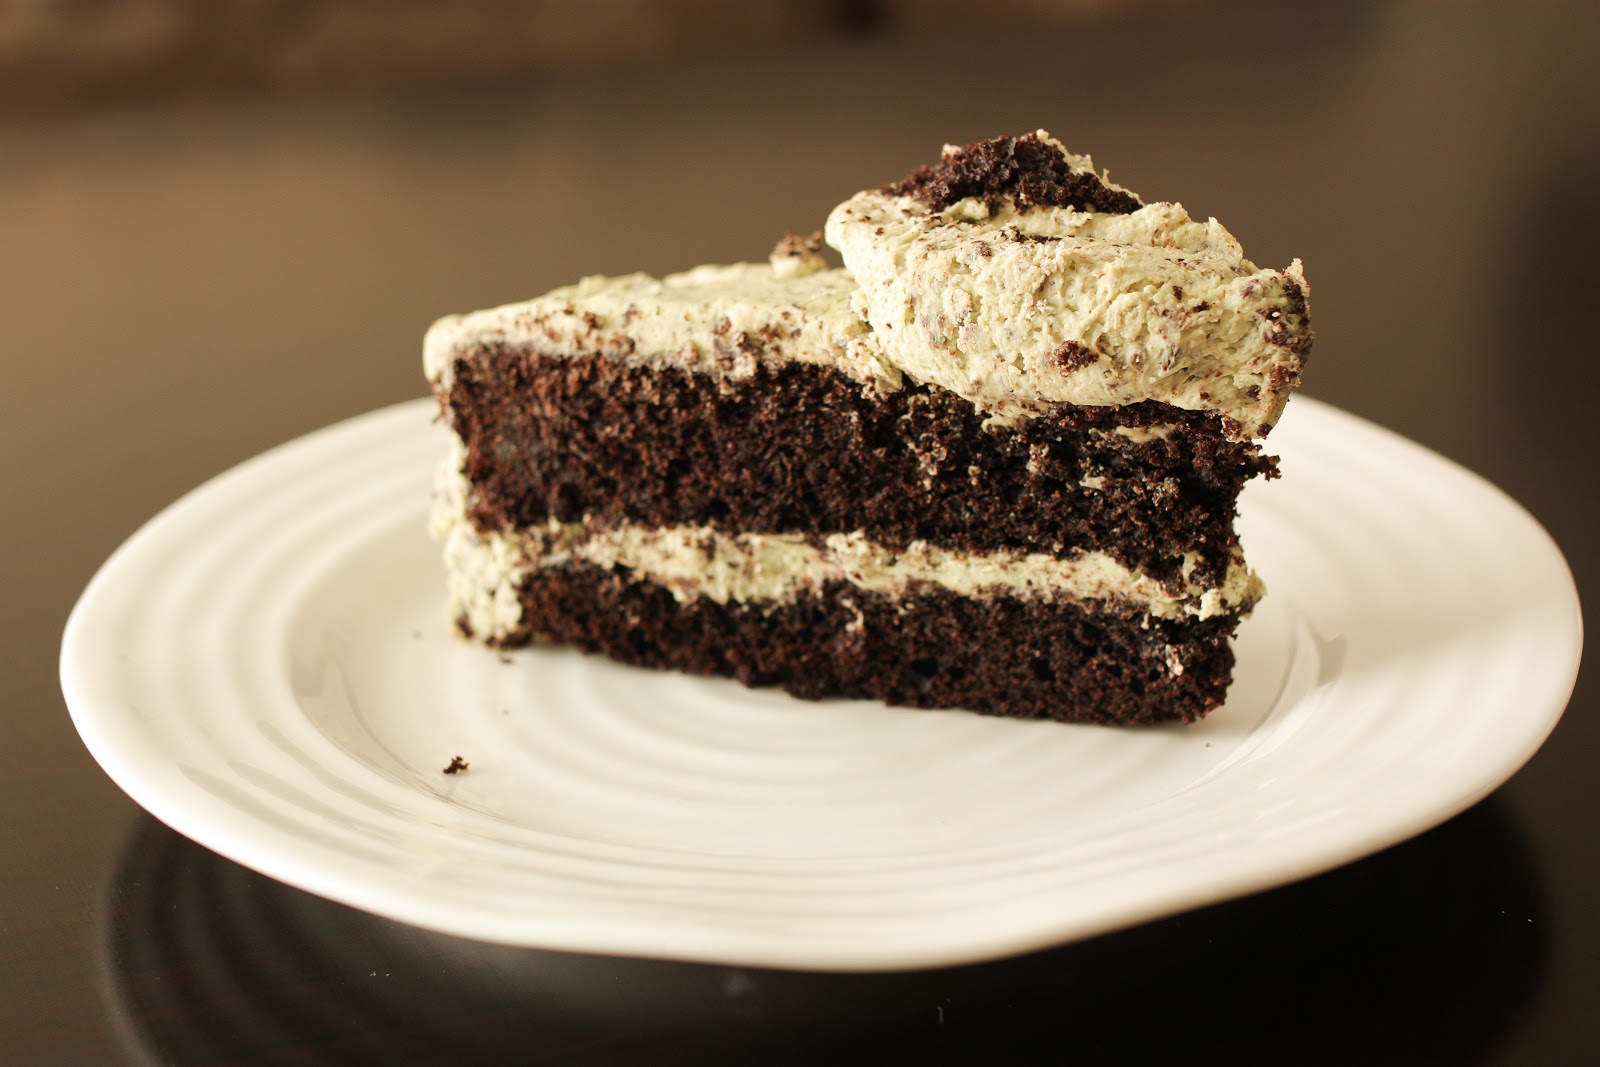
Yep, this is a pretty ugly piece of cake. It was the only piece leftover after serving it to my guests and I realized that I had better take a photo showcasing the lovely chocolate inside of the cake to show that my recipe is actually CHOCOLATE CAKE in light of what this challenge is about!!!
So, here is my entry into the Ultimate Chocolate Cake Crazy Cooking Challenge! Mint Chocolate Chip Cake. It seriously tastes just like the ice cream, so if you're a fan (and probably even if you aren't), you'll love this cake!

Mint Chocolate Chip Cake
Recipe minimally adapted from Raspberri Cupcakes

Ingredients:

For the Cake:
  • 9 tbsp unsweetened cocoa powder
  • 1 1/2 cups cake flour (not self-raising cake flour)
  • 1 1/2 tsp salt
  • 1 tsp baking soda
  • 1/4 tsp baking powder
  • 115g unsalted butter, at room temperature
  • 1 1/2 cups sugar
  • 2 large eggs
  • 1/2 cup strong coffee
  • 1/2 cup cream
For the Frosting:
  • 280g + 1/3- 1/2 cup unsalted butter at room temperature
  • 4 cups icing sugar
  • 2 tsp peppermint extract
  • 150g dark chocolate chips, run through the food processor until finely chopped
  • green food colouring
  • waffle ice cream cones to decorate (minis if you can find them!!)
Method:
  1. Butter and line the base of a 9" springform pan with parchment paper. Preheat the oven to 350F. Sift together the cocoa, cake flour, salt, baking soda and baking powder. Using a stand mixer, fitted with the paddle attachment, cream the butter and the sugar for about 5 minutes or until very fluffy and creamy. Add the eggs one at a time and beat after each addition until fully incorporated.
  2. Mix together the coffee and the cream. Stir half the dry ingredients into the butter mixture. Add the coffee-cream mixture. Then add the rest of the dry ingredients until smooth. Pour the batter into the prepared pan.
  3. Bake in preheated oven for 35-45 minutes or until a skewer inserted into the middle of the cake comes out clean (be careful not to overbake). Remove from oven and cool in baking tin for 5 minutes. Remove from baking tin to a wire rack and cool completely.
  4. Prepare the mint icing: In the bowl of a stand mixer, beat 280g of butter until fluffy and lighter in colour. Add the icing sugar one cup at a time and beat until smooth after each addition. Beat in additional butter (hence the 1/3 - 1/2 cup extra butter) until the icing is a nice spreading consistency. Beat in green food colouring until evenly distributed and coloured to desired green food colouring level. Stir through finely chopped chocolate until evenly distributed.
  5. Using a serrated knife, cut the cake in half to form two layers. Place one layer on a cake plate. Spread 1/4 of the icing on top of first layer of the cake. Then place the other half of the cake on top (trim top if necesary to get a nice flat surface). Ice the entire cake with the remaining icing. Use an ice cream scoop to make "scoops" of any extra frosting and arrange artfully on top of the cake. Top with the mini waffle cones.Can be served immediately or stored in an airtight container overnight. Serve at room temperature.
Mmmmm this was a deliciously moist cake and the frosting tasted so much like mint chocolate chip ice cream. It is a super cute cake that has a bit of a wow factor to it. I served it for a ladies get together at my house and it was a hit. Hope you enjoy it as much as we did!

This post has been linked up with Mouth Watering Mondays over at the Sweet Spot. Head on over there to check out some of the other mouth watering dishes fellow bloggers have cooked up this week. :)

This post has also been linked up with Fusion Fridays over at Jennifer Cooks. Head on over to check out her favorite submissions from last week and what other bloggers are linking up this week.

5.4.11

Mint Chocolate Cupcakes

If you have a mint chocolate addiction, these cupcakes are for you! The cupcake itself is light, moist and chocolately while the mint icing is perfectly minty without being too buttery. Plus, these cupcakes are easy to whip up.
I found the recipe on a blog I follow regularly called Tracey's Culinary Adventures. Tracey is always whipping up something spectacular and all the recipes I've tried off her blog are just fantastic. Do try to get over to her blog and check it out - you'll be hooked as soon as you browse some of her recipe archives!! She made these for St. Patty's day, but these cupcakes with their pretty green icing are just fine for any occasion!


Chocolate Cupcakes

Recipe from Martha Stewart (via Tracey's Culinary Adventures)


Ingredients:


  • 1 1/2 cups all purpose flour

  • 3/4 cup unsweetened cocoa powder

  • 1 1/2 cups granulated sugar

  • 1 1/2 tsp baking soda

  • 3/4 tsp baking powder

  • 3/4 tsp salt

  • 2 large eggs

  • 3/4 cup buttermilk

  • 3 tbsp vegetable or canola oil

  • 1 tsp vanilla extract

  • 3/4 cup warm water

Method:


  1. Preheat oven to 350F. Line muffin tins with paper liners.

  2. In a large bowl, whisk together flour, cocoa powder, sugar, baking powder, baking soda, and salt. Add the eggs, buttermilk, oil, vanilla and water. Whisk together until mixture is smooth and all ingredients are evenly distributed.

  3. Distribute batter evenly among the prepared pans, filling each about 2/3 of the way to the top. Bake for about 20 minutes or until the cupcake spring back when pressed lightly. Remove from the oven and cool in pans for about 5-10 minutes. Then remove from pans and cool completely on wire racks.

  4. Ice liberally with mint icing (see below for recipe).

Mint Buttercream

Recipe from Tracey's Culinary Adventures
Ingredients:

  • 4 cups icing sugar, sifted

  • 8 tbsp unsalted butter, at room temperature

  • 6 tbsp heavy cream

  • 4 tsp vanilla extract

  • 1 tsp mint extract

  • 1/2 tsp salt

  • green gel food colouring

  • semisweet chocolate chips for garnish

Method:


  1. In the bowl of a stand mixer fitted with the paddle attachment, beat the icing sugar and the butter until evenly distributed and crumbly, about 1-2 minutes.

  2. Add the cream, extracts, and salt and beat on high speed until light and fluffy, about 3 minutes. If you want green buttercream, beat in a few drops of green food colouring until you get the desired shade of green.

  3. Frost as desired, garnish with chocolate chips.
These cupcakes smell so good you won't be able to resist! They're so delicious I had to give them away to my co-workers so I didn't eat all of them myself. I could have done it the smart way like Tracey did and simply scale back the recipe, but why would I do that? That would have been the rational thing to do and when it comes to baking, I don't think I'm ever rational!!!! Any way, I would encourage you to try these out! They are so quick to whip up and you will dirty minimal dishes in the process. Happy Baking my Friends! Thanks for stopping by. :)