27.2.11

The Daring Bakers Challenge - February 2011 - Panna Cotta!


When this month's challenge was posted, I felt a little let down initially... after the hype of last month's uber challenging biscuit jaconde, the thought of making "simple panna cotta" seemed a little too easy. And while it was a technically simple procedure to make panna cotta, making layered panna cotta with other various elements including florentine cookies & homemade nuttella transformed this dessert into something spectacular which I think is what Mallory had in mind when she selected this fabulous challenge. It really gave me the opportunity to be creative and bring an otherwise simple dessert up a notch.

The February 2011 Daring Bakers challenge was hosted by Mallory from A Sofa in the Kitchen. She chose to challenge everyone to make Panna Cotta from Giada De Laurentiis' recipe and Nestle Florentine cookies. It was a great challenge and I'm so thankful to Mallory for showing us how to make Panna Cotta. It was amazing to see how the other Daring Bakers really stepped it up for this challenge and made some absolutley amazing creations - beautiful flavours, colours, shapes and sizes.

I chose to make a layered panna cotta which included the following layers: vanilla panna cotta, homemade nuttella, toasted hazelnuts (chopped), chocolate panna cotta. I also made the florentine cookies and filled them with more homemade nuttella. I served these for a dinner party last night and they were incredibly well received. I also thought this dessert turned out so great - they looked beautiful and it really adds a wow factor when you unmold them for your guests! :)

There are a lot of elements to this challenge, so this post is going to be a long one... hopefully you can bear with me to make it through these recipes!
Vanilla Panna Cotta
Recipe slightly adapted from Giada De Laurentiis

Ingredients:

  • 1 cup whole milk
  • 1 tbsp (1 package) unflavoured gelatin
  • 3 cups whipping cream
  • 1/3 cup honey
  • 1 tbsp granulated sugar
  • pinch of salt
  • 2-3 tsp vanilla extract

Method:

  1. Pour milk into a bowl or pot and sprinkle gelatin powder over the milk in an even layer. Let stand for 5 minutes to soften the gelatin.
  2. Pour the milk and gelatin into a medium size pan and place over medium heat on the stove. Heat until the mixture is hot, but not boiling, about 5 minutes. Whisking the mixture a few times while it heats up is a good idea!
  3. Next, add the remaining ingredients. Make sure the mixture doesn't boil, continue to heat over medium heat, stirring occasionally until honey and sugar are dissolved, about 5-7 minutes.
  4. Remove from heat, allow to stand for a few minutes to cool slightly. Then pour into glasses or ramekins, or whatever fun shaped dishes you have on hand.
  5. Refrigerate at least 6 hours or overnight.

Next element is homemade nuttella! I found this recipe for homemade nuttella on David Lebovitz's blog and just had to make it. It was absolutely perfect for this challenge and how great is it to be able to make nuttella from scratch?!

Homemade Nuttella

Recipe from David Lebovitz

Ingredients:

  • 1/3 cup whole almonds
  • 1 1/3 cup whole hazelnuts
  • 1 3/4 cup whole milk
  • 7/8 cup powdered milk
  • 3 tbsp mild flavoured honey
  • pinch of salt
  • 6 oz bittersweet or semisweet chocolate, chopped
  • 5 oz milk chocolate, chopped

Method:

  1. Spread the nuts on a baking sheet, keeping the almonds and hazelnuts separate. Toast the nuts in an oven preheated to 350F, stirring a few times for about 10-15 minutes, until the hazelnuts are browned.
  2. While they are roasting, warm the milk and powdered milk in a saucepan with the honey and salt just until the mixture starts to boil. Remove from heat.
  3. Melt the chocolate together in the microwave until smooth.
  4. Use a spatulla to put the warm hazelnuts in a kitchen towel and rub them vigorously to remove as much of the skin as possible (dont' worry if you don't get all of it, just get as much as you can).
  5. In a food processor, grind the nuts together until they are as smooth as you can get them. It will probably take a good 5 minutes or so to get them pretty smooth. Add the melted chocolate and continue to process until mixed really well. Stopping to scrape down the sides of the bowl if necessary.
  6. Once mixture is smooth, add the warm milk mixture and process until smooth. It might be a bit soupy here, but don't worry, it will firm up when it is refrigerated. For perfectly smooth nuttella, you can strain the mixture, but you don't have to. I didn't and it turned out fine.
  7. Transfer mixture into two jars and refrigerate. Keeps about one week.

Pipe a layer of nuttella onto the set layer of vanilla panna cotta and sprinkle with chopped toasted hazelnuts. Put that in the fridge to set up while you make the chocolate layer of panna cotta.

Chocolate Panna Cotta

Recipe adapted from Bon Apetit

Ingredients:

  • 1 cup whole milk
  • 1 tbsp (1 pkg) unflavoured, powdered gelatin
  • 2 cups whipping cream
  • 1/2 cup sugar
  • 3/4 cup bittersweet or semisweet chocolate
  • 1/2 tsp vanilla extract

Method:

  1. Pour milk into small bowl and sprinkle evenly with gelatin. Set aside for about 5 minutes to soften the gelatin.
  2. Place a saucepan over medium heat, stir in cream, sugar and vanilla. Bring to low boil. Add chocolate and stir until melted. Whisk in gelatin milk mixture. Whisk until gelatin has dissolved.
  3. Pour very carefully over the already set vanilla, nuttella and hazelnuts. Place in refrigerator to firm up for 8 hours or overnight.
  4. To serve, dip bottoms of ramekins in hot water, run sharp knife around edges and invert onto serving dishes. Garnish with florentine cookies and more chopped toasted hazelnuts.

And lastly, make the florentine cookies:

Nestle Florentine Cookies

Recipe from the cookbook Nestle Classic Recipes

Ingredients:

  • 2/3 cup unsalted butter, melted
  • 2 cups quick rolled oats
  • 1 cup granulated sugar
  • 2/3 cup all purpose flour
  • 1/4 cup dark corn syrup
  • 1/4 cup whole milk
  • 1 tsp vanilla extract
  • pinch of salt
  • homemade nuttella (recipe above)

Method:

  1. Preheat oven to 375F. Combine melted butter, oats, sugar, all purpose flour, corn syrup, milk, vanilla and salt. Mix well. Drop by the tablespoon full onto cookie sheet lined with parchment paper leaving 3 inches between cookies (they spread a lot). Flatten slightly with back of spatula.
  2. Bake in preheated oven for 6-8 minutes until cookies are golden brown. Cool completely on cookie sheet. Peel cookies off parchment paper and place face down on cooling rack in pairs. Pipe nuttella onto the bottom side of one cookie and place other cookie on top creating a sandwich cookie. Keep cool until serving to ensure nuttella stays firm.

And that is this month's Daring Bakers Challenge! How fabulous does that look?? And they tasted even better. :) Do try this recipe - its easy and you can simplify it by just making one kind of panna cotta or buying premade biscuits or nuttella to serve it with. Thanks Mallory for such a fantastic challenge and for sharing such great recipes with all of us Daring Bakers!

Happy Baking my Friends!

13.2.11

Cranberry Pear Linzer Tart

Can you believe today is February 27th already? Do you know what happens on the 27th of each month? Thats right, I post my daring bakers challenge. Well, this is definitely NOT my Daring Bakers challenge! This is a different post that I've been meaning to share with you for a while and while I have a few quiet minutes to myself this morning while hubby is still asleep and the dishwasher is washing the many dirty dishes from my dinner party last night I am going to write this post! Daring Bakers post to follow this evening after I have had a chance to photograph my dessert... thats right... I really saved it to the last minute this month!
I made this tart on boxing day, hence the sort of Christmassy holly looking thing on top of the tart (if you can't tell what it is, don't feel bad, I just didn't want to throw away leftover pastry!!!). It was really delicious, the pears are lovely and sweet and the cranberries add a tart burst here and there to really balance out the sweetness of the pears. But the part of this recipe that was the most interesting (and the most challenging) was the crust. As you'll see in the ingredients that follow, the majority of the ingredients go into the crust resulting in the most delicious flavour and texture in a pastry crust that I have ever tasted. Be warned though, this dough is not easy to work with... it caused me a lot of frustration, but the delicious results made it worth it!


Pear-Cranberry Linzer Tart
The Best of Fine Cooking Magazine

Ingredients:

  • 4 oz (1 cup) walnuts, lightly toasted
  • 1/2 cup granulated sugar
  • 8 oz (1 3/4 cups) all purpose flour
  • 1 tsp ground cinnamon
  • 1 tsp finely grated lemon zest
  • 1/2 tsp salt
  • 1/2 tsp ground cloves
  • 2 hard-cooked egg yolks, crumbled
  • 8 oz (1 cup) cold unsalted butter, cut into 1/2 inch pieces
  • 2 raw egg yolks
  • 1/2 tsp pure vanilla extract
  • 2 lb ripe pears, peeled, cored, and cut int 1/2 inch slices (about 4 cups)
  • 6 tbsp all purpose flour
  • 1 cup fresh or frozen cranberries, picked through and rinsed
  • 1/2 cup granulated sugar
  • 1 egg yolk
  • 1/4 cup heavy cream or whole milk

Method:

  1. To make the dough: in a food processor, grind the walnuts with the first amount of sugar to a sandy texture. Add first amount of flour, cinnamon, lemon zest, salt, cloves and crumbled hard cooked egg yolks. Pulse briefly to combine. Add butter and pulse until dough starts to come together and looks clumpy. Add the raw yolks and vanilla and pulse until well combined. The dough will be sticky and moist - more like a cookie dough than a pastry dough. Cut dough in half and set each half on a large piece of plastic and shape each into a flat disk, using the plastic to help you flatten. Wrap each disk in its plastic wrap and refrigerate at least 1 hour.
  2. To assemble the tart: on a floured work surface, roll each disk of dough onto an 11 inch round, about 1/4 inch thisk. Put one round on a plate and refrigerate, uncovered. Fit the other round into a 9 inch fluted tart pan with removable bottom. Fold the excess dough into the sides of the pan and press to get an edge flus with the side of the pan. Sprinkle 2 tbsp of the flour in the bottom of the tart and spread evenly to cover.
  3. Toss the pears and cranberries with remaining 4 tbsp of flour. Arrand the fruit in the tart shell so that pears lie as flat as possible (as you can see, I just tossed mine in there!!) and there are some berries showing on top. Scrape any remaining flour over the fruit and sprinkle with the other 1/2 cup of sugar. Take the other piece of dough from the fridge and cut into 8 1-inch wide strips. Arrange 4 strips evenly spaced over the top of the tart. Then on a shart diagonal to the first four, set the other four strips on top so that the overlapping layers make diamond-shaped windows. Trim the ends of the strips and press them into the edges of the tart.
  4. Position the rack in bottom of oven, line a heavy rimmed baking sheet with foil and set on the rack. Heat the oven to 350F. Whis the last egg yolk with the 1/4 cup cream. Brush top strips with the egg glaze.
  5. Bake on the baking sheet until the pastry is golden brown, 45 minutes to 1 1/4 hours. Let cool on a rack for 1 hour before serving.

This is such a delicious and versatile dessert and the crust really is so different tasting that it is worth giving it a try! You most definitely won't regret it and the people you share it with will be glad you went to the trouble of making it. :)

Happy Baking my Friends! Stay tuned for my Daring Bakers post later today.

Chocolate Chip Cookies

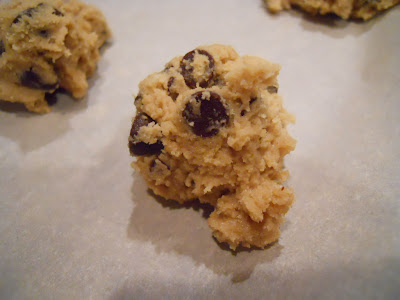
I hope you're all having a fantastic weekend! Mine has been great - a welcome rest from the craziness of last week. I felt moderately productive this weekend too! Hubby and I managed to finish a bench we have been "refinishing" for the last year. And I made some great meals this weekend - Lamb Rogan Josh on Saturday night and Pork Carnitas tonight! Deliciousness. :) In light of all the cooking / baking this weekend, I thought I would post something nice and simple with comfort-food qualities... I mean, who doesn't like chocolate chip cookies?!

This is a great recipe - simple, delicious and quick to make! I found it in the Better Homes & Gardens New Cook Book years ago. It is my go-to recipe. I do have other recipes that I like too, but I've made this one so many times I pretty well have it memorized! I hope you enjoy it as much as we always do.

Chocolate Chip Cookies
Recipe from Better Homes & Gardens New Cook Book

Ingredients:

  • 2 1/2 cups all purpose flour
  • 1 tsp baking soda
  • 1/2 tsp salt
  • 1 cup butter
  • 1 cup packed brown sugar
  • 1/2 cup granulated sugar
  • 2 eggs
  • 1 1/2 tsp vanilla
  • 2 cups chocolate chips (I only use 1 - 1 1/2 cups)

Method:

  1. Stir flour, soda and salt together. In the bowl of a stand mixer, beat butter on medium speed for 30 seconds. Add both sugars and beat until fluffy. Add eggs and vanilla; beat well.
  2. Add dry ingredients to beaten mixture, mixing until well combined. Stir in chocolate chips.
  3. Bake at 375F for 8-10 minutes. Be sure not to over cook them!


Happy Baking my Friends!

Rosemary Parmesan Coins

I absolutely love crackers! And homemade crackers are soooo much better than store-bought. This is a great recipe! The crackers are so delicately flavoured with an almost short-bread like consistency. I didn't get pictures of the crackers after they baked, but they looked just like the unbaked crackers but the flecks of parmesan turned a beautiful golden brown and made the finished product look so great. I made these for our Superbowl party and they were definitely a hit!

Rosemary Parmesan Coins
Recipe from The Best of Fine Cooking - Party Food 2010

Ingredients:

  • 6 oz (1 1/2 cups) all purpose flour
  • 1 oz (3/4 cup lightly packed) freshly grated parmigiano-reggiano
  • 1 generous tbsp finely grated lemon zest
  • 2 1/2 tsp coarsely chopped fresh rosemary
  • 1 tsp table salt
  • 1/4 tsp coarsely ground black pepper
  • 4 oz (1/2 cup) unsalted butter, cut into 1/2 inch pieces, chilled
  • 1 large egg yolk
  • 2 tbsp fresh lemon juice
  • kosher salt, for sprinkling (optional)

Method:

  1. In a food processor, combine the flour, cheese, lemon zest, rosemary, table salt, and pepper. Process until just blended. Add the butter and pulse until the dough resembles coarse crumbs. Stir the yolk and lemon juice together with a fork and drizzle over the mixture. Pulse until you have small, moist crumbs that just begin to clump together.
  2. Pile the moist crms on an unfloured work surface. With the heel of your hand, push and gently smear the crumbs away from you until they start to come together in cohesive dough. Using a pastry scraper or metal spatula, lift up one edge of dough and fold it into the center (dough will still be rough, so don't expect a neat, smooth fold). Repeat withthe opposite edge, like folding a letter. Turn the dough 45 degrees. Give the dough another smearing and shape into 14 inch log thats 1 1/4 inches in diameter.
  3. Wrap in plast and refrigerate until firm, about 4 hours, or up to 2 days.
  4. Position racks in upper and lower thirds of the oven and heat to 375F. Line two large baking sheets with parchment. Using a thin, sharp knife, cut the log into 1/4 inch slices. Arrange about 1/2 inch apart on prepared sheets.
  5. Bake until medium golden around the edges about 15-20 minutes. Rotating the sheets as needed for even baking. Don't overbake them though or you will lose the lemon and rosemary flavours. If you like, sprinkle with a little kosher salt just as baking sheets come out of the oven. Set sheets on racks to cool. When coins are completely cool, store in an airtight container.

Stay tuned for some more great recipes this week including a delicious Cranberry Pear Linzer tort! And the upcoming Daring Bakers Challenge which is released on February 27th. :) Can't wait!!!

Happy Baking my Friends!

Chocolate Ginger Mousse

Wow! This week flew by... I was working long days and out of town and it seems like I looked up and all of a sudden it was Friday! So I hope you can forgive me for being a really bad blogger this week. I will make it up to you by posting this amazing, unique chocolate ginger mousse recipe. It is beautiful to serve and tastes really decadent with an exotic twist. I hope you enjoy!

Here is a bit of a disclaimer for you though - beware of what fussy husbands might think of this recipe. My husband politely told me "the chocolate part is delicious, but the ginger tastes like chunks of the spatula broke off while you were mixing it"... soooo if your husband is fussy, this is probably not the dessert to make for him! The ginger adds a really unique element to the chocolate mousse but you definitely have to be a ginger fan to enjoy this dessert.

This is not a technically difficult recipe, but it does dirty a lot of dishes... so be prepared. Start with a clean kitchen and an empty dishwasher! Tidy up as you go along or your kitchen will look like a bomb went off in it (think I learned the hard way?)! But - it is worth doing the extra dishes - it is soooo good! Smooth and fluffy with little pieces of candied ginger studded in the rich chocolatey goodness like little treasures waiting to be found! So without further delay, on to the recipe.

Chocolate Ginger Mousse
Recipe from The Guy Can't Cook by Cinda Chavich

Ingredients:
  • 10 oz bittersweet chocolate
  • 1/4 cup brewed strong coffee or espresso
  • 1/3 cup cold unsalted butter, cut into small pieces
  • 1/4 cup finely chopped, crystalize ginger, plus extra for garnish
  • 4 large eggs, separated
  • 1/2 cup granulated sugar
  • 1/4 cup brady or rum
  • 1/8 tsp cream of tartar
  • 1 cup whipping cream plus 1/2 cup for garnish
  • fresh mint sprigs

Method:

  1. Get out all your mixing bowls - you'll need them.
  2. Chop the chocolate into small pieces and, in a small saucepan, combine with the coffee and butter. Melt over low heat (or in the microwave on low), stirring every 10 seconds until smooth. Stir in the minced candied ginger and set aside.
  3. In a stainless bowl, whisk the egg yolks with sugar until the mixture is pale and fluffy. Whisk in the brandy. Place the bowl over a saucepan of simmering water (a pan just large enouh to blance the bowl on top is perfect - make sure the bowl isn't touching the water), and whisk until the mixture is thick and hot to the touch. Remove from the heat and whisk in the melted chocolate mixture. Cool to room temperature.
  4. In a separate bowl, and using an electric mixer, beat the egg whites with the cream of tartar until stiff peaks form. In a separate bowl, beat the whipping cream until stiff.
  5. Now its time to mix and fold. Pile the stiffened egg whites on top of the chocolate mixture and, using a spatula, gently life and fold together until incorporated. Fold the whipped cream into the mousse, using the same technique. Spoon the mousse into 8 wine glasses or small dessert dishes and refrigerate from 6 hours to overnight. Whip the remaining 1/2 cup of whipping cream. To serve, garnish the top of each mousse with a dallop of whipped cream, a sprinkling of chopped ginger and a sprig of mint.
Enjoy this recipe! Hope it slightly makes up for me being a bad blogger this week! :) This dessert is yummy and would be well received by any guests! And it is definitely elegant enough to be served at a dinner party. Happy Baking my Friends! More exciting posts to follow this weekend - I promise!

Hot Crab and Artichoke Dip

I LOVE ordering crab and artichoke dip when I go to restaurants. I was so disappointed when Cactus Club discontinued theirs a couple years ago.... I know, I know, they have to constantly update their menu to keep with the times and such, but honestly, why get rid of a good thing? I was pretty excited when I found this recipe for crab and artichoke dip. It isn't quite up to snuff with Cactus Club's dip, but it is pretty darn close. :)

Another great thing about this recipe is how easy and quick it is. Step 1 - gather ingredients; Step 2 - Whirl ingredients in food processor; Step 3 - Bake til hot. Thats it - its that simple. One thing I would recommend - don't use canned crab. Use either lump frozen crab meat or fresh crab meat. It honestly makes a big difference in the taste and texture of this dip.


Hot Crab and Artichoke Dip
Recipe from The Guy Can't Cook by Cinda Chavich

Ingredients:
  • one 4-oz package cream cheese
  • 2 tbsp bottled chili sauce
  • 1 tsp freshly squeezed lemon juice
  • 1 tsp prepared horseradish
  • 1/2 cup low-fat mayonnaise
  • 1/2 cup plain yogurt or sour cream
  • 1 cup finely grated fresh parmesan or romano cheese
  • freshly ground black pepper
  • 1/2 tsp hot pepper sauce
  • one 14-oz can artichoke hearts, drained well and chopped
  • 1 clove garlic, crushed
  • 1 green onion, chopped
  • 1 cup fresh or frozen crabmeat
  • smoked paprika for garnish

Method:

  1. Preheat the oven to 350F.
  2. In a food processor, add cream cheese, chili sauce, lemon juice, horseradish, mayonnaise, yogurt, parmesan, pepper, and hot pepper sauce. Process until smooth. Using a rubber spatula, scrape down the sides of the bowl so all ingredients are well combines. Add the artichoke hearts, garlic, green onions and crabmeat (be sure to pick through the crab to remove any bits of shell or cartilage). Pulse a few times, just to combine. Spoon the dip into a small baking dish. Sprinkle with a bit more cheese and some smoked paprika, and bake for 20-30 minutes or until it begins to bubble and starts to brown on top. Serve this dip hot, with pita chips or crostini (I like tortilla chips too).

Pretty easy huh? Any yummy! You can make a restaurant quality starter for your dinner party and impress your guests (or bring back some nostalgic feelings about Cactus Clubs delicious dip...)! I am heading out of town this week for work, so might not be blogging as much as I should be. But I have set up a few posts to attempt while I'm out of town, so we'll see how it goes. Hope all of you have an awesome Sunday and a great week! Today I'm making Ginger Cake with a Warm Apple Compote before I head off and leave hubby to fend for himself this week... at least he'll have cake!


Happy Cooking my Friends!

9.2.11

Addictive Rosemary Pecans

Mmmmmm pecans!! Whats better than pecans? Toasted, seasoned pecans! Thats what this recipe is all about - toasty & spicy. The first time I came across this recipe I thought, wow, what a lame name for a recipe that sounds so good... I mean, surely Cinda Chavich, queen of cookbook writing could come up with a better name for the recipe. However, after I tried them the first time, I understood why the name had to be "Addictive Rosemary Pecans", you seriously can't stop. And an unwritten rule goes that you MUST double this recipe every time you make it, because you won't have enough if you just make one batch! This recipe is so well used that my cookbook actually opens to this page every time I pick it up.

So do try these pecans! You can eat them as is or you can top salads with them or really just do whatever strikes your fancy. But be warned - make the recipe and share it... you won't want to share, but you should. Nuts pack a whole lot of calories & fat grams per serving, so be sure to make yourself share... your waistline (and your husband/ boyfriend) will thank you!

The Addictive Rosemary Pecans
Recipe from the Girl Can't Cook by Cinda Chavich

Ingredients:
  • 3 cups whole pecans (I mix it up - last time I did a mix of cashews and pecans)
  • 2 tbsp olive oil
  • 1/4 tsp cayenne pepper
  • 1 tsp salt (I like kosher)
  • 2 tsp brown sugar
  • 2 tbsp minced fresh rosemary

Method:

  1. Preheat oven to 400F. Place pecans on a rimmed baking sheet in a single layer and toast for 5-10 minutes. The nuts should be hot and fragrant, but watch them carefully so they don't burn.
  2. Meanwhile, in a large bowl, combine the olive oil, cayenne pepper, salt and brown sugar, mixing it well to form a slurry. Stir in the rosemary. Pour the hot, toasted nuts into the bowl and toss with the seasoning mix for several minutes, until all the nuts are coated and cooled. Makes about 2 cups.

Oh yeah, did I mention how easy this recipe is? Put the nuts in some pretty glasses (you could use martini glasses or something cute like that) and strategically place on your coffee table when you have guests over. One handful of these and they will be hooked!

Happy Cooking my Friends!

8.2.11

Not-too-Special Grilled Cheese

Well folks, I have some earth-shattering news for you!!!!! I made it through cooking my entire Superbowl menu without some sort of accident (knock on wood that next year goes as smoothly). Some highlights from the menu include: slow cooker chicken wings, stuffed mushrooms, ginger sandwich cookies with lemon cream and drum-roll please..... Caramel Apple Cheesecake that some of you may have seen on an episode of Bobby Flay's Throwdown! It was a great night and recipes will most likely follow (although, no promises about how quickly they will be posted)! All in all it was a good time and definitely good food. But, after all that luck, of course everything can't be perfect right? I woke up sick, sick, sick on Monday morning and of course its busy at work so I have to drag myself in there and do my job. :( Poor me! haha

So I'm laying in bed "resting" right now while I post a short post to let you know I'm still alive after all the Superbowl cooking and definitely feeling a little sorry for myself (which I shouldn't be - there are people out there feeling a heck of a lot worse than me right now!!!).

When you're sick you want a little comfort and for me that came in the form of coming home to dinner being all ready for me - tomato soup (yes, from a can) and grilled cheese sandwich. Hubby felt bad that I had to go to work sick, so he made me my favorite "sick meal". :) What a nice guy!

So tonight, I made another grilled cheese - that of course I took a couple pictures of! Here is what is in my not-too-special grilled cheese (recipe by me!) haha if you can call it a recipe.

Take a couple pieces of bread, butter one side of each slice. Spread a thin layer of mayo on the other side of one of the slices of bread. Put a nice layer of shredded old cheddar cheese on top of the mayo, top with some crisp fried bacon, sprinkle with garlic powder and a few red chilli flakes then top with a bit of shredded parmesan cheese. Top with other slice of bread (buttered side out) and place in frying pan heated over medium heat. Fry until golden brown on one side, flip and fry until the other side is golden brown. Remove to plate, cut in half on the diagonal and serve with bucket-loads of ketchup (or not, but thats how I roll!). Enjoy while wallowing in your own self-pity.

Heres to feeling better tomorrow!!! Happy Cooking my Friends! More exciting posts to follow later in the week. :)

5.2.11

More Mac & Cheese... and peas & bacon!

All I have to say about this recipe is YUM!!!! It was sooooo good. I know the photos aren't great and there aren't very many of them, but thats because I was far to excited to just eat this mac & cheese. Its nothing fancy and mine is really low class because I ran out of macaroni and just substituted broken up spaghetti instead... oh well, its the taste that matters right? And cheesy goodness can cover up a multitude of sins!

I am in the middle of prepping for my Superbowl party which as most of you are aware (or should be aware in hubby's opinion) is happening tomorrow - like ALL DAY! I am definitely not a football fan, nor will I ever be, but I am always game for having people over and cooking and baking for them! Its so fun and it gives me an excuse to try out new recipes and spend exhorbitant sums of money on food without hubby getting after me! Entertaining is the one time its acceptable to go all out in the kitchen! WAHOO!!! I will be tired on Monday, but it will be worth it.
Last year while prepping for the Superbowl party I burned myself really badly by stupidly picking up a hot pan... I had to hold ice packs on my hands for the next two days and my hands blistered. :( It was not fun, but the food was still delish!! So far, this year's prep work is going far better than last year... will keep you posted because I still have a lot to do!
On to the mac & cheese though...
The Ultimate Macaroni & Cheese with Peas & Bacon
Recipe from Tyler's Ultimate


Ingredients:

  • kosher salt
  • 1 lb elbow macaroni
  • 3 tbsp unsalted butter
  • 3 tbsp flour
  • 4 cups warm milk
  • 5 1/2 cups shredded sharp white cheddar cheese
  • freshly ground black pepper
  • 1/4 cup chopped fresh flat,leaf parsley
  • extra virgin olive oil
  • 4 slices bacon, cut crosswise into thin strips
  • 1 large onion, diced
  • 2 garlic cloves, smashed
  • leaves from 1/4 bunch of fresh thyme
  • 2 cups froze peas, thawed in a colander under cool water

Method:

  1. Bring a pot of salted water to a boil over high heat. Add macaroni and cook 8-9 minutes, until al dente. Drain.
  2. Preheat oven to 400F.
  3. Melt the butter in large, deep skillet over medium heat. Whisk in flour and cook for about 1 minute, stirring constantly to keep lumps from forming. Gradually whisk in the milk and, whisking vigorously, cook until the mixture is thick and smooth. Stir in 4 cups of the cheese and continue to cook and stir to melt the cheese. Season with salt and pepper. Add cooked macaroni and the parsley and folt that all in to coat the macaroni with the cheese mixture. Scrape into a 3 quart baking dish and sprinkle with remaining 1 1/2 cups cheese. Bake for 30 minutes, or until hot and bubbly.
  4. While thats going on, heat a 2 count of olive oil in a saute pan. Add the bacon, onion, garlic, and thyme and cook for 5 minutes to soften the onion. Fold in the peas and season with salt and pepper (I cooked mine longer to make sure the bacon was a little crisp).

Enjoy!!!


Happy Cooking my Friends! Hope you get a chance to take in some Superbowl festivities and maybe do some cooking and baking! :D

3.2.11

Pita Bread - Attempt #2 & Hummus Ma Lahma

Alright, it has taken me a while, but I've finally got up the nerve to try my hand at making pita breads again! I took the advice of a couple of my great blog followers and upped the temperature of my oven and rolled them thinner. And the results were far improved! Still not perfect, but definitely much improvement! I saw partial pockets form this time where last time I got no pockets! Soooo I will keep trying. I do have a bit of a tale to tell about this one though...

Have you ever broken a rolling pin? Didn't think so! Well, while I was making these, my rolling pin broke. I had been using this cheap wooden one I picked up from ikea when I first moved out on my own and it had always done the trick. I tidied up my kitchen prior to starting to make the pitas so I would have a nice clean counter to roll them out on. When i started rolling out the second pita, I noticed some brown dust on the dough which looked like coffee grounds. So I'm like, I already wiped down the counter... where the heck is this coming from??? Well i look a little closer and the "coffee grounds" are actually pouring out of the middle of my rolling pin. NOT GOOD!!! So I had to be creative and roll the rest of my pitas out with a big can of chickpeas! So that is my kitchen disaster tale with a happy ending! Maybe I can blame the less than perfect results on the lack of a rolling pin? :D


I have wanted to try something like this for a while, but I just got around to trying it out! I found the recipe on the Food Network website. Emeril Lagasse developed the recipe and it sure is delicious. I would highly recommend this to anyone who likes hummus and making home made pita breads just amp up the delicious factor!
You can find the recipe here. It is late and I'm not up for typing up the recipe. So please accept my apologies for my laziness!!!
I didn't change a thing other than add additional liquid (mixture of olive oil and water) to the hummus to get it to the consistency I wanted it. You can definitely play around with it til you get it the way you like it. Hummus is great like that! You can also mix up the spices you use on the beef. I think next time I'm going to try out a yummy curry spice mixture on the beef. Lots of ways to personalize this recipe and make it how you and your family like it! Have fun playing with it!
Happy Cooking my Friends!