Showing posts with label beverage. Show all posts

4.10.13

Weekend Wine - 49 North 2012 White


Happy Friday my lovelies! I thought we could kick off the weekend right with a delish and refreshing wine suggestion from Forty Nine North! At $10 per bottle, you can't beat the price point!


The grapes for this wine were harvested in October 2012 and includes a blend of grapes from vineyards in Osoyoos, Oliver, Kelowna, and Naramata in British Columbia. The tasting notes on the Artisan Wine Shop website include the following:

This is a fresh, mouthwatering white blend showing peach, pear and subtle floral notes. The crisp palate is filled with green apple, grapefruit, spice and citrus flavoured acidity. It is a wonderful accompaniment to seafood, white meat dishes or served as an aperitif. 

I really enjoyed this wine - it was refreshing, crisp and relatively dry. Let me know what you think of it or if you've tried it before!

Cheers!

16.8.13

Weekend Wines: 14 Hands Chardonnay


Its been a while since I've put together a wine suggestion blog post for you. So I thought we would kick the weekend off right with a delicious wine suggestion. I don't drink a lot of wine that isn't from British Columbia, but a work friend gave me a bottle of Chardonnay from 14 Hands Vineyards in Washington, USA.

Keith Kenison is the winemaker at 14 Hands and has a really interesting philosophy on wine making that clearly works well for them. His philosophy is to "let the fruit express itself" which in my opinion, it truly does. I loved the fruity yet dry taste of this chardonnay and how unique it is from other chardonnays I have tasted in the past. Keith also says  "I guide the wine [it] to its final destination with as few manipulations as possible, making every decision by taste because, ultimately, that's what matters to the person buying a bottle." Who wouldn't want to taste a wine made with that particular philosophy?


Here are the tasting notes from the 14 Hands website for the 2011 Chardonnay:

"Aromas and flavors of fresh apple with subtle hints of vanilla and buttery caramel. On the palate, notes of sweet oak and spice give way to a soft, lingering finish."


I would recommend this wine to anyone who likes a relatively dry and oak-y tasting wine. It is a unique twist on a typical chardonnay while staying true enough to the traditional chardonnay flavour that it is sure to please lovers of chardonnay! Have you tried this wine before? Have you tried other varietals from this vineyard? Let me know in the comments below! I would love to hear from you.

Cheers!

11.8.13

Nutella Banana Smoothie


Yesterday was such a beautiful and sunny day here in Southern British Columbia! We have been so blessed to have such a beautiful July and I hope this amazing weather continues through August as well! When the weather is this warm, we usually wait until later in the evening to walk the dog so he doesn't get overheated (and maybe so we don't get overheated too!!). After we went for our dog walk, I was craving something cold and creamy... something that was refreshing but could also substitute as dessert. After a quick check of what I had on hand, I came up with the idea for a Nutella Banana Smoothie! It is mostly dairy-free except for the small amount of dairy in the Nutella. You could substitute one of the dairy free nut butters or spreads for a truly dairy free beverage though (note I haven't tested this option though, so I'm not sure how it will taste).


Nutella Banana Smoothie
Recipe by A Tale of One Foodies Culinary Adventures

Ingredients:
  • 1 banana
  • 2 tbsp. Nutella
  • 6-8 ice cubes (add more if your smoothie isn't thick enough)
  • 1/4 cup coconut milk
  • 1/4 cup almond milk (or more if your smoothie is too thick)
Method:
  1. Combine banana, Nutella, coconut milk and almond milk in blender. Blend until smooth. Add ice cubes to blender a few cubes at a time blending until smoothie reaches desired thickness. Top with dairy free whipped topping if desired & enjoy!

I love how quickly this smoothie came together and it literally tasted like a decadent milkshake! I can tell this is going to become a regular beverage in our house. What is your favorite kind of smoothie to make? Feel free to share your favorite recipe or flavour in the comments below!

Cheers!

28.7.13

Blueberry Mint Sparklers

 
Hey Friends! How is your summer going so far? I can't believe we're already at the end of July! Time is flying faster than ever it seems. Summer here has been unusually hot, sunny and dry! Which has been an amazing change. In the midst of this unusual heat though, I along with many others I know have been searching for delicious, refreshing summer beverages to make that are easy and don't take too long to whip up! (because when you're thirsty and in need of a drink, you don't want to wait all day)
 
Last weekend my sister and I were browsing through the July/August 2013 issue of Everyday with Rachael Ray and we found Blueberry Tarragon Sparklers - they looked delicious and sounded super easy to whip up. So we decided to give them a try.
 
I headed off to the grocery store with a very short list of ingredients to purchase and when I got to the produce section to look for tarragon, the fellow working in the store politely informed me they hadn't carried fresh tarragon in oh, about ten years. Say what?? So quick thinking coupled with my strong desire not to have to try every grocery store in the area resulted in me picking up a container of fresh mint instead. What a success!! These drinks were lovely!
 
Without further delay, here's the yummy recipe.
 
Blueberry Mint Sparklers
minimally adapted from Everyday with Rachael Ray
 
Ingredients:
  • 1/2 cup fresh blueberries
  • 1/4 cup honey
  • 2 tbsp. fresh mint leaves
  • ice
  • 1 bottle sparkling white wine (I used Yellow Tail Bubbles)
Method:
  1. In a small saucepan, bring blueberries, honey, mint and 1/4 cup water to a boil over medium-high heat. Stir until honey dissolves, about 3 minutes. Remove from heat and muddle blueberries and let stand for 20 minutes. Strain and place in refrigerator until chilled.
  2. To serve, spoon 1-2 tbsp. of blueberry syrup into 4 glasses. Add ice, then pour sparkling wine over top. Stir. Garnish with more fresh mint and blueberries.
Super easy, refreshing and delicious!
 
Cheers to the rest of our summer being just as fantastic as the first half.

15.6.13

Easy & Healthy Iced Tea


The weather is really starting to heat up around here - a sure sign summer is finally here! With the increase in the temperature, I've been on the lookout for some refreshing summer drinks that aren't full of calories. I noticed they're hard to find! So I decided to make my own iced tea!


I headed down to my local farmers market and found a booth selling some delicious tea and picked out cream of earl grey and cream of blueberry. Both sounded lovely to me, but you can really use any tea you want! Try to use high quality tea to avoid bitterness in your tea.


To make your iced tea - place 6 tsp of loose tea in a liquid measuring cup. Pour 1 1/2 cups boiling water over top and steep for five minutes. Don't steep for any longer or your tea will get bitter. Meanwhile, fill a pitcher 1/4 full with ice cold water.


 Once your tea is finished steeping, strain the mixture - putting the tea liquid into your prepared pitcher and discarding the tea. Fill the pitcher to the top with cold water. Serve tea over ice and garnish with slices of citrus fruits - I used lemons and oranges, but lime or grapefruit would be good too depending on the type of tea you're serving. I didn't need to sweeten mine, but if you must - sweeten it with honey!

This is such a simple, delicious and healthy alternative to other sugar-laden beverages we associate with summer. Give it a try - you might be surprised how delicious and refreshing it tastes!


 What's your favorite summer beverage that is easy on your waistline while still being refreshing?

Cheers!

29.4.12

Heavenly Iced Coffee!

I don't know about you, but when the warm spring and summer days hit, nothing tastes better to me than a delicious, creamy iced coffee! When you make it at home it just doesn't taste the same as when you get one from your favorite coffee shop. This recipe will teach you how to make one that tastes just like the one you get from the coffee shop with way less fat and sugar and for a fraction of the price! Plus, once you make the coffee base, it keeps in your fridge for a month, so you can enjoy iced coffees for weeks before having to make another batch. :)

This recipe uses the cold brew method of brewing coffee which takes a long time, but avoids the bitterness of hot brewing coffee, so its well worth it. Start making these the evening before you want to enjoy.


I found  this recipe/ method on Craving Comfort with the Homesteading Housewife. If you have a chance, head over there for some lovely photos and some great recipes.

You can make this recipe in smaller or larger batches depending on your coffee consumption rate!! The ratio is 1 oz coffee beans to 1 cup of cold water.

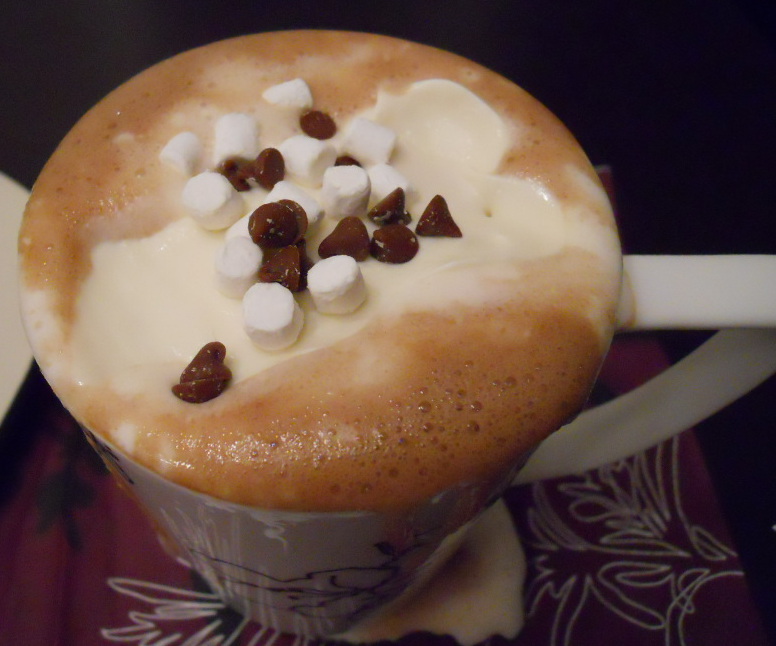
Creamy & Sweet Iced Coffee
Recipe minimally adapted from Craving Comfort

Ingredients:
  • 8 oz coffee beans, coarsely ground just before using
  • 8 generous cups of cold water
  • cheese cloth
  • 1 can fat free evaporated milk
  • 1/2 can low fat sweetened condensed milk (1.5g fat per serving)
Method:
  1. Combine coarsely ground coffee with the cold water in a large bowl. Stir to ensure all coffee grounds are moistened. Leave sit 8 hours or overnight.
  2. Line a fine mesh sieve with a few layers of cheesecloth (3-4) or with a coffee filter (you may need to change the coffee filter several times while filtering). Pour coffee mixture through the lined sieve until completely drained. Chill coffee base in fridge and discard the grounds.
  3. Mix together the evaporated milk and sweetened condensed milk. I combined mine in a salad dressing container that mixed everything together nicely.
  4. Fill a tall glass with ice and find a pretty straw. Fill glass 3/4 full with coffee mixture then top remaining room with the milk mixture. Stir and enjoy! You won't ever have to buy iced coffee again!! 

You can also experiment with different flavours of coffee beans. The second time I made this one I used 3 1/2 oz of hazelnut cream flavoured beans and the remaining 4 1/2 oz of beans I used just plain regular coffee beans. It was delicious! Some of the other flavours I want to try out are vanilla, bavarian chocolate, and irish cream. Using 3 1/2 ozs resulted in a very prominent flavour, so if you are after a more subtle flavour try starting with 2 - 2 1/2 ozs of flavored beans. This adds extra flavour to your coffee without adding extra calories!


Hope you enjoy this one! I know I definitely did. I've made it twice now and even my hubby enjoys it and he's not nearly the coffee fanatic I am. Cheers!

5.1.12

Peanut Butter Hot Chocolate


Did you make New Years resolutions this year? What kind of resolutions do you usually make? I always make New Years resolutions, and I'm always dead set on achieving them... for about a month, then my motivation wears off and I revert back to my old ways. Part of that may be the fact that my resolutions are usually overly ambitious and I try to change overnight. The fact is that change takes time - it doesn't just hapen overnight, and developing new habits and ways of life is tough so you have to be patient with yourself. This year I haven't talked much about my resolutions, but I feel like I need to document them here. I made sure I didn't set too many goals for this year and that they are achievable for the most part. Here are my resolutions for the year - both personal and blog related:
  1. Improve my blog through the use of better photos and more frequent posting. Plan posts in advance and stick to my schedule.
  2. Be nicer. At home, at work, to my friends.
  3. Get active a minimum of four days per week. Doesn't have to be anything crazy, just get off my butt and walk the dog, do some crunches, go for a run or do a workout off my Nike Training App I just downloaded for my phone (its free and its awesome - go download it if you're wanting to get active - it is a great tool to help you be successful).
Reasonable right? I'm looking forward to improving myself in 2012 in little ways and eventually those little things will add up to big things. :)


Any way, on to what you came here for - the recipe!! Peanutty, chocolatey, creamy goodness in a mug... it is like a taste of heaven! Sooooo smooth and decadent. You probably won't want to share... its that good. But you should share because that's the nice thing to do (or, just double the recipe!!).


Peanut Butter Hot Chocolate
Recipe minimally adapted from Bonnie the Baker

Ingredients:
  • 2 tbsp unsweetened cocoa powder
  • 3 tbsp brown sugar
  • 1 1/2 cups skim milk or 1% milk
  • 1 cinnamon stick
  • 1 tsp vanilla extract
  • 1 tbsp smooth, creamy peanut butter
  • whipped cream, mini chocolate chips and mini marshmallows for garnish
Method:
  1. Mix cocoa, brown sugar, milk, cinnamon stick, and vanilla extract in a medium saucepan. Whisk over medium heat until mixture is smooth. Simmer to let the cinnamon stick flavour the hot chocolate for a couple minutes. Lower the heat and stir in the peanut butter until smooth. Heat mixture to desired temperature, but don't simmer or bubble the mixture at all or it will get grainy.
  2. Pour into large mug. Garnish with whipped cream, mini chocolate chips and mini marshmallows. Makes one large mug.
This one is nice and easy to whip up on a week night and you will love to savor it while reading your favorite novel or browsing your favorite food blogs.

Happy Baking my Friends!