Showing posts with label cookies. Show all posts

16.9.13

Chewy Brown Sugar Coconut Cookies


Summertime is all about desserts and treats that show off the beautiful bounty of produce we have available to us! Beautiful, juicy strawberries, raspberries, cherries, peaches, etc. But as the weather cools down and fall arrives, I crave something a little heavier and comforting. Enter freshly baked cookies! The oven warms your house a bit as you bake them and that homey, delicious smell is so comforting and satisfying. Today I have an awesome cookie recipe for you! Its a twist on the classic chewy gingersnap cookie - it is a brown sugar-molasses cookie made with coconut oil. I doubled the batch and it didn't even last the afternoon in our house. They're soooo yummy!

My sister found this recipe on Averie Cooks. She has a great website full of amazingly delicious sounding recipes. This is the first one I've tried, but it sure won't be the last. Pop over and check out her blog - I'll still be here when you get back!

Chewy Brown Sugar Coconut Cookies
Recipe minimally adapted from Averie Cooks

Ingredients:
  • 1/2 cup coconut oil
  • 1 cup dark brown sugar, packed
  • 1 large egg
  • 2 tbsp vanilla
  • 1 tbsp unsulphered mild molasses
  • 1 3/4 cup all-purpose flour
  • 2 tsp corn starch
  • 1 tsp baking soda
  • 1/4 tsp salt
Method:
  1. Place coconut oil and brown sugar in the bowl of a stand mixer. Beat on medium high til combined. Add egg and beat until light and fluffy - about 4-5 minutes. Scrape down sides of bowl, add vanilla and molasses. Beat to incorporate - 1-2 minutes. Add flour, cornstarch, baking soda and salt. Mix until just combined.
  2. Using a medium cookie scoop, form mounds that are approximately 2 heaping tbsp. Place dough mounds on a large plate and chill in fridge for 20 minutes - 2 hrs (the longer you chill, the less the cookies will spread. I chilled mine for 20 minutes).
  3. Preheat oven to 350F. Line baking sheet with parchment paper. Place dough on prepared cookie sheet leaving 2 inches in between. Bake for 8-10 minutes or until tops have just set. Even if the cookies are slightly undercooked, pale and glossy in the center - they will firm up as they cool.
  4. Allow cookies to cool on baking tray for 5-10 minutes before moving.


Yep, thats it! I love the short ingredient list for this cookie recipe! Majority of the items are pantry basics! Gotta love a recipe like that hey?!
Check out Averie's blog for many more versions of this recipe as well (note some involve nut butter, cookie butter, white chocolate etc). Be creative and mix it up! I love the coconut oil and heavy dose of vanilla in this recipe though!
Happy Baking my Friends!

9.8.13

{Dairy Free} Chocolate Cappuccino Biscotti


Whew! What a week its been so far. Despite being a shorter week than usual, it seems like it was so much more exhausting than it usually is. Part of it is that two of my four days this week were attending training seminars all day and the fact that my car broke down on my way to said training seminar. I think I was also coming back to reality after such a fantastic yoga retreat last weekend which made this week seem even tougher! You know what you need on weeks like that? Delicious and flavourful biscotti. That's what will make it allllll better. Especially biscotti you can indulge in nearly guilt free - these have no added fat (some fat in the chocolate chips, but no oil or butter products added to this dough) and they have no dairy (I substituted almond milk for the milk).


Chocolate Cappuccino Biscotti
Recipe minimally adapted from Joy of Baking

Ingredients:
  • 2 cups all purpose flour (or you could substitute 1 cup whole wheat for one cup of white flour)
  • 1 cup granulated sugar
  • 1/2 tsp baking soda
  • 1/2 tsp baking powder
  • 1/2 tsp salt
  • 1/2 tsp cinnamon
  • 1/4 tsp cloves
  • 1/4 cup strong coffee
  • 1 tbsp finely ground coffee
  • 1 tbsp almond milk
  • 1 egg
  • 2 tsp vanilla extract
  • 3/4 cup semi sweet chocolate chips


Method:
  1. Preheat oven to 350F. Line two baking trays with parchment paper, set aside.
  2. In a small bowl, whisk coffee, ground coffee, almond milk, egg and vanilla.
  3. In the bowl of a stand mixer beat flour, sugar, soda, powder, salt and spices until combined. Gradually mix in coffee mixer until combined. Add chocolate chips and incorporate without overmixing.
  4. With floured hands, divide the dough in half. Roll each portion of dough into a log about 10 inches long and 2 inches wide. Transfer logs to prepared baking sheets (one on each sheet).
  5. Bake in preheated oven until firm to the touch. Remove from oven and cool on wire rack 10 minutes.
  6. Reduce oven temperature to 300F. On a cutting board, cut the logs lengthwise on a diagonal into 3/4 inch slices. Place cut side up on a baking tray. Bake five minutes, flip over and bake five minutes on the other side. Remove from heat, let cool. Store in an airtight container.
 
These were really yummy with all the spices and with the strong coffee flavour. We really enjoyed them dipped in coffee or tea or even just eaten as a snack. What is your favorite kind of biscotti?
 
Here are a few of my favorites:
 
Happy Baking my Friends!

5.6.13

Coconut Chocolate Chip Cookies


Happy Wednesday peeps! The week is more than half over - you can do it!! These cookies got me revved up about baking again - they're delicious and totally different than any chocolate chip cookie I've ever had. They have a secret ingredient - coconut oil!


 If you're worried about how expensive coconut oil is, let me tell you a little secret! You don't have to pay loads of money for good quality cold pressed coconut oil!! Go down to your local Costco and load up- they had huge jars of really good quality stuff on for around $20! Stop paying the ridiculous prices at grocery stores and health food stores! You absolutely don't need to.


 I found this recipe on the Well Traveled Wife. Head on over there and check out her site - it seems like a good one with lots of yummy recipes. And if this recipe is any testament to the quality of her recipes, her blog is fantastic!


Coconut Chocolate Chip Cookies
Recipe adapted from The Well Traveled Wife

Ingredients:
  • 1/2 cup coconut oil
  • 1 cup white sugar
  • 2 eggs
  • 1 tbsp. vanilla
  • 1 3/4 cup all purpose flour
  • 1/2 tsp kosher salt
  • 1 tsp baking powder
  • 1/4 tsp baking soda
  • 3/4 cup white chocolate chips
  • 3/4 cup semi-sweet chocolate chips
  • 1/2 - 1 cup shredded coconut
Method:
  1. Preheat oven to 375F. Line two baking sheets with parchment paper and set aside.
  2. In the bowl of your mixer, cream the coconut oil and sugar together. Add eggs one at a time beating until incorporated after each addition. Add vanilla and beat til fluffy.
  3. In another bowl, mix the flour, salt, powder and soda. Gradually add to the coconut mixture until just about incorporated (mixing on a very low speed). Add in chocolate chips and coconut and mix til just combined.
  4. Drop by spoonful's onto prepared baking sheets. Bake in pre-heated oven for 8-10 minutes until just lightly browned around the edges and still soft in the middle. Let set on tray for 2-4 minutes after removing from oven, then remove to wire rack to cool completely.

The coconut oil adds such an amazing flavour to these cookies! You really need to try them. The beauty of these cookies is how quick and easy they come together - none of this finicky cookie stuff! Simple and delicious is all you'll find here!


Happy Baking my Friends!
 

22.10.12

No Bake White Chocolate Peanut Butter Cookies for SRC


Time for Secret Recipe Club again! This month seems to have been another busy month, even though I have been expecting life to just slow down a bit. No such luck though!! This is one of those months I wish I would have had more spare time because the blog I was assigned, Veronica's Cornucopia is such a great blog! There were so many great recipes and so many creative ideas. I will definitely be visiting again in a month I have more time to experiment, because there were a lot of great looking recipes to try. Go have a look around for yourself - I'll still be here when you come back. :)


I didn't really go too crazy due to my lack of time, but I was super impressed with how quick, easy and delicious the recipe I selected was! I made Veronica's Cow Pie Cookies - but changed them up to be made with white chocolate and peanut butter because that's what I had on hand!

White Chocolate Peanut Butter Cookies
Recipe adapted from Veronica's Cornucopia

Ingredients:
  • 12 oz white chocolate
  • 4 tbsp peanut butter
  • 2/3 cup rolled oats
  • 1/2 cup shredded coconut
  • chopped marshmallows (I used about 1/2 - 1 cup)
Method:
  1. Melt the white chocolate and peanut butter on low heat in the microwave. Stir until smooth. Stir in the oats, coconut and marshmallows. Drop by spoonfuls onto parchment paper. Let set at room temperature until firm - approximately 1 hour. Enjoy!
Yep! Thats it - easy, and delicious. Veronica says you can mix in whatever you want! I think next time I make these I'll mix in pretzels for that sweet and salty combo that I can't get enough of.


Thanks for stopping by - Happy Baking my Friends!

13.10.12

Coconut Crusted Salted Caramel Cookies


I follow a great blog called Taking on Magazines written by "the Mom Chef" who is actually Christiane. Its a great blog with loads of delicious recipe ideas. Please check it out right now - I'll be here when you get back. :)

Any way, a while back she posted the recipe for these amazing cookies and I pinned it to try later. Later finally came when I made them a couple weeks ago. They were such a hit!!! Devoured eagerly and quickly that I barely had time to snap a couple of pictures. You've gotta try making them they are absolutely delicious and easy to make. In fact they might be fun to make with your kids if you have them - the kids could help with rolling them into balls and rolling them in the coconut (or nuts if you choose). It would be a fun kitchen project to take on.


Coconut Crusted Salted Caramel Cookies
Recipe adapted from Taking on Magazines

Ingredients:

  • 3 sticks unsalted butter, softened
  • 1 cup sugar
  • 1 tbsp vanilla
  • 3 1/2 cups flour
  • 1/2 tsp kosher salt
  • 2 large eggs, lightly beaten
  • coconut for rolling
  • 1 2/3 cups sugar
  • 1/2 c water
  • a few drops lemon juice
  • 1c whipping cream
Method:
  1. First make the caramel sauce. Put the 1 2/3 cups of sugar into a very clean saucepan. Gently pour the water oer the sugar and add the lemon juice. Place pan over medium high heat with the lid on. Bring to a boil and let boil with lid on, removing and replacing the cover every so often. When all the water is boiled off, the sugar will be boiling with big bubbles breaking on the surface. The bubbles will gradually get smaller as the temperature rises. Remove the lid and pay attention now. The sugar will change colour - when it reaches a nice gold/ amber colour, remove it from the heat - don't let it get too dark or it will taste burnt. Add the cream carefully (it will bubble and steam like crazy). Have a wooden spoon ready and stir until well blended. Set aside to cool and thicken up a bit.
  2. Preheat oven to 350F. Line two baking sheets with parchment paper. Set aside.
  3. Beat together butter with 1 cup sugar until smooth and fluffy. Beat in vanilla.
  4. Add the flour a little at a time, then add the salt. Beat to combine.
  5. Roll dough into 1 1/4 inch balls. Dip each ball in the egg, then roll in coconut to coat. Place on prepared cookie sheet. Press to flatten a bit, then use your thumb to make an indentation in the center of the cookie. Repeat with remaining dough.
  6. Bake in preheated oven for 10 minutes. Repress indent with your thumb and then bake for another 9-10 minutes or until golden. Let cool on wire racks.
  7. When completely cooled fill indentation with a little of the caramel sauce, then sprinkle with sea salt.
 Yep, so that is all!! I am writing this to share with you while enjoying bacon rolls - like cinnamon buns, but savory!! Recipe to follow on world bread day - 3 days left! Can you wait that long?!

Happy Baking my Friends!


20.8.12

Chocolate Peanut Butter Chip Cookies for SRC!


Hi Friends! Its time for Secret Recipe Club's Group C reveal again and you know what that means - I get to try out a new recipe from a new blog! This month I was assigned Erin's blog (yep, we have the same name) Making Memories with your Kids. I decided to make her Chocolate Pastel Mint cookies, but I didn't have mint chips, so I substituted peanut butter chips on top, plus I added some to the dough as well (because you can never have enough PB chips right?!). The cookies were a huge hit with my family!


Lets get right down to business, here's my version of the recipe (the only changes I made were to use PB chips instead and add some to the dough as well.

Chocolate Peanut Butter Chip Cookies
Recipe minimally adapted from Making Memories with your Kids

Ingredients:
  • 1 cup sugar
  • 1/2 cup butter, at room temperature
  • 1 egg
  • 2 tsp vanilla
  • 1 1/2 cups flour
  • 1/2 cup dutch process cocoa powder
  • 1/4 tsp baking soda
  • 1/4 tsp baking powder
  • 3/4 cup peanut butter chips + extra for topping the cookies with
Method:
  1. Preheat oven to 350F.
  2. In the bowl of the stand mixer, cream together butter and sugar until smooth and fluffy. Add egg and vanilla and mix until well combined.
  3. Add flour, cocoa powder, baking soda & baking powder. Mix until just combined. Add in peanut butter chips until just combined.
  4. Roll cookies into 1 inch balls and place on an ungreased cookie sheet. Bake in preheated oven for 12 minutes or until just set (don't over cook them or they will be dry). Remove from oven and immediately top with 5-6 more peanut butter chips, pressing into the soft cookies slightly.


Thats it! Easy to  make, basic ingredients and only dirties one bowl! Whats not to like? Thanks Erin for a fantastic recipe. :)

18.6.12

Pistachio Cranberry Icebox Cookies for SRC!


Hi Everyone! Thanks for stopping by to check out this month's Secret Recipe Club's Group C reveal. Its pretty much one of the best days ever - its when we get to reveal our top secret blog assignment for the month and our selected recipe from that blog. :) If you're interested in learning more about SRC or joining, check out what its all about here.


This month, my assignment was The World in my Kitchen written by Mindy. Mindy is from Kentucky, but she has lived and traveled to many different places over the years. Her blog is a great testament to the different places she has lived and she has so many cool recipes to share. You've got to stop by and check if out if you haven't been there before. I can't wait to pop back over there and make some more of Mindy's recipes given the wild success of the one I selected for SRC.


I made the Cranberry, Pistachio Icebox Cookies - they were so perfect because they're easy (and not at all finicky) and they used ingredients I already had in my pantry (woot!). Mindy had a really cute story about how these cookies pulled her out of a string of unsuccessful cookie baking attempts, so I knew the recipe must be a winner. And it was! You've got to try it out ASAP. :D


Cranberry, Pistachio Icebox Cookies
Minimally adapted from The World in my Kitchen

Ingredients:
  • 1 1/2 cups flour
  • 1 tsp vanilla extract
  • grated zest of one lemon
  • 1/4 tsp salt
  • 3/4 cup unsalted butter, softened
  • 1/4 cup sugar + 2 tbsp for sprinkling
  • 1/2 cup shelled pistachios, roughly chopped
  • 1/3 cup dried cranberries, roughly chopped
  • 1 egg, lightly beaten
Method:
  1. Stir together the flour and the salt in a small bowl.
  2. Beat together the butter, lemon zest, vanilla, and 1/4 cup of the sugar about 3 minutes (or until pale and fluffy). Reduce speed to low and add flour mixture in three separate additions, mixing well after each addition. Mix until dough starts to come together in clumps. Add pistachios and cranberries and stir til evenly distributed through dough (it will be very crumbly still).
  3. Gather and press dough together and divide into two equal portions. Using a piece of plastic wrap, gather and form each piece into a log (about 1 1/2 inches in diameter). Chill, wrapped tightly in plastic wrap until firm - minimum two hours, but up to three days.
  4. Once chilled, preheat oven to 350F and line two large baking trays with parchment paper.
  5. Brush egg over the log covering all surfaces except the two ends of the log. Sprinkle liberally with remaining two tbsp of sugar (or use turbinado sugar).
  6. Slice each log into 1/4 inch rounds and place on the prepared cookie sheets. Bake in preheated oven for about 15 minutes, or until edges are lightly browned. Cool completely on a cooling rack.
 And thats it! These are super easy and they taste delicious. They also look great because of the beautiful colours added by the pistachios and cranberrys. Thanks Mindy for such a lovely recipe. Can't wait to try out many more. :)

This post has been linked up with Whatcha Bakin Wednesdays over at Cajun Sugar Pie. Head over and check out what other mouthwatering desserts other bloggers have come up with this week.

22.4.12

Snickerdoodles... sort of!


Good morning friends! Thanks for stopping by. I'm just hanging out with two lovely Golden Retrievers and my delicious iced coffee (check back later this week for that amazing recipe) on this beautiful Sunday morning. Not quite as beautiful as yesterday morning, but still great!

I know I haven't been putting as much effort into my blog lately as I would like to, but sometimes life just goes that way doesn't it?

Here's what I've been up to lately:

Coming to the end of a crazy and insane busy season at the accounting office I work for. It seems so much crazier than last year... not sure why, but it just is. The last two weeks, I haven't been working quite as many hours, but I'm still feeling a tad burnt out. I have also been getting more responsibility on the enagement's I've been staffed on and that seems to come with more stress and accountability, so I have been learning to adapt to that role without going crazy from the increased stress!!

For the past five weeks I've been trying to change my lifestyle so that I can lose some weight, get more active and just generally improve my health. You can imagine how tough that is with all this delicious baking around... but it is necessary... my goal is to lose 53 lbs over the next year. So far in five weeks I've lost 15.2 lbs and lost 13.5 inches. I'm pretty proud of that accomplishment and hope it continues to come off that quickly! I've been getting more exercise and trying to make my health a priority. So, you may see more healthy recipes coming through here in the future (don't worry, I'll still post yummy and sinful recipes too, just probably not as many!!).

I'm also in the final year of getting my CA (chartered accountant) designation. Its a stressful year - I have to pass two more modules - one of which is known to be very technical and diffucult - in order to qualify to write the final UFE (uniform final examination). So, this summer is going to be filled with studying for the UFE and to pass those courses. I'm just praying I pass everything in the first go so I can say goodbye to this stressful part of my life and move on to a life that is non-student!!


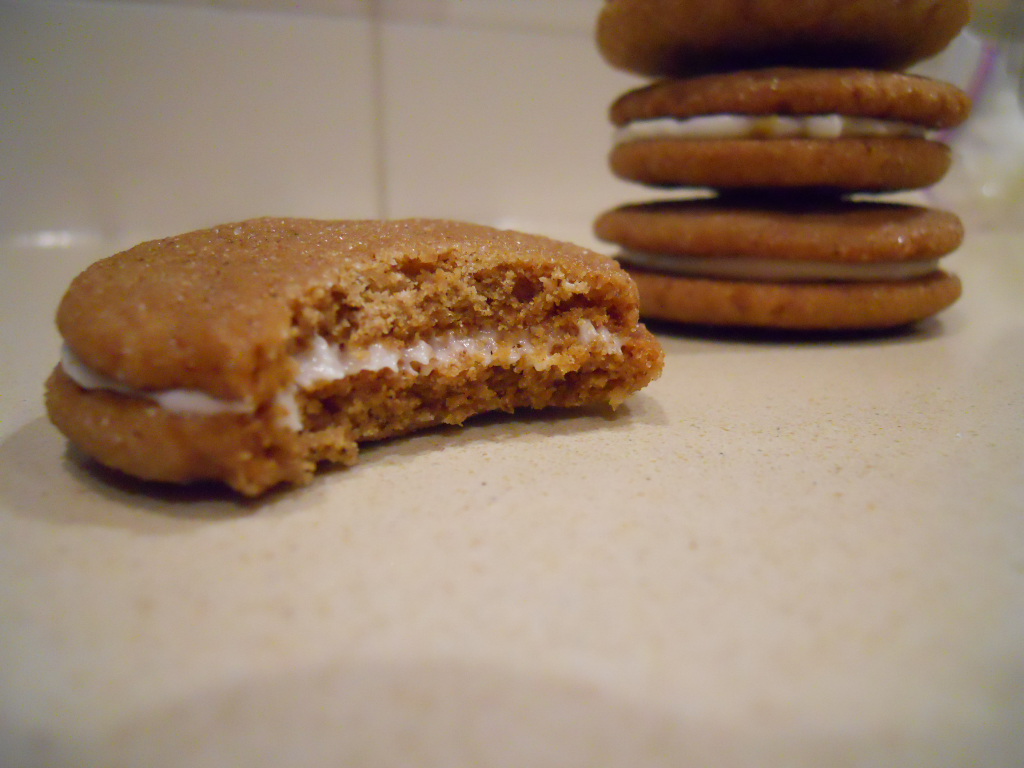
But, enough about me for now! Lets get to this yummy recipe! These aren't traditional snickerdoodles, but I'll give a suggestion below on how to make them taste more traditional. If you make the recipe as is, they will taste more like a sugar cookie coated lightly with cinnamon and sugar. They are delicious as is, but not traditional tasting!

Snickerdoodles... sort of!
Recipe adapted from Anna Olson's Back to Baking

Ingredients:
  • 1 cup butter, softened
  • 1 cup sugar
  • 2 eggs
  • 2 tsp vanilla extract
  • 2 1/2 cups all purpose flour
  • 1 tsp cream of tartar
  • 1 tsp cinnamon (add this in for more traditional tasting snickerdoodles - note this was not included in the original recipe, so omit if you want a less traditional snickerdoodle)
For the coating:
  • 1/2 cup sugar
  • 1 1/2 tsp ground cinnamon
Method:
  1. Preheat oven to 350F and line two baking trays with parchment paper.
  2. Cream the butter and the sugar together until fluffy (about 2-4 minutes). Beat in eggs one at a time until well blended. Add vanilla extract and stir until incorporated.
  3. In a separate bowl, combine the flour, cream of tartar and cinnamon (if using). Add to the butter mixture and blend well (don't over mix of you will get tough cookies).
  4. For the cinnamon sugar coating, in a small bowl mix both ingredients together well. Using a large cookie scoop, scoop out portions of the dough and roll them into balls and then roll in the cinnamon sugar mixture to coat completely. Place on a baking tray and press lightly to flatten them.
  5. Bake in preheated oven for 15-17 minutes, depending on the size of your cookies. As soon as the edges start to turn light brown, they are done. You want the center of the cookie to still look soft. Don't worry - it will finish cooking once you take it out of the oven and will be completely cooked on the inside.


And thats that! Those are easy cookies to whip up in an evening. Your family will love them... I mean, who doesn't love Snickerdoodles?!

Sorry for the long post today! I just wanted you to know whats been going on with me, especially since I haven't written much on my blog lately. Hope you enjoy this recipe! I've got the Secret Recipe Club April challenge going up on Monday (its a good one that I'm really excited about!!!), and the Daring Bakers' Challenge going up on the 27th, so its going to be a delightful week of recipes. Hope you'll stop by to check them out.

Happy Baking my Friends!

2.4.12

Savory Oatmeal Cookies


I have a confession to make... I'm pretty obsessed with Pinterest. I may have disclosed this at some point in the past couple of months, but seriously, this obsession has gotten worse (yes, I'm aware gotten isn't proper english and this is my caring face heehee). Any way, seriously, I check out Pinterest first thing when I wake up in the morning, at lunch time in the office, and of course lying in bed at night before I go to sleep. Now that I have the Pinterest app on my phone... well, my obsession has intensified. On one of my many Pinterest binges, I came across these amazing looking savory oatmeal cookies. And this weekend I finally got around to making them. I made some minor changes to the recipe, and the result was glorious!!

Savory Oatmeal Cookies
Recipe very slightly adapted from the Kitchn.com

Ingredients:
  • 1 cup steel cut oats
  • 1/4 cup warm water
  • 1/3 cup extra virgin olive oil
  • 1/3 cup honey
  • 1 large egg, beaten
  • 1 cup all purpose flour
  • 1/4 tsp baking soda
  • 1 tbsp finely chopped fresh rosemary
  • 1/2 tsp freshly ground black pepper
  • 1 cup finely grated parmesan cheese
  • kosher salt for sprinkling
  • Roasted garlic goat cheese
Method:
  1. Preheat oven to 350F. Line large baking tray with parchment paper.
  2. Place oats in a large bowl and sprinkle with warm water. In a smaller bowl, combine the olive oil, honey, and egg until well mixed. Pour mixture over the oats and stir to combine. Set mixture aside.
  3. In another mixing bowl, combine the flour, baking soda, rosemary and black pepper. Whisk until well incorporated. Then gently stir in the parmesan cheese. Add the flour mixture to the oat mixture and stir until blended (try not to overmix).
  4. Scoop onto prepared baking tray (I did about 1/8 cup portions or the size of an ice cream scoop). Flatten slightly then sprinkle with kosher salt.
  5. Bake 18 minutes or until edges are lightly browned. Remove from oven and cool on wire rack.
  6. Once cookies are cooled, serve spread with roasted garlic goat cheese.


Yep, they're pretty easy and use very basic ingredients that you probably already have in your pantry and fridge. These are a great snack or starter to a yummy dinner and pair really well with white wine. If you have a chance, head over to the Kitchn to check out other delicious recipes and some great tips.
This post has been linked up with the recipe party over at the Sweet Spot! Head over and check out all the amazing Easter Goodies that have been linked up with the party. :)

Happy Baking my Friends!!

25.1.12

Lemon Sugar Cookies


A little while ago my hubby decided to upgrade our internet to an uber fast network. The last month or so though our internet has had nothing but problems. It cuts out all the time for no apparent reason and you have to reset the modem or wait a few hours for it to be restored. So hubby called the internet provider and asked them to send someone to fix the internet. Oh, yes, they're here tonight while I'm trying to write this post and control my CRAZY golden retriever at the same time. So, as you read this post, picture me, dragging my dog upstairs to my bedroom, closing the door to lock us in said bedroom and consoling my pup who is heartbroken that the repairman doesn't want to be BFFs. Ahhhh the joys of having a dog who will forever have puppy brain! Annyyyy who, on to the food!

Ready to get your bake on? Make these delicious and easy cookies! I made them for the ladies get together I hosted at my place on the weekend and they were a hit. Hubby has already insisted that I make another batch because he loved them so much. And he doesn't do that very often, so you know they're delicious. The best part about these cookies is that you probably have all the ingredients on hand in your pantry already! Wahoo for no trip to that pesky grocery store!!


Chewy Lemon Sugar Cookies
Recipe minimally adapted from My Baking Addiction

Ingredients:
  • 2 3/4 cups flour
  • 1 tsp baking soda
  • 1/2 tsp baking powder
  • 1/2 tsp salt
  • 1 cup butter, softened
  • 1 1/2 cups white sugar
  • 1 egg
  • 1 tsp vanilla extract
  • zest of one large lemon, finely minced
  • 4 tbsp fresh lemon juice
  • 1/2 cup sugar for rolling cookies
Method:
  1. Preheat oven to 350F. Line cookie sheets with parchment paper.
  2. In a small bowl, whisk together flour, soda, powder and salt. Set aside.
  3. Using a mixer, beat together the butter and the sugar until light and fluffy, about 5 minutes. Beat in egg, vanilla, lemon zest and lemon juice. Gradually add the dry ingredients until mixture is combined uniformly. Do not overmix.
  4. Form into 1 1/2 inch balls, roll in sugar and bake in preheated oven for 12 minutes or until lightly browned. Let stand on cookie sheets to cool for two minutes before removing to cooling rack to cool completely.
Pretty easy huh? They were sooooo delicious. Some of the best cookies I've made in a long time. They aren't overly lemony, so if you're looking for that pop of lemon flavour I would add some extra zest (double it!!) to the batter.

This post has been linked up with Whatcha Baking Wednesdays over at Cajun Sugar Pie! Pop on over there to check out what yummy desserts other bloggers are making this week. :)

This post has been linked up with Jane Deere's Fusion Fridays over at Jennifer Cooks. Have a wander over to her blog to check out some of the awesome things fellow bloggers are making, cooking and baking this week.

Happy Baking my Friends!

10.6.11

GO CANUCKS GO!! Final Round Baked Goodies!

Well folks, its the final rounds of the Stanley Cup Finals and our beloved Canucks are struggling ... they started out strong the first two games, but they've lost a bit of steam. D had a bright idea that when we baked the Canucks cupcakes at the start of the 3rd round, they came through and won it... So we are really hoping that the baked goodies trick will win us the Cup too!! D did all the work! I mostly kept her company, made a batch of icing and piped some icing between the cookies. She did the hard part of coming up with the design, baking the cookies and piping the little letters painstakingly onto each sandwich cookie!! Of course she was kind enough to bring them in to work to share with our treat-loving office!


So lets hear a cheer for D and her mad skills!


Cookies are: Blondie (chocolate chip cookies without the chocolate chips) cookies, filled with vanilla buttercream and decorated with royal icing. Yummers!!


And three cheers for our beloved Canucks!!! You can do it boys!!


GO CANUCKS GO!!!

5.6.11

Neiman Marcus Cookies

I received an email a while ago (probably a couple of years ago) that had this recipe in it and said to pass along to all the people I possibly could. I didn't think much of it until I came across the recipe again in one of my cookbooks. According to the cookbook note, "the rumor that gave this cookie its rise to fame tells of a customer who inadvertently paid $250 US for this cookie recipe, thinking she was being charged $2.50 US." In spite of the ridiculously high price, she shared the recipe with everyone she possibly could. A quick google search put this rumor to rest as the information I read indicated that Neiman Marcus didn't even make chocolate chip cookies when this was said to occur. But its still a funny rumor that makes these cookies interesting to make!

These cookies are really delicious with the addition of some instant coffee powder. It just gives them this unique flavour and makes them really stand out above other chocolate chip cookie recipes. They're super easy to whip up, just be sure you don't over cook them. Cookies are always best when they're still nice and soft in the middle and just cooked through.

Neiman Marcus Cookies
Recipe from 500 Cookies by Philippa Vanstone

Ingredients:


  • 1/2 cup sweet butter (I used salted)

  • 1 cup light brown sugar

  • 1 egg

  • 2 tsp vanilla extract

  • 1 1/2 cups all-purpose flour

  • 1/2 tsp baking soda

  • 1/2 tsp baking powder

  • 1/4 tsp salt

  • 1 1/2 tsp instant coffee powder

  • 1 1/2 cups semisweet chocolate chips

Method:


  1. Preheat the oven to 375F.

  2. Beat the butter and sugar together, and add the egg and vanilla. Sift together the remaining dry ingredients, including the coffee powder. Stir the dry ingredients into the butter mixture and mix in chocolate chips.

  3. Roll into balls. Use your finger to flatten onto a non-stick baking sheet 2 inches apart. Bake for 8-10 minutes. Cool for five minutes.

  4. Store in an airtight container for 4-5 days. Makes 2 dozen cookies.


I hope you enjoy this recipe and it's wonderful simplicity. It is a wonderful recipe and I guarantee you'll be asked for the recipe many times by any of your friends lucky enough to taste these cookies.

I'm going to head off and try to enjoy some of the sunshine we're finally getting here in Vancouver! Enjoy the rest of your Sunday afternoon.

Happy Baking my Friends!

5.3.11

Ginger-Spice Sandwich Cookies with Lemon Cream Filling

I've been having a great weekend! My Dad is here visiting, so we went out for a great dinner last night and spent the day hanging out together. Plus, the weather is nicer than its been in quite some time here, so all in all its been a good weekend! Since I'm feeling pretty joyful, I thought I would share a recipe with you that brought me a lot of joy and satisfaction - ginger-spice sandwich cookies with lemon cream. Mmmmmmm!!! I had never tried sandwich cookies before, but decided plain old cookies weren't really special enough to make for my hubby's Superbowl party last month, so I decided on this recipe from the Best of Fine Cooking Magazine - Tailgating 2010. It was definitely a good call - all of the cookies were devoured during the party and people raved about them! They were so perfect - the right amount of spice in the cookies countered with the sweet lemon cream inside the cookies. Next time I make them I'll be sure to put even more filling in them.


The cookies weren't nearly as much work as I thought they would be which is always a plus. And if you put the filling into a piping bag and pipe the filling onto the cookies, filling them is a breeze - speedy with minimal cleanup. If you make them, put about double the filling you see piped on them in the picture below, and make them the night before that way the cookies can soak up some of the filling making them extra moist and delicious.

Ginger-Spice Sandwich Cookies with Lemon Cream
Recipe from the Best of Fine Cooking magazine - Tailgating 2010


Cookie Ingredients:


  • 9 oz (2 cups) unbleached all-purpose flour
  • 2 tsp ground ginger
  • 1 1/2 tsp. ground cinnamon
  • 1/2 tsp ground cardamom
  • 1/2 tsp baking soda
  • 1/2 tsp kosher salt
  • 6 oz (3/4 cup) unsalted butter, softened
  • 1/2 cup packed dark brown sugar
  • 1/2 cup granulated sugar, plus more for rolling
  • 1/4 cup unsulfured molasses
  • 1 large egg, at room temperature
  • 1/2 tsp pure vanilla extract

Lemon Cream Ingredients:

  • 4 oz cream cheese, at room temperature
  • 1 tbsp finely grated lemon zest
  • 6 oz (1 1/2 cups) confectioners sugar

Method:

  1. Position a rack in the center of the oven and heat the oven to 350F. Line 3 baking sheets with parchment paper.
  2. In a medium bowl, whisk the flour, ginger, cinnamon, cardamom, baking soda, and salt.
  3. In the bowl of a stand mixer fitted with the paddle attachment, beat the butter and both sugars on medium-high speed until light and fluffy, about 3 minutes. Add the molasses, egg and vanilla and continue to beat until incorporated, about 1 minute. Reduce the speed to low, slowly add the flour mixture and mix until just incorporated, about 1 minute. Shape the dough into a disk, wrap in plastic, and refrigerate until firm, about 1 hour.
  4. Put about 1/3 cup granulated sugar in a small bowl. Using your hands, roll about a tsp of dough into 1-inch ball. Roll each ball in sugar and arrange about 2 inches apare on the lined baking sheets. Use the bottom of a gladd to flatten the cookies slightly. Bake one sheet at a time until the cookies feel dry to the touch and are beginning to firm up (they'll still feel soft inside), 12-14 minutes. Cool completely on racks.
  5. Make the lemon cream: with a hand mixer, mix the cream cheese and lemon zest in a medium bowl until smooth. Slowly add the confectioners sugar and continue to mix until smooth.
  6. Assemble the cookies: pipe filling liberally onto the center of a cookie, top with another cookie, then gently press them. Repeat with the remaining cookies. Store in an airtight container for up to two days.


If you want to serve them up pretty, you can put them on a plate with some candied ginger. It adds a nice touch!


I hope you're having an exciting weekend! Filled with friends, family and fun times. I am heading out of town again for work (leaving tomorrow), out to the middle of no where... so blogging may be somewhat intermittent, so please bear with me. :) Hope you enjoyed this post and are inspired to try out these little bits of heaven!
Happy Baking my Friends!