Showing posts with label coconut. Show all posts

16.9.13

Chewy Brown Sugar Coconut Cookies


Summertime is all about desserts and treats that show off the beautiful bounty of produce we have available to us! Beautiful, juicy strawberries, raspberries, cherries, peaches, etc. But as the weather cools down and fall arrives, I crave something a little heavier and comforting. Enter freshly baked cookies! The oven warms your house a bit as you bake them and that homey, delicious smell is so comforting and satisfying. Today I have an awesome cookie recipe for you! Its a twist on the classic chewy gingersnap cookie - it is a brown sugar-molasses cookie made with coconut oil. I doubled the batch and it didn't even last the afternoon in our house. They're soooo yummy!

My sister found this recipe on Averie Cooks. She has a great website full of amazingly delicious sounding recipes. This is the first one I've tried, but it sure won't be the last. Pop over and check out her blog - I'll still be here when you get back!

Chewy Brown Sugar Coconut Cookies
Recipe minimally adapted from Averie Cooks

Ingredients:
  • 1/2 cup coconut oil
  • 1 cup dark brown sugar, packed
  • 1 large egg
  • 2 tbsp vanilla
  • 1 tbsp unsulphered mild molasses
  • 1 3/4 cup all-purpose flour
  • 2 tsp corn starch
  • 1 tsp baking soda
  • 1/4 tsp salt
Method:
  1. Place coconut oil and brown sugar in the bowl of a stand mixer. Beat on medium high til combined. Add egg and beat until light and fluffy - about 4-5 minutes. Scrape down sides of bowl, add vanilla and molasses. Beat to incorporate - 1-2 minutes. Add flour, cornstarch, baking soda and salt. Mix until just combined.
  2. Using a medium cookie scoop, form mounds that are approximately 2 heaping tbsp. Place dough mounds on a large plate and chill in fridge for 20 minutes - 2 hrs (the longer you chill, the less the cookies will spread. I chilled mine for 20 minutes).
  3. Preheat oven to 350F. Line baking sheet with parchment paper. Place dough on prepared cookie sheet leaving 2 inches in between. Bake for 8-10 minutes or until tops have just set. Even if the cookies are slightly undercooked, pale and glossy in the center - they will firm up as they cool.
  4. Allow cookies to cool on baking tray for 5-10 minutes before moving.


Yep, thats it! I love the short ingredient list for this cookie recipe! Majority of the items are pantry basics! Gotta love a recipe like that hey?!
Check out Averie's blog for many more versions of this recipe as well (note some involve nut butter, cookie butter, white chocolate etc). Be creative and mix it up! I love the coconut oil and heavy dose of vanilla in this recipe though!
Happy Baking my Friends!

21.8.13

Pantry Basics: Coconut Oil


This week's Pantry Basics post will focus on Coconut Oil. I have just started using coconut oil recently and really didn't know much about it other than that I really liked the taste of it. So, I decided to do a little research and see what I could find out about it to share with you. We'll look at general information about coconut oil such as how it is processed, types of coconut oil available, health facts about coconut oil, and recipes to put it to good use. That's a lot to cover in one post, so we better dive in!
 
How Coconut Oil Is Produced
I did a little online reading and the general consensus among a number of different websites is that there are two main methods for producing coconut oil. The first method is the wet process and the second is, you guessed it, the dry process. Here is a brief description of each method:
 
  1. The Wet Process: For the wet production process, oil is extracted from fresh coconut meat using a variety of processes including boiling, fermentation, centrifugal force and other processes. The highest quality type of coconut oil (see types of coconut oil below) is made using a wet extraction process and then cold pressed to extract the oil without the addition of heat or chemicals.
  2. The Dry Process: For the dry production process, coconut is first dried to produce a product called Copra. This copra is then pressed and solvents are added to extract the oil from it. This oil often needs to be refined further to be fit for human consumption and is often hydrogenated in order to raise the melting point further (regular coconut oil has a melting point of approximately 24 degrees C, hydrogenated coconut oil's melting point can be raised to 36-40 degrees C).
That above is the most basic method of processing coconut oil for human consumption. Lets talk about the main two types of coconut oil produced using the above methods that are available for purchase.
 
Types of Coconut Oil
There are two main types of coconut oil on the market - Extra Virgin Coconut Oil (can be cold pressed or not) and Refined, Bleached, Deodorized Coconut Oil (RBD).
 
Extra virgin coconut oil is made using the wet process of production as this typically produces the highest quality coconut oil. This oil has a fresh, mild coconut flavour. Cold pressed is the highest quality since it doesn't have any heat or chemicals applied during production which means minimal flavour change or loss of nutrients. Either way, you will notice that extra-virgin coconut oil is the most expensive because using the wet process yields far less oil than the dry process and as a result more coconut goes into the making of extra virgin coconut oil.
 
The second type of coconut oil is RBD. This oil is highly processed to the point where the coconut smell and flavour are removed from the oil. This oil is often used for cooking where the coconut flavour is not desired. This oil is also often used for cosmetic and other industrial applications.
 
Moral of the story: Based on the above information, in most cases extra virgin coconut oil is best - it has superior flavour, is processed less and if you buy cold pressed it doesn't have chemicals applied during processing. Especially from a health perspective, I would go with the extra-virgin oil.


Cooking with Coconut Oil
When you're cooking or baking with coconut oil, the substitution ratio with butter and other oils is one-to-one. That means if a recipe calls for one tablespoon of olive oil, you can use one tablespoon of coconut oil. Coconut oil can make a great substitute for olive oil, butter, shortening and canola or vegetable oil.
 
Coconut oil has a high smoke point - 350F for regular coconut oil and 320F for virgin coconut oil. This makes it great for most cooking and baking related applications! Remember that oil shouldn't be used at temperatures past its smoke point.
 
 
Health Facts about Coconut Oil
There are a lot of claims out there about the miraculous coconut oil. I don't really buy into most of them because there doesn't seem to be a lot of scientific research to support those claims, but what I do know is that there are some great things about coconut oil and some not so great things. Here's what I know:
  • Coconut oil has a significantly higher level of saturated fat compared to most other oils which can lead to increased cholesterol and other health issues if consumed in large quantities on a regular basis (saturated fat per serving of coconut oil is 91% saturated fat compared to 13% of olive oil). If you want to read more about that, you can look at this article.
  • Using coconut oil on the skin or hair can improve condition of them - providing added moisture to skin and making hair very shiny.
After doing some reading online, there has been a small amount of research done on coconut oil's health benefits, but there has not been much in the way of conclusive results. According to the Mayo Clinic website:
"Although eating coconut oil in moderation for a short-term diet probably won't harm your health, it may not help you lose weight. And keep in mind that coconut oil actually has more saturated fat than do butter and lard. For successful, long-term weight loss, stick to the basics — an overall healthy-eating plan and exercise."
That seems to be the general consensus among researchers and medical doctors that are science based. Any other benefits that may be experienced may be legitimate, but the benefits so far haven't been able to be reproduced over the general population. 
 
Recipes using Coconut Oil
Despite the inconclusive results regarding the wild health claims made about coconut oil, its no worse for you than any other type of oil when used in moderate quantities, and it has great flavour, so you may as well try it out! Here are some recipes and ideas for incorporating it into your kitchen routine:
 
Hope this gives you a good start! Do you already cook or bake with coconut oil? If so, what is your favorite thing to make with coconut oil? Please feel free to share in the comments. :)
 

Happy Cooking my Friends!

5.6.13

Coconut Chocolate Chip Cookies


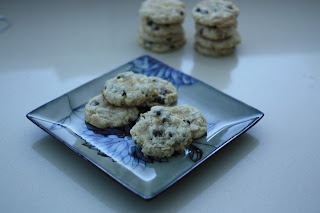
Happy Wednesday peeps! The week is more than half over - you can do it!! These cookies got me revved up about baking again - they're delicious and totally different than any chocolate chip cookie I've ever had. They have a secret ingredient - coconut oil!


 If you're worried about how expensive coconut oil is, let me tell you a little secret! You don't have to pay loads of money for good quality cold pressed coconut oil!! Go down to your local Costco and load up- they had huge jars of really good quality stuff on for around $20! Stop paying the ridiculous prices at grocery stores and health food stores! You absolutely don't need to.


 I found this recipe on the Well Traveled Wife. Head on over there and check out her site - it seems like a good one with lots of yummy recipes. And if this recipe is any testament to the quality of her recipes, her blog is fantastic!


Coconut Chocolate Chip Cookies
Recipe adapted from The Well Traveled Wife

Ingredients:
  • 1/2 cup coconut oil
  • 1 cup white sugar
  • 2 eggs
  • 1 tbsp. vanilla
  • 1 3/4 cup all purpose flour
  • 1/2 tsp kosher salt
  • 1 tsp baking powder
  • 1/4 tsp baking soda
  • 3/4 cup white chocolate chips
  • 3/4 cup semi-sweet chocolate chips
  • 1/2 - 1 cup shredded coconut
Method:
  1. Preheat oven to 375F. Line two baking sheets with parchment paper and set aside.
  2. In the bowl of your mixer, cream the coconut oil and sugar together. Add eggs one at a time beating until incorporated after each addition. Add vanilla and beat til fluffy.
  3. In another bowl, mix the flour, salt, powder and soda. Gradually add to the coconut mixture until just about incorporated (mixing on a very low speed). Add in chocolate chips and coconut and mix til just combined.
  4. Drop by spoonful's onto prepared baking sheets. Bake in pre-heated oven for 8-10 minutes until just lightly browned around the edges and still soft in the middle. Let set on tray for 2-4 minutes after removing from oven, then remove to wire rack to cool completely.

The coconut oil adds such an amazing flavour to these cookies! You really need to try them. The beauty of these cookies is how quick and easy they come together - none of this finicky cookie stuff! Simple and delicious is all you'll find here!


Happy Baking my Friends!
 

29.5.13

Coconut Almond Bars


Howdy friends! How are you this fine, rainy Wednesday evening? I figured you might need a sweet chocolaty pick-me-up! I know I could. I made these quite a while ago and to be honest just never got around to blogging them. But I was flipping through pictures and noticed I had these lovely little shots my hubby took and I just had to share them with you!

This recipe is from one of my favorite baking books - Back to Baking by Anna Olson! I hope you enjoy as much as we did!


Coconut Almond Bars
Minimally adapted from Back to Baking by Anna Olson

Ingredients:

Base:
  • 1/4 cup butter
  • 1 oz unsweetened chocolate, chopped
  • 1/2 cup sugar
  • 1 egg
  • 1 tsp vanilla extract
  • 1/3 cup all purpose flour
Filling:
  • 1 1/3 cup sweetened coconut flakes
  • 1 cup sliced almonds
  • 1 300 ml tin sweetened condensed milk
  • 2 tsp vanilla extract
  • 1/4 tsp salt
Topping:
  • 5 oz semisweet chocolate chips
  • 2 tbsp. butter
Method:
  1. Preheat oven to 350F. Grease and line an 8-inch square pan with parchment paper so paper comes up the sides.
  2. Melt butter and chocolate in a small pan over low heat, stirring until smooth. Remove from heat and stir in sugar. Then add egg and vanilla and stir til blended. Add flour and stir. Spread this mixture into the bottom of prepared an and bake for 10 minutes until it loses its shine. Cool while preparing the filling.
  3. For the filling, stir the coconut, almonds, condensed milk, vanilla and salt to combine. Spread over cooled base. Bake 25 minutes until light golden brown. Cool to room temperature before adding the topping.
  4. For the topping, melt the chocolate and butter in the microwave on low heat, stirring often.  Pour mixture over cooled filling and spread evenly.
  5. Chill the pan for about 2 hours to set the chocolate. Cut the squares while chilled, but then store and enjoy at room temp. I used a small round biscuit cutter to cut mine into cute little round shapes for a fun way to present them!


These bars have amazing chocolaty flavour, but they are a little on the sweet side! If you don't like super sweet treats, then these probably aren't the bars for you! If however you love a little sugar hit - get on making these right away to cure your mid-week blues!

Happy Baking Friends!

22.10.12

No Bake White Chocolate Peanut Butter Cookies for SRC


Time for Secret Recipe Club again! This month seems to have been another busy month, even though I have been expecting life to just slow down a bit. No such luck though!! This is one of those months I wish I would have had more spare time because the blog I was assigned, Veronica's Cornucopia is such a great blog! There were so many great recipes and so many creative ideas. I will definitely be visiting again in a month I have more time to experiment, because there were a lot of great looking recipes to try. Go have a look around for yourself - I'll still be here when you come back. :)


I didn't really go too crazy due to my lack of time, but I was super impressed with how quick, easy and delicious the recipe I selected was! I made Veronica's Cow Pie Cookies - but changed them up to be made with white chocolate and peanut butter because that's what I had on hand!

White Chocolate Peanut Butter Cookies
Recipe adapted from Veronica's Cornucopia

Ingredients:
  • 12 oz white chocolate
  • 4 tbsp peanut butter
  • 2/3 cup rolled oats
  • 1/2 cup shredded coconut
  • chopped marshmallows (I used about 1/2 - 1 cup)
Method:
  1. Melt the white chocolate and peanut butter on low heat in the microwave. Stir until smooth. Stir in the oats, coconut and marshmallows. Drop by spoonfuls onto parchment paper. Let set at room temperature until firm - approximately 1 hour. Enjoy!
Yep! Thats it - easy, and delicious. Veronica says you can mix in whatever you want! I think next time I make these I'll mix in pretzels for that sweet and salty combo that I can't get enough of.


Thanks for stopping by - Happy Baking my Friends!

13.10.12

Coconut Crusted Salted Caramel Cookies


I follow a great blog called Taking on Magazines written by "the Mom Chef" who is actually Christiane. Its a great blog with loads of delicious recipe ideas. Please check it out right now - I'll be here when you get back. :)

Any way, a while back she posted the recipe for these amazing cookies and I pinned it to try later. Later finally came when I made them a couple weeks ago. They were such a hit!!! Devoured eagerly and quickly that I barely had time to snap a couple of pictures. You've gotta try making them they are absolutely delicious and easy to make. In fact they might be fun to make with your kids if you have them - the kids could help with rolling them into balls and rolling them in the coconut (or nuts if you choose). It would be a fun kitchen project to take on.


Coconut Crusted Salted Caramel Cookies
Recipe adapted from Taking on Magazines

Ingredients:

  • 3 sticks unsalted butter, softened
  • 1 cup sugar
  • 1 tbsp vanilla
  • 3 1/2 cups flour
  • 1/2 tsp kosher salt
  • 2 large eggs, lightly beaten
  • coconut for rolling
  • 1 2/3 cups sugar
  • 1/2 c water
  • a few drops lemon juice
  • 1c whipping cream
Method:
  1. First make the caramel sauce. Put the 1 2/3 cups of sugar into a very clean saucepan. Gently pour the water oer the sugar and add the lemon juice. Place pan over medium high heat with the lid on. Bring to a boil and let boil with lid on, removing and replacing the cover every so often. When all the water is boiled off, the sugar will be boiling with big bubbles breaking on the surface. The bubbles will gradually get smaller as the temperature rises. Remove the lid and pay attention now. The sugar will change colour - when it reaches a nice gold/ amber colour, remove it from the heat - don't let it get too dark or it will taste burnt. Add the cream carefully (it will bubble and steam like crazy). Have a wooden spoon ready and stir until well blended. Set aside to cool and thicken up a bit.
  2. Preheat oven to 350F. Line two baking sheets with parchment paper. Set aside.
  3. Beat together butter with 1 cup sugar until smooth and fluffy. Beat in vanilla.
  4. Add the flour a little at a time, then add the salt. Beat to combine.
  5. Roll dough into 1 1/4 inch balls. Dip each ball in the egg, then roll in coconut to coat. Place on prepared cookie sheet. Press to flatten a bit, then use your thumb to make an indentation in the center of the cookie. Repeat with remaining dough.
  6. Bake in preheated oven for 10 minutes. Repress indent with your thumb and then bake for another 9-10 minutes or until golden. Let cool on wire racks.
  7. When completely cooled fill indentation with a little of the caramel sauce, then sprinkle with sea salt.
 Yep, so that is all!! I am writing this to share with you while enjoying bacon rolls - like cinnamon buns, but savory!! Recipe to follow on world bread day - 3 days left! Can you wait that long?!

Happy Baking my Friends!


9.4.12

Coconut Topped Buttermilk Brownies with Chocolate Buttermilk Frosting


Stop right there!! Don't scroll down to the recipe yet... pause and have a look and these beautifully lit photos my darling hubby captured for me. He got up early to get great lighting for me while I was heading off to work. What a sweetie?! He totally deserves mad props in my opinion!!

These little beauties are coconut topped buttermilk brownies finished with a chocolate buttermilk frosting. Yah, I may have had some buttermilk leftover from another recipe I was trying to use up, but it turned out to be a great success. These were eagerly devoured by my co-workers and my hubby's co-workers (did I mention the recipe made wayyyy more than I thought?!). These even started a little rivalry between husbands at my hubby's workplace.. turns out another wife had sent in baking that day too... cookies. It ended with one of his co-workers (who shall remain nameless), telling my hubby that my cupcakes were way better than so-and-so's wife's cookies... whoops!! Maybe we should plan which days we are allowed to send in baking so we don't step on any toes?!


Don't even think about how much work these may be... just go out, get the ingredients and get to it!! They are soooo worth the effort. :)

Coconut Topped Buttermilk Brownies with Chocolate Buttermilk Frosting
Brownie recipe adapted from Bake Space
Coconut topping from In Katrina's Kitchen
Frosting Recipe by me

Ingredients:
Brownies:
  • 2 cups all purpose flour
  • 1 cup granulated sugar
  • 1 cup packed brown sugar
  • 1 tsp baking soda
  • 1 cup butter
  • 1/3 cup unsweetened cocoa powder
  • 1 cup water
  • 2 eggs
  • 1/2 cup buttermilk
  • 1 tbsp vanilla
Coconut Topping:
  • 4 1/2 cups shredded coconut
  • 1 small can sweetened condensed milk
  • 1 1/4 cups icing sugar
Frosting:
  • Find the frosting recipe here. Substitute 1/3 cup of the icing sugar for 1/3 cup of cocoa powder for a chocolate version of the same frosting.


Method:
  1. To make the brownies: Preheat the oven to 350F. Line 3 - 12 cup muffin tins with paper liners. Set aside. In a large bowl, combine the flour, granulated sugar and baking soda.
  2. In a medium saucepan, combine brown sugar, butter, cocoa powder and water. Bring mixture just to boiling, stirring constantly. Remove from heat. Add the chocolate mixture to the flour mixture and mix until all of the flour is incorporated. Add the eggs, buttermilk and vanilla. Whisk until mixture is smooth and silky (it will be quite thin). Fill prepared muffin tins 1/3 - 1/2 way full. Bake in preheated oven for 10-14 minutes (or until tops spring back lightly when touched). Do not overbake or they will be dry. Err on the side of slightly underbaked as they will continue to cook after they are removed from the oven.
  3. Cool on a wire rack.
  4. While brownies are cooling, prepare coconut topping by combining all three ingredients and stirring until evenly distributed. Mixture should be quite stiff. Once cupcakes are cooled, form 1-2 tbsp portions of the coconut mixture into disks and fit them on top of the cupcakes, pressing down gently to adhere them to the cakes. Repeat until all cupcakes have been fitted with a coconut disk.
  5. Prepare the frosting and frost cupcakes however you like. 


This post has been linked up with the Recipe Party over at the Sweet Spot. Head on over to check out what other goodies fellow bloggers have whipped up this week.

Yep, these are pretty incredible!! :) :) Hope you'll take the time to try them out. Happy Baking my Friends!

27.2.12

February 2012 Daring Bakers' Challenge: Quick Breads


Seems like this month has just flown by... I know, I say that every single time I post a challenge, but its true. It is amazing how quickly so much time can pass while it feels as though I haven't had a chance to blink! This month's challenge was really easy and something I've made a lot of. So I decided to try out some flavours and recipes I haven't experimented with much - first - Whole Wheat Soda bread with Oats & Rosemary and second - Coconut Banana Muffins. They both turned out deliciously.


The Daring Bakers’ February 2012 host was – Lis! Lisa stepped in last minute and challenged us to create a quick bread we could call our own. She supplied us with a base recipe and shared some recipes she loves from various websites and encouraged us to build upon them and create new flavor profiles.


First, I'll share the savory recipe with you -  its delicious. Prepare yourself so you don't end up eating two loaves of this stuff all by yourself. Find someone to give it away to, or put it in the freezer, whatever you have to do! Because if you leave it on the counter, you will eat it!!

Whole Wheat Soda Bread with Rosemary &Oats
Recipe minimally adapted from No More Secrets by Adrienne Johnston

Ingredients:
  • 2 1/4 cups all purpose flour, plus extra for dusting
  • 2 tsp baking soda
  • 1 tsp baking powder
  • 2 tsp kosher salt, plus extra for sprinkling
  • 2 cups whole wheat flour
  • 1 cup rolled oats, plus extra for sprinkling
  • 2 cups buttermilk
  • 1 large egg, lightly beaten
  • 2 tbsp + 1 tsp finely chopped fresh rosemary 
Method:
  1. Preheat oven to 350F.
  2. Stir together the flours, salt, baking soda, baking powder and 2 tbsp of the rosemary. Add the oats and stir well. Mix together the buttermilk and the egg. Add wet ingredients to dry ingredients and stir until it forms a dough.
  3. Turn dough out onto lightly floured surface and knead briefly until a sticky, but manageable dough is formed. Divide into two and form into flattish rounds about six inches in diameter. Place the loaves on parchment lined baking sheet, sprinkle with oats, remaining tsp fresh rosemary, kosher salt, and a bit of flour. Bake in the middle of the preheated oven for about 30 minutes, until lightly browned. They should sound hollow when tapped on the bottom.

See what I have to resort to in order to get photos? Leaving threatening letters to my family: "Eat & Die!! No Touch!! Needs to be Photographed" LOL!! A girl's gotta do what a girl's gotta do right?!


Next up, these delectable muffins... coconut, banana and lime! It doesn't get any better than that for breakfast. Get ready to feel like you're somewhere tropical, because these babies will make you feel like you're on the beach!


Coconut Banana Muffins
Recipe adapted from Anna Olson's Back to Baking

Ingredients:
  • 2 large, ripe bananas, mashed
  • 1/2 cuppacked dark brown sugar
  • 1 egg
  • finely grated zest of one lime
  • 2 tsp vanilla extract
  • 1/2 cup coconut milk - refrigerate the can, scrape off the thick white portion and use the clear liquid from the bottom of the can for this recipe.
  • 1 1/4 cups flour
  • 1 tsp baking powder
  • 1/4 tsp salt
  • 1/2 cup sweetened, flaked coconut
Method:
  1. Preheat oven to 375F and line a muffin tin with paper liners.
  2. Stir the bananas and sugar together, then stir in the egg, lime zest, and vanilla. Stir in the coconut milk.
  3. In a separate bowl, mix the flour, baking powder, and salt, then add the flour mixture to the banana mixture and stir until combined. Mix in the coconut and spoon the batter into the prepared muffin tin.
  4. Bake for 20 - 25 minutes, until the muffins spring back when gently pressed. Let muffins cool for 10 minutes before removing from the tin to cool completely. The muffins will keep in an airtight container for up to three days.

Yep, these recipes are pretty delicious. You should try them out when you get a chance!

Thanks Lis for hosting a back to the basics challenge. Sometimes simple is a refreshing change from complex and time consuming. I really enjoyed the break this month, but hopefully back with a more "daring" challenge for March!! :)

This blog has been linked up with Mouthwatering Mondays over at the Sweet Spot. Head on over there to check out what other delicious treats bloggers have baked up this week.
Happy Baking my Friends!

25.2.12

Coconut & Blueberry Mini Tarts {Dairy & Egg Free}


Lately a lot of my lovely readers (thats you!!) have been asking me if I'll share some healthier recipes with you - some have asked for gluten free, some asked for dairy free, and some asked for low fat. Well, I've been trying to find some recipes that incorporate those diet restrictions but still taste good. I have tried a few recipes that haven't made the cut to be shared here, but this one definitely made the cut - Coconut & Blueberry Mini Tarts! I found the recipe in Anna Olson's new cookbook - Back to Baking. I made one or two very slight changes and arrived at these little beauties. They are delish with or without the blueberries and you could substitute other berries if you wanted to (raspberries would be amazing!!).


And while my tarts don't look perfect, they were a breeze to throw together and tasted quite delicious too. I didn't particularly care for the texture of the custard  - so I've changed the recipe to use about half the original amount of cornstarch to thicken. So if you find your custard isn't thick enough for your liking, just double the amount of cornstarch. :)


Coconut & Blueberry Mini Tarts
Minimally adapted from Anna Olson's Back to Baking

Ingredients:
  • 1 1/2 cups whole wheat flour
  • 1/4 cup vegetable oil
  • 3 tbsp dark brown sugar
  • 3 tbsp honey (or agave would work well too)
  • pinch ground cinnamon
  • pinch salt
  • 1 tin coconut milk
  • 1 vanilla bean and 2 tsp vanilla extract
  • 1/2 cup sugar
  • 1/8 cup cornstarch
  • 1 cup fresh blueberries
Method:
  1. Preheat the oven to 350F and spray a 24 cup mini muffin with non-stick cooking spray.
  2. For the crust, stir together the whole wheat flour, vegetable oil, brown sugar, honey, cinnamon and salt until mixture has a wet and crumbly texture (like wet sand). Press crust mixture into bottom and sides of muffin cups. Bake in preheated oven for 10 minutes, then cool to room temperature.
  3. To make the custard, pour the coconut milk into a saucepan. Scrape in the seeds of the vanilla bean and stir in the vanilla extract. In a bowl, stir together the sugar and the cornstarch. Whisk into the coconut milk, then turn the heat to medium and whisk until the mixture comes to a simmer and thickens, about 6 minutes. Scrape the custard into a bowl, cover the surface of custard with plastic wrap and allow to cool to room temperature.
  4. Once cooled, pipe the coconut filling into the mini tart shells and top each with 3 blueberries. Chill at least two hours in the tin before popping them out to serve.
  5. Tarts will keep in the fridge for up to 3 days. Note: You could also make the filling up to a day ahead of time and chill until you fill your tarts. If you use this make ahead option, be sure to puree the custard in a food processor or with an immersion blender prior to piping into the tarts to ensure it has that perfect, silky smooth texture it had prior to chilling.

Pretty easy right? With minimal ingredients that you probably already have in your pantry! Isn't that the best kind of dessert? Hope you enjoy!


This post has been linked up with Mouthwatering Mondays over at the Sweet Spot. Head on over to check out what kind of deliciousness is going on in the blogosphere this week.
Happy Baking my Friends!

18.1.12

Macaroon Madness Bars


After yesterday's "healthy" post, I have to catch up by posting something extra un-healthy today! Just kidding! I'm trying to post one healthy recipe per week going forward as I've had a number of requests from my readers for healthy recipes including - low fat, low sugar, diabetic friendly, gluten free and dairy free! I'm going to do my best to try to post a variety of these recipes over the next year. If there is anything you'd like to see me make, or you have a healthy recipe you'd like me to feature, by all means, please leave me a comment or send me an email.  I would love to hear from you!


I found this recipe on Jen's blog Food & Whine. She has a great online recipe box full of amazing recipes - so if you haven't already, do check her out. She doesn't post every day but whenever she does post I'm always excited to see what new recipe she is sharing because they're always good!! I made these macaroon madness bars and they're so delicious I just have to share them with you. If you love coconut, you'll fall hard for these little beauties. Jen notes that you should leave them overnight in the fridge before slicing them and she's right. I let them soften a bit to room temperature prior to slicing and they were a little messy to slice.

Macaroon Madness Bars
Recipe minimally adapted from Food & Whine

Ingredients:
  • 1/2 cup butter, at room temperature
  • 2 cups flour
  • 2 tbsp cornstarch
  • 1 tsp baking powder
  • 1 cup salted butter, melted
  • 1 1/2 cups brown sugar, packed
  • 2 tsp vanilla
  • 3 eggs, lightly beaten
  • 1 can sweetened, condensed milk (14 oz)
  • 2 cups sweetened coconut flakes
  • 2 cups quick cooking oatmeal
  • caramel syrup (I used store bought, but you can find a good recipe on Jen's post)
  • 1/2 cup white chocolate chips
  • 1/2 cup semi-sweet chocolate chips
Method:
  1. For the base, line a 9x13 inch pan with parchment paper and spray lightly with cooking spray. Leave an overhang of parchment on each end to lift out of the pan easily after baking. Combine butter, flour, cornstarch, and baking powder in a medium bowl. Mix until mixture is well combined and crumbly. Press into bottom of prepared pan (use the bottom of a glass to really pack in the crust). Set aside.
  2. Preheat oven to 350F. For the filling, over low heat, combine the butter, brown sugar, vanilla and sweetened condensed milk. Stir until sugar is dissolved. Remove from heat and stir in eggs. Fold in coconut and oatmeal until well combined. Pour over crust in prepared pan. Bake in preheated oven for 25-30 minutes until golden brown (center will still be a bit jiggly). If the center is too wobbly, cook for another 5 minutes.
  3. Cool completely. Cover, refrigerate overnight.
  4. Drizzle bars with caramel syrup. Place back in the refrigerator for 10-15 minutes. Then melt the white chocolate and drizzle over the bars. Refrigerate another 10-15 minutes. Finally, melt the chocolate and drizzle over the bars. Refrigerate another 10-15 minutes or until chocolate is firm. Remove from pan and slice into squares or triangles. Keep left over bars in the fridge, or freeze for later use.


Hope you enjoy these bars! I know we sure did. I've actually saved some of the leftovers in the freezer (and by freezer, I mean my patio - its -8 again today, so no need to take up valuable freezer space when I have a big one outdoors!!) for a girls get together I'm having at my place on Sunday. Oh its going to be a good time - we're going to get a valentines card making tutorial from one of the ladies and what kind of girls get together would be complete without a friendly chocolate tasting competition?! I'll let you know how it goes and obviously give you the DL on what kind of food I make next week.

This post has been linked up with Whatcha Baking Wednesdays over at Cajun Sugar Pie. Head on over to check out what other delicious desserts have been whipped up this week by fellow food bloggers.

This post has been linked up with Jane Deere's Fusion Fridays! Please stop by the Fusion Friday's link party to check out what everyone else was cooking up this week.

Happy baking my friends!

1.10.11

German Chocolate Layer Cake

 Wow!! You can't imagine how happy I am to be back in my kitchen, cooking and baking now that this exam is over. :) I have been meaning to share this cake with you for a while... I made it and brought it in to work for my co-workers. They LOVED it!! Despite having German grandparents, I never ever ate German Chocolate Cake growing up. Once I saw that this recipe was full of coconut and chocolate, I couldn't resist - I had to make it. One note that I have about this recipe - if I made it again, I would add far less liquid to the chocolate ganache - with the amount of liquid called for in the recipe, the ganache was more pourable than spreadable. Start with about 1/2 of the amount of liquid called for below. Other than that, recipe is delicious as is!!

 German Chocolate Layer Cake
Recipe adapted from Meals in Heels by Jennifer Joyce

Ingredients:
  • 350g unsalted butter, chopped and softened, plus more for greasing the pans
  • 350g cake flour, sifted
  • 80g unsweetened cocoa powder
  • 4 large eggs
  • 1 tbsp vanilla extract
  • 1 tsp baking soda
  • 450g granulated sugar
Coconut Filling Ingredients:
  • 2 large egg yolks
  • 175g granulated sugar
  • 170ml evaporated milk
  • 60g unsalted butter, chopped
  • 90g unsweetened coconut
  • 120g chopped pecans, toasted
  • 1 tsp vanilla extract
Chocolate Ganache Ingredients:
  • 200ml double cream
  • 200g milk chocolate, chopped
 Method:
  1. Preheat oven to 350F. Line 3 8 inch cake tins with parchment paper and grease the paper with butter.
  2. Whisk the cocoa with 350ml boiling water in a bowl until smooth. Allow to cool to room temperature. When cool, transfer 75ml into a large bowl and whisk together with the eggs and vanilla extract until well combined.
  3. Please flour, 1 tsp salt, baking oda and sugar in the bowl of an electric mixer and beat on low speed for 30 seconds. Add the butter and remaining dissolved cocoa mixture and beat on low speed for 7-8 minutes or until well comined, then increase to medium and beat for 1 1/2 minutes. Add the egg mixture, in three batches, beating for 30 seconds after each addition. Don't over-beat the mixture or the cake will be heavy. Divide amond cake tins and smooth the tops.
  4. Position the oven racks so you can fit 2 cakes in the middle and one in the lower third of the oven. Rotate the cakes halfway through the baking time. Bake for 25-30 minutes or until a skewer comes out clean. Cool in the tins for 10 minutes, then remove from tins, peel off the baking paper and cool completely on wire racks. At this stage, you can wrap the cakes in plastic wrap and refrigerate for up to 2 days before frosting.
  5. For the coconut filling: Whisk together the egg yolks and sugar in a saucepan. Add the milk and butter and whisk continuously over medium heat for 10 minutes until the mixture thickens enough to coat the back of the wooden spoon. Do not allow to boil. Remove from the heat and stir in the coconut, pecans and vanilla extract. Allow to cool completely.
  6. For the chocolate ganache: Place cream in a heatproof bowl set over a saucepan of boiling water and heat the cream until just below boiling point. Remove from heat and stir in the chocolate. Whisk until smooth and allow to cool for five minutes, then refrigerate, stirring occasionally, for one hour or until thickened.
  7. Line a cake stand or serving platter with baking paper and place cake on top. Spread with half the coconut filling, top with another cake, spread with the remaining filling and top with the third cake. Using a large palette knife, spread the top and sides with the chocolate frosting in a swirling pattern. Carefully pull out the baking paper to serve.

Alright, so definitely not an easy or quick recipe, but sure was delicious. Soooo welcome back to me and happy baking my friends! Hopefully you'll be hearing from me a little more frequently over the next little while. Thanks for sticking around. :)