Showing posts with label summer. Show all posts

23.8.13

BBQ Madness with Elite Kitchens and Baths!


Happy Friday friends! I hope you have some sweet plans this weekend. I am hanging out with my Mom and my Sister who I haven't seen for a few weeks. We'll do some cooking, maybe take some walks and of course share a bottle of wine.

A couple of weeks ago, Elite Kitchens and Bathrooms in Langley BC hosted a contest for an amazing gift basket prepared by Well Seasoned. I entered the draw and was the lucky winner! I was a little shocked since I never, ever win anything. But none-the-less an amazing surprise! When I went to pick up my gift basket I had the pleasure of meeting Ken who is the owner of Elite (pictured above). He was kind enough to tour me through their facilities and their show room! What a cool operation - they make all the cabinets in-house and work with their clients to design the kitchens and bathrooms of their dreams. The show room was beautiful and had so much inspiration; especially for a foodie like me! Thanks so much Ken for the lovely gift basket and for sharing a bit about your business with me.
Hubby took some pics of all the amazing goodies in this gift basket... wow, I hit the motherload. So many different sauces, marinades and spice rubs. But I think the best part about the basket was the cooking classes I won at Well Seasoned. :) I can't wait to take those in!


I decided I should start using up some of the yummy stuff I received in that gift basket, so I thought what better opportunity to try out the rotisserie attachment on our BBQ. I used some Smoke on Wheels marinade and marinated a beautiful pork tenderloin roast in it for about 3-4 hours. Then I removed it from the marinade and rubbed it all over with some House of Q seasoning.
Next up, I threaded the roast onto the rotisserie and heated the BBQ. If you have a temperature gauge, try to aim to keep it between 350-400F. You'll need to cook the pork for about 20 minutes per lb. So for this small roast, it was less than an hour til it was done. Try not to overcook it - use a meat thermometer if in doubt.

Serve with some roasted garlic mashed potatoes and some maple roasted veggies and you've got a delish summer meal. To make the maple roasted veg, just chop your favorite veggies, toss with some olive oil, maple syrup, salt, pepper and garlic powder and roast in an oven preheated to 450F for 20-30 minutes or until tender. I used zucchini, carrots, mushrooms and cauliflower this time.
So thats what I've got for you today! Nothing too formal, just thought I would share my awesome basket with you and some of the things I've created with it so far. Happy Friday! Hope you all have a great weekend.

Happy Cooking!

12.8.13

Crazy Gourmet Hot Dogs!


Oh Monday... why do Monday's have to be so hard? Do you feel like you're seriously dragging your behind on Mondays? Because I sure do!!! So, to make myself feel better, I checked out some of my recent food photos and came across these babies! If these don't cheer you up on a blah Monday, I'm afraid nothing will!
 
I came across the idea for these in the magazine Everyday with Rachael Ray (July/August 2013 issue). Normally I'm not a fan of Rachael Ray or her recipes, but I'm glad I gave her another chance - this magazine was jam packed with great ideas and recipes. I will definitely be buying this magazine again. You should check it out!


 Be sure to start with some amazing, all natural hot dogs and some oversized, extra-fresh buns. Then you can go hog-wild with the toppings! Seriously! Go crazy! Some of the craziest sounding flavour combos are often the most delicious.

For our gourmet dog night, we picked two flavour combos to try out.

The Natcho Dog: Sprinkle with shredded cheddar cheese, top with guacamole, pickled jalepenos and crunched up tortilla chips.

Pimento Cheese Dog: Spread with store bought pimento cheese, then sprinkle with crushed ritz crackers, drizzle with some franks red hot. (Note-Pimento cheese wasn't available where I live, so I took a package of imperial cheddar and blended it with some cream cheese and some red jalepeno pepper - it did the trick!)

They were delish, but I think the Natcho dog was my favorite!


Some other flavour combos listed in the magazine that sounded soooo good to me were:
 
Deli Dog: Top with egg salad, fresh diced pickles and freshly cracked black pepper.
 
Hummus Deluxe Dog: Spread with hummus then top with sliced roasted red peppers, sprinkle with smoked paprika.
 

Yep, we'll probably be making these again soon - just an excuse to try out some more flavours. :) Hope this brightened your Monday night! You can do it!!!

Happy Cooking my Friends!

15.6.13

Easy & Healthy Iced Tea


The weather is really starting to heat up around here - a sure sign summer is finally here! With the increase in the temperature, I've been on the lookout for some refreshing summer drinks that aren't full of calories. I noticed they're hard to find! So I decided to make my own iced tea!


I headed down to my local farmers market and found a booth selling some delicious tea and picked out cream of earl grey and cream of blueberry. Both sounded lovely to me, but you can really use any tea you want! Try to use high quality tea to avoid bitterness in your tea.


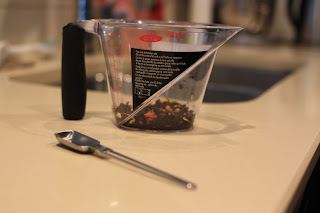
To make your iced tea - place 6 tsp of loose tea in a liquid measuring cup. Pour 1 1/2 cups boiling water over top and steep for five minutes. Don't steep for any longer or your tea will get bitter. Meanwhile, fill a pitcher 1/4 full with ice cold water.


 Once your tea is finished steeping, strain the mixture - putting the tea liquid into your prepared pitcher and discarding the tea. Fill the pitcher to the top with cold water. Serve tea over ice and garnish with slices of citrus fruits - I used lemons and oranges, but lime or grapefruit would be good too depending on the type of tea you're serving. I didn't need to sweeten mine, but if you must - sweeten it with honey!

This is such a simple, delicious and healthy alternative to other sugar-laden beverages we associate with summer. Give it a try - you might be surprised how delicious and refreshing it tastes!


 What's your favorite summer beverage that is easy on your waistline while still being refreshing?

Cheers!

26.8.12

Summer Berry Flan


I'm not normally one to be too into making desserts with fruit. I like chocolate, cream, cake and other desserts, but normally I don't like to "pollute" them with fruit! However, this dessert is the exception - not only does it look beautiful and impressive to your guests, it tastes fantastic with the perfect balance of flavours and the berries don't "pollute" the dessert at all. They complement the rest of the dessert so perfectly. It was the aha moment where I determined that fruit has its place in dessert and that dessert can be just as decadent and delicious as non-fruit desserts. I'm hooked on this one! You should give it a try too. Its a bit involved, but the sense of satisfaction you get from making all components from scratch and the oooo's and ahhhh's you'll get from your friends and family will be well worth the effort. :)


 The beautiful thing about this dessert is that you can do so many variations to change it up - you could make a chocolate pastry cream and serve it with strawberries or cherries on top. Or you could do a tropical fruit tart with pineapple, papaya and toasted coconut... the options are endless!! What would be your go to flavour combination for this one?


Classic Fruit Flan
Minimally Adapted from Back to Baking by Anna Olson

Ingredients:

Tart Shell:
  • 1/2 cup unsalted butter, room temperature
  • 1/4 cup sugar
  • 2 egg yolks
  • 1/2 tsp vanilla
  • 1 cup flour
  • 1/4 tsp salt
  • 3 oz white chocolate
Pastry Cream:
  • 1 cup whole milk
  • 2 eggs
  • 1/4 cup sugar
  • 2 1/2 tbsp cornstarch
  • 2 tsp vanilla extract
  • 2 tbsp unsalted butter
Fruits:
  • 4 cups assorted fresh, tender fruits - I used raspberries, blueberries and strawberries
  • 1/4 cup apple jelly
Method:

Tart:
  1. Beat butter and sugar together until fluffy. Stir in egg yolks and vanilla. Stir in flour and salt until dough comes together. Shape dough into a disc, wrap in plastic and chill for at least 2 hours until firm.
  2. Preheat oven to 350F. Knead pastry dough on lightly floured surface to soften it a little bit. Dust the pastry with a little flour, and roll out just larger than your tart pan (make sure it has a removable bottom). Line pan with dough, trim edges. Chill pastry for 10 minutes in the freezer.
  3. Place the chilled tart pan on baking tray. Dock the bottom of the pastry shell with a fork, then bake in preheated oven for 16-20 minutes, until just the edges are golden brown and center of shell looks dry. Cool completely.
  4. Melt 3 oz white chocolate. Brush to coat bottom and sides of cooled tart shell. Chill the shell while preparing pastry cream.
Pastry Cream:
  1. Heat the milk in a heavy-bottomed saucepan until just below a simmer. In a small bowl, whisk the eggs, sugar and cornstarch. Whisk half of the hot milk into the egg mixture, then pour entire mixture back into the pot with the remaining milk. Whisk the custard constantly over medium heat until it thickens and just begins to bubble, about 3-4 minutes.
  2. Strain custard into a bowl, stir in vanilla and butter until melted, then cover bowl with plastic wrap so the plastic directly covers the surface of the custard. Cool custard to room temperature, then chil1 in the pan for at least 2 hours.
Assemble the Tart:
  1. Spoon the custard into the tart shell and spread it evenly. Top the custard with the fresh fruit, creaming an appealing design. Melt apple jelly in the microwave, then brush it over the fruit. Chill the tart in the pan until you are ready to serve. The tart can be stored in the fridge for up to one day.

So I told you it was a bit of work and I wasn't kidding, but its well worth the time and effort. Remember when selecing your fruits that some fruits turn brown (oxidize) upon contact with air. Those may not be best suited to this type of tart. Some examples of fruits that oxidize are - apples, bananas, peaches, and pears.

I hope you enjoy this one! Happy Baking my Friends!

2.6.12

Summer Recipe Roundup!

Happy Saturday peeps! Hope you've had a chance to pour your first cup of coffee before sitting down to check out whats going on in the blogosphere. :) I'm just about to pour my second cup! For today's post I feel like celebrating summer, so even though by looking outside you'd never know it is June, I am feeling summery! In light of that summery feeling, I'm going to share some of my favorite past recipe posts that have a summery feel. Hope you enjoy!

Sips

The best iced coffee


Appetizers

Kale Chips


Gourmet Guacamole

Salads & Sides

Skinny Caesar Salad

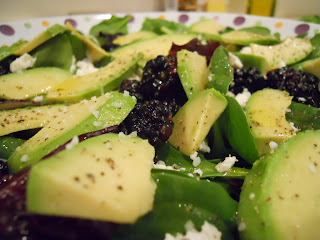
Blackberry Avocado Salad

Mains

Meatball Souvlaki

Monster Burger

Desserts

Coconut Blueberry Mini Tarts

Lime & Blackberry Italian Meringue Pie
I hope this post gives you some new recipes to try out this summer! Most of them use really fresh, summery ingredients and they're all super delish. Let me know which ones you try!

Happy Baking my Friends! Enjoy your weekend. :)

12.8.11

Cherry Pie!

Whew! What an insane week. I don't know where the time went, but it sure flew by fast. My hubby is out of town and I've been studying and working like crazy, oh and trying to fit in a few 6am spin classes to squeeze in some much needed exercise too! Any way, last weekend during some of my *ahem* spare time, I decided to use up my 10lbs of cherries I purchased in the Okanagan while we were there. So I made cherry pie! YUM!! I think this was my best cherry pie yet - this claim can be backed by various co-workers' rave reviews, including one cherry pie afficianado who claims it is the best cherry pie he has ever tasted. Hows that for an ego boost?

You're probably thinking this is a lot of work, or some outrageous recipe. Nope! Sure isn't. Its just Anna Olson's basic cherry pie recipe from her cookbook Fresh. I tweaked the recipe a little. Here is where you can find the original recipe.


Now, I made a few changes! First off - for the pastry - I used all butter (one whopping cup of buttery goodness) instead of half butter and half shortening. I think it lead to a flakier and richer tasting crust. You could definitely taste the butter. Be warned, this does make the pastry a tad more difficult to work with because it heats up and the butter melts a lot faster, so keep handling to a minimum and be sure to chill thoroughly prior to working with the pastry.

Next, I used sweet cherries because thats what was for sale in the Okanagan while I was there. To thicken the pie filling, I used a mix of half cornstarch and half flour, I also used a heaping quarter cup (total) of the cornstarch/flour mixture as I found that in the past the filling was a tad runny. This slight adjustment lead to the perfect consistency of pie filling!

An thats it! Easy, peasy!


Happy Baking my Friends! I promise to try to catch my neglected blog up to speed with some interesting posts this weekend. :)