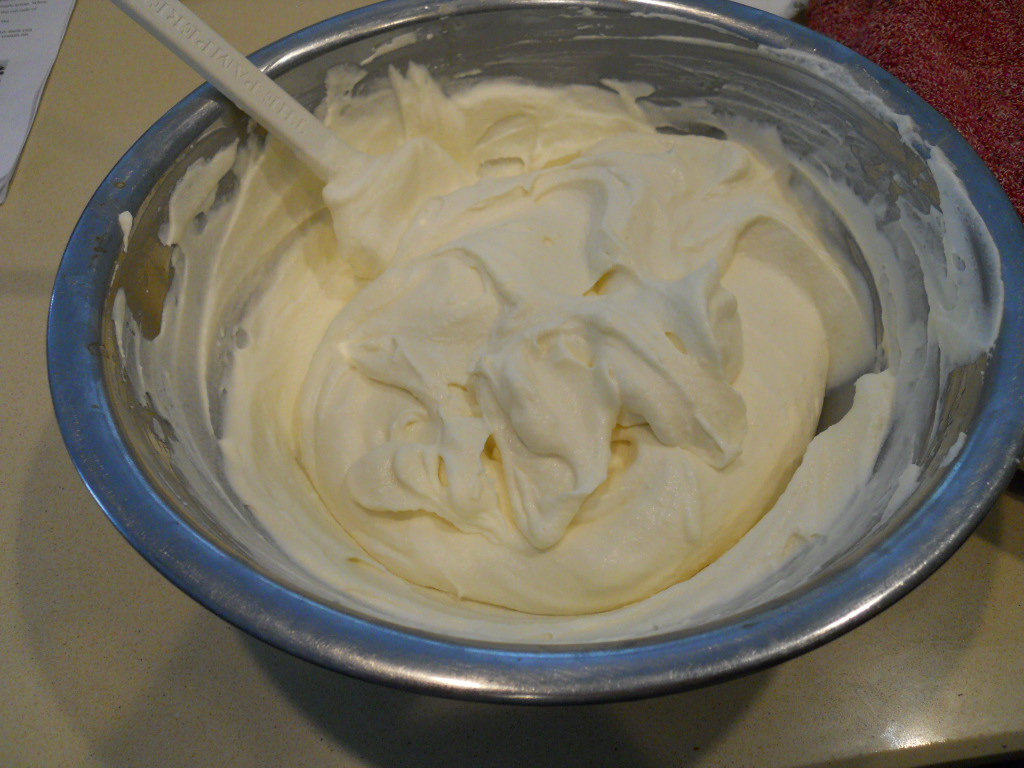
The problem lies with the cake in my case... pretty bad!! Instead of following the recipe and the suggested alterations to arrive at a coconut chiffon cake, I decided to make my own creative adaptations to the recipe. A friend had given me some coconut flour which I was very excited to use... so excited in fact that I substituted it 100% for all of the regular flour in the recipe. Rookie mistake!!! My friend had even cautioned me against doing that very thing! Any way, the coconut flour absorbed moisture like crazy, so I just continued adding coconut milk until the batter was what I thought was the right consistency. WRONG!! The cake baked all the way through but was very wet; so wet that I couldn't cut it in half and transfer half back to the springform pan for molding. So to salvage the cake, I cut out shapes to fit in my ring molds and popped them in the freezer to firm up prior to handling them and putting them in the molds. It worked out well, but I still didn't like the texture of the cake for eating, though it was alright as long as all of the other components were included in that particular bite.
27.7.11
The Daring Bakers Challenge - July 2011 - Fresh Fraisiers!!!
The problem lies with the cake in my case... pretty bad!! Instead of following the recipe and the suggested alterations to arrive at a coconut chiffon cake, I decided to make my own creative adaptations to the recipe. A friend had given me some coconut flour which I was very excited to use... so excited in fact that I substituted it 100% for all of the regular flour in the recipe. Rookie mistake!!! My friend had even cautioned me against doing that very thing! Any way, the coconut flour absorbed moisture like crazy, so I just continued adding coconut milk until the batter was what I thought was the right consistency. WRONG!! The cake baked all the way through but was very wet; so wet that I couldn't cut it in half and transfer half back to the springform pan for molding. So to salvage the cake, I cut out shapes to fit in my ring molds and popped them in the freezer to firm up prior to handling them and putting them in the molds. It worked out well, but I still didn't like the texture of the cake for eating, though it was alright as long as all of the other components were included in that particular bite.
25.7.11
I'm Back with Rollkuchen (fried bread)!!
18.7.11
A Little Nosh's Dark Chocolate Cupcakes with Peanut Butter Frosting
- 8 tbsp unsalted butter, cut into pieces
- 2 oz semi-sweet chocolate, chopped
- 1/2 cup dutch processed cocoa powder
- 3/4 cup all-purpose flour
- 1/2 tsp baking soda
- 3/4 tsp baking powder
- 2 eggs
- 3/4 cups granulated sugar
- 2 tsp vanilla extract
- 1/2 tsp fine salt
- 1/2 cup sour cream
Method:
- Preheat oven to 350F. Line muffin tin with paper liners and set aside.
- Combine butter, chocolate and cocoa powder in a microwave safe dish. Using 30 second increments, microwave until melted. Stir well until smooth. Set aside to cool.
- Whisk flour, baking soda, salt and baking powder in a small bowl.
- In the bowl of your stand mixer, beat eggs until fluffy. Add sugar and vanilla and beat well until fully incorporated. Beat in cooled chocolate mixture until well combined. Stir in one third of flour mixture until just combined, then beat in sour cream. Add the remaining flour mixture and stir until just incorporated. Do not overmix or you will have tough cupcakes!
- Divide batter evenly among baking cups. Bake 18 minutes in preheated oven until toothpick comes out with a few moist crumbs on it.
- Cool cupcakes completely, then frost with peanut butter frosting (recipe below).
Recipe from A Little Nosh (October 2010)
Ingredients:
- 1 cup icing sugar
- 1 cup creamy peanut butter
- 5 tbsp unsalted butter, at room temperature
- 1.5 tsp vanilla extract
- 1/4 tsp kosher salt
- 1/3 cup heavy cream
Method:
- Beat together icing sugar, peanut butter, butter, vanilla and kosher salt until well combined.
- Beat in heavy cream until icing is smooth.
- Pipe liberally onto cupcakes however you like!
- Try not to eat the whole batch of cupcakes.
Thanks Amanda for hosting the Secret Recipe Club again this month, and thank you to Amy at A Little Nosh for introducing me to such a lovely recipe!
If you want to join the Secret Recipe Club, check out the website here.
Happy Baking my Friends!
12.7.11
Spiced Sweet Potato Fries
Tonight for dinner I made sweet potato fries - baked, not fried! So they're a little healthier for you. If you use a minimal amount of oil on them, they're even healthier for you. :) Healthy + easy = what more could you want!
I served with some homemade sweet chilli dip - mix some sweet thai chilli sauce with a couple spoonfuls of fat free greek yogurt and you're laughing!
10.7.11
Santa Fe Chicken Salad
Recipe adapted from Mennonite Girls Can Cook
Ingredients:
- 4 chicken breasts, boneless & skinless
- chili powder &/or cajun seasoning
- 8 cups mixed greens
- 1 - 14 oz can black beans, drained & rinsed
- 3/4 cup corn kernels
- 2 avocados, halved and sliced
- 1/2 cup feta cheese
- 1/4 cup roasted peanuts, chopped
- Peanut Lime Vinaigrette Dressing (recipe follows)
Method:
- Prepare the salad dressing (recipe and instructions follow).
- Prepare the salad ingredients in separate containers.
- Rub chicken breasts liberally with the chili powder and/ or the cajun seasoning until well coated. Grill chicken until cooked through. Let chicken breasts rest before slicing while you plate the salad.
- Assemble the salad ingredients on plates - start with a bed of greens, sprinkle with beans, corn, avocado, feta, sliced chicken and garnish with a sprinkle of chopped toasted peanuts.
- Drizzle with dressing and serve.
Peanut Lime Vinaigrette Dressing
Recipe Adapted from Mennonite Girls Can Cook
Ingredients:
- 1/3 cup lime juice
- 1/2 cup olive oil
- 1 tbsp peanut butter
- 2 tsp dijon mustard
- 1 tsp lime zest
- 1/4 cup dry roasted peanuts, finely chopped
Method:
- Using a blender, mix lime juice, olive oil, peanut butter, and mustard. Blend until emulsified. Stir in lime zest and finely chopped peanuts. Use as directed in Santa Fe Chicken Salad recipe (above).
This salad is pretty easy to whip together. Make your hubby BBQ the chicken while you prepare the rest of the ingredients and you'll have dinner on the table in no time (thats why I did!). Hope you've been having a fantastic weekend. I sure have - we have had some beautiful summer weather, I did some shopping for my upcoming vacation, and did a little celebrating at finishing a big exam on Friday afternoon. :)
Happy Cooking my Friends!
5.7.11
Hello Cupcake! Featuring pastry chef Tina Bacon!
On June 22nd my sister and I attended the Hello Cupcake! class at Well Seasoned Gourmet Food Store in Langley, BC. This awesome class was hosted by Tina Bacon of the Pink Spatula. I had only heard of the Pink Spatula when I purchased some marshmallows from Well Seasoned around Christmas time. If you haven't tried these marshmallows, you are missing out!! They are so good and they come in all different flavours.Any way, back on topic- we soon discovered how creative and talented Tina Bacon really is. You can check her out on Facebook too under The Pink Spatula. This class was great! Can you believe that in a two and a half hour class we had six different kinds of cupcakes to take home? With no pre-baking or pre-making icing!! Now that shows some mad skills!
Here are some of the lovely flavour combinations we tried:- Chocolate cupcakes brushed with Baileys, topped with an espresso swiss buttercream icing and garnished with a chocolate covered coffee bean.
- Chiffon cupcakes brushed with a rum simple syrup, topped with a lime swiss meringue buttercream, sprinkled with shredded coconut.
- Vanilla cupcake filled with caramel, topped with very vanilla easy buttercream, drizzled with caramel, and finished with a sprinkle of fleur de sel & toasted pecans.
- Chocolate cupcakes filled with peanut butter filling, topped with cocoa easy buttercream and rolled in toasted peanuts.
- Vanilla cupcakes topped with espresso vanilla easy buttercream icing and sprinkled with sliced toasted almonds.
Can you say delicious?! I think so! Needless to say, I left the class so inspired with all these amazing flavour combinations running through my brain.
I'm going to share Tina's Chocolate Cupcake recipe with you along with her swiss meringue buttercream icing recipe. You can flavour the buttercream however you want! We added espresso so some of it and lime zest to some of it so we had two flavours from one batch of buttercream. You can also freeze the buttercream - which is super handy because this recipe makes a huge batch of icing!!!Tina Bacon's Chocolate Cupcakes
Ingredients:
- 1 cup cake flour
- 1 cup plus 2tbsp granulated sugar
- 2/3 cup dutch-processed cocoa powder
- 1 tsp baking soda
- 1/2 tsp baking powder
- 1/2 tsp salt
- 1/2 cup unsalted butter (or 1/4 butter and 1/4 oil)
- 1/2 cup freshly brewed coffee
- 1/2 cup buttermilk
- 1 large egg
- 1 large egg yolk
Method:
- Preheat over to 325. Fill 12 muffin tins with cupcake liners.
- Sift together dry ingredients and set aside. Heat butter and coffee in a small pot over medium heat until the butter has melted. Pour into a medium bowl. Whisk in buttermilk, egg and yolk. Then add sifted dry ingredients and whisk until incorporated.
- Pour batter into prepared muffin tins and bake until a toothpick inserted in the center comes out clean or with just a few moist crumbs, 20-25 minutes. Cool for a few minutes in pan. Transfer to rack to cool completely.
Tina Bacon's Swiss Meringue Buttercream
Ingredients:
- 10 large egg whites
- 2 3/4 cups + 2 tbsp sugar
- 2 1/2 cups unsalted butter, at room temperature
Method:
- Place egg whites and sugar into a metal bowl that will fit over a saucepan. Fill saucepan with an inch or two of water and bring to a low simmer. Place bowl over pot and whisk constantly until mixture is hot to the touch, around 130F. Pour into a stand mixer fitted with whisks and beat on high until it is thick and glossy and feels room temperature. It will probably be close to 90F. This can take up to ten minutes.
- Meanwhile, chop butter into walnut-sized chunks. When egg mixture has cooled, remove the whisks and use paddles with your machine set on low. Add butter a couple chunks at a time while beating continuously. As you continue to add butter it may look quite liquid. Nows' the time for the magic!! Turn your mixer on high and keep beating until it breaks and then becomes thick and fluffy. At this point, reduce the speed to low and add whatever flavour you like (i.e. up to 1/4 cup vanilla or liqueur, 2/3 cup dark chocolate melted and cooled, a paste of 2 tbsp instand expresso powder and 2 tsp vanilla).
Tina shared so many great recipes and tips with us that I can't fit them all into one post! I'm sure you'll see tidbits pop up over the next couple of months as I get the chance to try out some of her techniques in my own kitchen.
Thanks Tina for such a wonderful class and for so kindly providing me permission to blog about and your class and share your recipes. It was an absolute pleasure to meet you and I hope to take some more of your classes in the future!
Happy Baking my Friends!
1.7.11
Curried Roast Butternut Squash Soup
I made this amazing butternut squash soup last night for dinner (I pre-roasted the squash the night before so cooking up a batch of soup last night took no time at all!!) and I'm so excited about this recipe that I'm sharing it with you the day after. I'm pretty sure that has never happened on this blog! Usually I'm all about the procrastination.
I just did a random google search for roasted butternut squash soup, but it was so hard to find a recipe that a) wasn't full of whipping cream or some other high fat substance that adds creaminess to the soup or b) looked like it would be full of flavour. So many of the recipes were just squash, broth, salt, pepper and whipping cream. And thats okay... I guess... but I wanted something more. Then I stumbled across an old post on Jen's blog Food&Whine. Jen is a fellow Canadian so of course she had maple syrup in her butternut squash soup recipe! I made a couple small changes, but mostly followed her recipe because it sounded so good!
Recipe adapted from Food&Whine
Ingredients:
- 2 butternut squash
- 1 tbsp grapeseed oil
- 1 small onion, finely chopped
- 1 tbsp butter
- 1 litre of chicken stock (about 4 cups)
- 1/3 cup light cream
- pinch of cinnamon
- 1 tsp curry powder (I used hot)
- 1 heaping tsp cumin
- salt and black pepper to taste
- 1/3 cup of maple syrup or to taste
Method:
- The night before: cut each squash in half lengthwise. Scoop out the seeds and the stringy parts. Preheat the oven to 375F. Rub the cut side of the squash with some of the oil, then grease a 9x13 inch pan with the remainder of the oil. Place the squash cut side down in the pan and bake in the preheated oven for 45 minutes to one hour or until the squash is tender. Cool until you can safely handle the squash. Scrape into a container and place in the fridge overnight.
- The day of: In a large saucepan, melt the butter and saute the onions until they are soft and just about starting to brown. Add the squash you roasted last night and cover with the chicken stock. You can add more if you like a thinner soup, but I liked it with the one litre of stock. Bring to a boil and then turn down the heat and simmer for 20 minutes.
- Add the maple syrup, salt and pepper, curry, cumin and cinnamon. Stir well. Transfer to blender and blend in batches until silky smooth. Return to the saucepan. If you want to be virtuous, eat it at this point. If you want a tiny bit of decadence, stir in the light cream (as much or as little as you like really). Heat over low heat until soup is warmed through. Don't bring it back to a boil now that you've added the cream though.
- Serve with a dallop of sour cream and some more maple syrup drizzled on top. Also, it doesn't hurt to make some yummy biscuits or bread for dipping.
Hope you enjoy this recipe and your long weekend!
Happy Cooking my Friends!