Showing posts with label healthy. Show all posts

27.11.13

Roasted Garlic and Yam Soup

Hey Friends! I realize its been a while since I updated my blog... Not even going to try to make excuses for whats going on or why I haven't been posting much. What I am going to do is bring you a delicious soup that will warm you through and through despite this cold weather we've all been having. A delicious roasted garlic and yam soup.

This soup is a bit time consuming due to the many layers of flavours that go into it! You can make the veggie stock a day or two before and you can roast the veggies ahead of time too if you want to speed up the process. If you really don't have time and need to skip one of the steps - just buy the veggie stock. Don't skip roasting the veg - it adds such a delish layer of flavours that you can't miss out on to enjoy the true delightfulness of this soup.

First things first - make the veggie stock. You can find a delish recipe here - though it will make more than you need for this recipe, just freeze the rest and use it up as you see fit. Next you can get started on the recipe below. 

Roasted Garlic and Yam Soup
Minimally adapted from Rebar

Ingredients:
  • 6 cups veggie stock (recipe linked above)
  • 3 large yams
  • 2 heads of garlic
  • 4 roma tomatoes
  • 2 red peppers
  • 2 tablespoons vegetable oil
  • 1 medium yellow onion, diced
  • 2 tsp salt
  • 3 garlic cloves, minced
  • 2 tbsp minced fresh sage
  • 2 tbsp minced fresh oregano
  • 1 tsp ground coriander
  • 1 tsp ancho chile powder
  • pinch of allspice
  • 2 tsp chipotle puree (puree one can of chipotle peppers in adobo sauce and measure out 2 tsp)
  • 1 tbsp maple syrup
  • juice of one lime
  • salt and pepper to taste
Method:
  1. Preheat oven to 375F. Using a fork, pork a few holes in each yam. Cut the top 1/4 off the garlic to expose each of the pieces of garlic inside, drizzle each head with olive oil then wrap in foil. Place yams and garlic on a baking tray and roast in preheated oven for approximately 45 minutes. Yams may need a bit longer, but garlic should come out after 45 minutes. Yams are done when they are very tender. Cool slightly, then remove yams and garlic from their skin.
  2. Halve and seed the peppers. Place peppers and whole tomatoes on a well-oiled baking tray and roast until skins are browned and puffed (about 15 minutes). Transfer to a bowl and cover with plastic wrap for approximately 10 minutes. Peel away the skins and set aside.
  3. Heat the oil in a large soup pot, add onions and saute until translucent. Add garlic, spices and herbs and cook until garlic is fragrant (about 1 minute). Stir in the peeled, roasted veggies, the stock and the chipotle puree. Bring to a boil, reduce heat and simmer for about 20 minutes.
  4. Puree the soup until smooth. Whisk in maple syrup and lime juice. Season to taste with salt and pepper. Serve hot and topped with crushed tortilla chips and a bit of cheese. Also delicious with a dallop of sour cream or greek yogurt.


Happy Cooking my Friends! What have you been cooking and baking lately?

26.8.13

Black Bean and Brown Rice Casserole


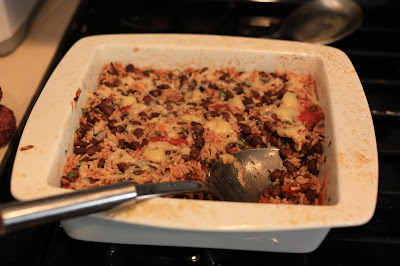
Monday always seems to roll around far too quickly, but this week I'm happy to see it arrive - it means I'm that much closer to leaving on vacation on Friday! Woohoo! I seriously can't wait for a break from work and real-life responsibilities. Despite the anticipation I have for this week to begin and pass by, Monday still comes with the reality of needing a quick, nourishing meal to whip up for hubby and I after work. This Black Bean and Brown Rice Casserole is just thing! Comes together in under half an hour, its super healthy and oh so flavourful.

Black Bean and Brown Rice Casserole
Minimally adapted from Thrifty Veggie Mama

Ingredients:
  • 2 cups cooked brown rice (about 1 cup uncooked)
  • 2 cans black beans, rinsed and drained
  • 2 cloves garlic, minced
  • 1/4 cup cilantro, chopped
  • 1 can stewed tomatoes with basil (you may want to squish the tomatoes to break them up a bit)
  • 1/2 tsp salt
  • 1/2 tsp black pepper
  • 2 tsp chili powder
  • 2 tsp cumin
  • 1/4 cup applewood smoked cheddar, shredded
  • hot sauce to serve
Method:
  1. Combine all ingredients except the cheese and hot sauce and place in an 8x8 inch pan. Top with cheese.
  2. Bake at 400F for 15 minutes or until cheese is melted. Drizzle with hot sauce to serve if desired. Sour cream would also be delish!


A super simple recipe that comes together so quick on a rushed weeknight. Hope you enjoy this as much as we did... leftovers disappeared quickly in our house!

Happy Cooking my Friends!

15.7.13

Lentil & Chickpea Curry

 
Happy Monday friends! I hope you had a fantastic weekend. I sure did! It was filled with yoga, spa time, and relaxation in the sun with a great book. And lets not forget some awesome time spent with some really good friends. All in all such a great weekend.
 
Today I've got such a great recipe to share with you! It makes a huge batch (for super cheap) but its so good you won't mind eating it all week like I did last week. The leftovers are almost better than the night you make it.


I found the recipe for Lentil & Chickpea Curry on this great blog called Sweet Sugar Bean written by a sweet gal from Saskatchewan. Since Saskatchewan is one of the world's largest producers of lentils, I figured Renee must know a thing or two about how to prepare them in a delicious, healthful way. I made a couple modifications to the original recipe, but by and large I stayed pretty true to the original.

 Lentil & Chickpea Curry
Minimally adapted from Sweet Sugar Bean

Ingredients:
  • 3 tbsp. olive oil
  • 1 onion, diced
  • 3 cloves garlic, minced
  • 2 tbsp. fresh ginger, grated
  • 2 medium carrots, diced
  • 3 tbsp. medium indian curry paste
  • 1/2 tsp cayenne pepper
  • 2 tsp cumin
  • 1 tsp coriander
  • 1 1/2 tsp sea salt
  • 1 540ml can diced tomatoes
  • 1 540ml can coconut milk
  • 1 cup red lentils, rinsed thoroughly and picked through
  • 1 540ml can chickpeas, drained and rinsed
  • 3 tbsp. honey
  • 2 cups cauliflower florets
  • 1 cup frozen peas
  • vegetable stock
  • handful of cilantro, chopped
  • plain yogurt
  • hot sauce
(Seems like a long ingredient list right? I know, I know... but the great thing about this recipe is a) you likely have more than half of this on hand already and b) the above listed ingredients are super cheap to buy and this recipe makes about a billion servings...)

Method:
  1. In a large pot, heat the oil over medium heat. Add the onion and cook til soft, about 5-8 minutes. Add garlic and ginger and stir til fragrant. Add the curry paste, carrots, spices and salt. Stir well and cook for a couple of minutes.
  2. Stir in tomatoes, coconut milk, lentils, chickpeas and honey. Bring to a boil then reduce heat to medium-low to maintain an active simmer. Stir every ten minutes or so until lentils are cooked through (this takes approximately 40 minutes).
  3. Once lentils are cooked, stir in cauliflower and peas. Cook til cauliflower is tender. If curry is too thick, add some veggie stock or water to thin it out. Stir in cilantro and adjust seasonings if necessary.
  4. Serve topped with a dallop of yogurt and a few drops of hot sauce if you like it spicy. Some home made naan takes this meal over the top.


Happy Cooking my Friends! Hope you enjoy this one.

6.7.13

Pineapple Fried Quinoa


Okay, so maybe the above pictured dish doesn't look all that appetizing... I believe one of my FB friends exact words were "this looks like something my cat would throw up". Thanks for that my darling friend! But in all seriousness, this isn't a pretty, stunning dish to make for your dinner party guests, but its a quick delicious and healthy weeknight dinner that will leave you with leftovers to eat for lunch the next day.
 
This dish is like fried rice, but with quinoa! I've also lightened it up, so its miles healthier for you than your typical fried rice.
 
Pineapple Fried Quinoa
Recipe adapted from  Allrecipes.com
 
Ingredients:
 
  • 1 cup uncooked quinoa
  • 2 cups chicken broth
  • 1/2 cup water
  • 2 eggs, beaten lightly
  • 2 tsp sesame oil
  • 5 cloves garlic
  • 1 cup diced pineapple
  • 1/3 cup finely chopped fresh cilantro
  • 1/4 cup soy sauce
  • 1/2 tsp red pepper flakes (adjust depending on heat preferences)
Method
  1. Place quinoa, chicken broth and water in a medium sized saucepan and bring to a boil. Cover and reduce heat to low and simmer for 20-25 minutes or until quinoa is tender and liquid has been absorbed.
  2. In a large skillet over medium heat, add eggs and scramble til cooked through. Remove from pan and set aside.
  3. Add sesame oil to skillet then add minced garlic and cook til fragrant - this will only take about 30 seconds. Add pineapple and stir for a few minutes. Next stir in cooked quinoa, eggs, cilantro, soy sauce and red pepper flakes. Garnish with more cilantro and a drizzle of hot sauce if desired.
 
Quick and easy - you can have a week night dinner on the table in 30 minutes! A bonus is that is tastes delish and is super healthy for you too. For you meat lovers, add some cooked chicken or shrimp to this dish.
 
To make this dish vegan - omit the eggs and use tamari instead of soy sauce.
 
Happy Cooking my Friends!

22.6.13

Turkey Stuffed Zucchini Boats


I have been experimenting with healthier meals recently and this was one of my awesome recipe finds! I found it on Pinterest and it is from Recipe Girl which is written by Lorie Lane. Her website is full of amazing recipes and beautiful pictures! Hop on over and check it out - I'll still be here when you get back.

This recipe is great because you can really mix it up by varying the meat, the vessel, the cheese etc. Be creative and try different combinations!


Here is my version of the recipe - I stuck pretty close to Lorie's version and just changed a couple things based on personal preference and what I had on hand. You can check out the original recipe here.

Turkey Stuffed Zucchini Boats
Recipe minimally adapted from Recipe Girl

Ingredients:
  • Four medium zucchini, ends trimmed then cut in half lengthwise
  • 1 small onion, finely chopped
  • 3 medium garlic cloves, minced
  • 1 lb hot Italian turkey sausage
  • 1/2 cup tex mex shredded cheese blend
  • 3/4 cup roasted garlic marinara sauce
  • 3 tbsp. fresh basil, finely chopped
  • salt and pepper to taste
Method:
  1. Preheat oven to 350F. Spray a baking tray with non-stick cooking spray. Set aside.
  2. Use a small spoon to hollow out the zucchini halves - don't scrape all the way to the skin, just hollow out a nice spot to put your stuffing. Place pulp onto your cutting board, roughly chop it up and place it in a medium bowl.
  3. Place a medium skillet over medium heat. Add sausage, zucchini pulp, and onions. Sauté until onions are soft and sausage is cooked through and starting to brown. Add garlic and stir until fragrant. Pour mixture through fine mesh sieve to drain off excess moisture from zucchini and any oil from the sausage. Transfer meat mixture to a medium bowl. Add all but two tbsp. of the cheese to the meat mixture, along with the marinara sauce and the basil. Stir til combined adding salt and pepper to taste if desired.
  4. Divide meat mixture between hollowed out zucchini, mounding each one and pressing firmly into cavity. Set the filled zucchini halves on prepared baking dish and sprinkle with remaining two tbsp. of cheese - adding extra cheese if desired.
  5. Bake in preheated oven 30 minutes or until zucchini boats are tender.


 The original recipe called for one full cup of cheese, but since I'm trying to eat healthier and consume less fat, I cut that amount down. You can add the full amount of cheese if you're not as calorie conscious (seriously jealous right now if you're that person).


 Next time I make this recipe I am going to sauté some mushrooms as well and mix them in with the meat mixture to add a little extra bulk! But overall we really, really enjoyed this recipe and I will definitely be making it again in the near future.


Happy Cooking my Friends!

15.6.13

Easy & Healthy Iced Tea


The weather is really starting to heat up around here - a sure sign summer is finally here! With the increase in the temperature, I've been on the lookout for some refreshing summer drinks that aren't full of calories. I noticed they're hard to find! So I decided to make my own iced tea!


I headed down to my local farmers market and found a booth selling some delicious tea and picked out cream of earl grey and cream of blueberry. Both sounded lovely to me, but you can really use any tea you want! Try to use high quality tea to avoid bitterness in your tea.


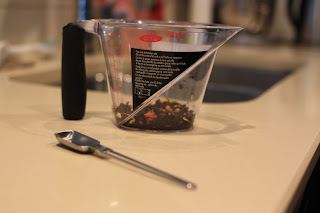
To make your iced tea - place 6 tsp of loose tea in a liquid measuring cup. Pour 1 1/2 cups boiling water over top and steep for five minutes. Don't steep for any longer or your tea will get bitter. Meanwhile, fill a pitcher 1/4 full with ice cold water.


 Once your tea is finished steeping, strain the mixture - putting the tea liquid into your prepared pitcher and discarding the tea. Fill the pitcher to the top with cold water. Serve tea over ice and garnish with slices of citrus fruits - I used lemons and oranges, but lime or grapefruit would be good too depending on the type of tea you're serving. I didn't need to sweeten mine, but if you must - sweeten it with honey!

This is such a simple, delicious and healthy alternative to other sugar-laden beverages we associate with summer. Give it a try - you might be surprised how delicious and refreshing it tastes!


 What's your favorite summer beverage that is easy on your waistline while still being refreshing?

Cheers!

9.6.13

Honey Roasted Carrots & Zucchini


This weekend has been a marathon of cooking and baking for my hubby's birthday party. Part of the menu was honey roasted carrots and zucchini. I wasn't going to blog these, but when I posted a picture on instagram, I received so many requests for the recipe, that I am posting now!

I don't have much to say about these other than that they are easy, taste delicious and are super healthy (as long as you keep the amount of oil at a reasonable amount). They're the perfect summer veggie to accompany your meal.

Honey Roasted Carrot and Zucchini
Minimally adapted from Meals in Heels

Ingredients:
  • 6 carrots, cut into 3/4 inch batons
  • 4 zucchini - I used 1 zucchini, 2 grey zucchini and one yellow zucchini, cut into 3/4 inch batons
  • 2 tbsp. olive oil
  • 1 tbsp. honey
  • 1 tsp cumin seeds
  • 2 tsp mustard seeds
  • salt and pepper to taste
Method:
  1. Preheat oven to 400F. Place carrot and zucchini in a bowl and toss with oil and honey. Sprinkle over the cumin and mustard seeds and season with salt and pepper. Roast for 20 minutes or until golden and tender.
Pretty simple and very delicious! Hope you enjoy these as much as we did. The cumin and mustard seeds really take this recipe up a notch!


Happy Cooking my Friends!

2.6.13

Banana Oatmeal Pancakes

 
My hubby and my family have abandoned me this weekend - all off doing their own things, so its just me and the dog all alone all weekend! If you know me, you know that I get bored and lonely pretty fast when I'm all alone! So this morning I was feeling a tad sorry for myself and decided I would make myself a healthy, yet indulgent breakfast. So I surfed the net and came up with Cookie and Kate's blog - about Kate and her dog Cookie. On her blog she had a fantastic sounding recipe for gluten free banana oat pancakes. With a couple modifications due to personal preference, I was on my way! Boy were these delicious! I can't wait to make them again. Hope you enjoy as much as I did!


Banana Oatmeal Pancakes
Minimally adapted from Cookie & Kate

Ingredients:
  • 3 small ripe bananas, mashed
  • 2 tbsp. coconut oil, melted
  • juice of 1/2 a large lemon
  • 2 tsp honey
  • 1 tsp vanilla
  • 2 eggs
  • 1 cup oats - pulse 1/2 of them in your food processor to make oat flour and keep the other half whole (I like the texture of oats - if you think you won't like the texture, pulse all of the oats in your food processor)
  • 1/2 tsp baking soda
  • 1/2 tsp salt
  • 1/2 tsp cinnamon

 Method
  1. In a medium bowl, combine mashed bananas and melted coconut oil. Stir well to combine. Then add remaining wet ingredients - lemon juice, honey, vanilla and eggs. Beat until well mixed.
  2. In another medium bowl, combine oat flour, oats, baking soda, salt and cinnamon. Stir until combined.
  3. Pour dry ingredients into wet ingredients and mix until just moistened. Let batter stand for 10 minutes while you heat up your pan or your griddle over medium-low heat.
  4. Using a non-stick pan pour 1/4-1/2 cups of batter onto the pan and flatten with your measuring cup until it is about 1/2 inch thick. Allow to cook until edges are set and bottom is a beautiful golden brown. Flip and continue cooking until other side is golden brown and pancake is cooked through.
  5. Enjoy right away, topped with a dallop of honey flavoured greek yogurt and some fresh sliced strawberries.

These are super filling pancakes because of the oats in them - so while the batch looks small, it will actually feed 2-3 people quite comfortably. Mine made 3 1/2 cup sized pancakes and one pancake filled me up and kept me going til lunch time!


Thanks for stopping by! Hope you enjoy the rest of your weekend. Happy Baking my Friends!


20.4.12

Zucchini Parmesan Crisps {Healthy, Low Fat}

Okay, I promise, I do have better pictures coming for you this weekend!! But, I really have to share these with you. Head over here to see good pictures of these darling little zucchini parmesan crisps. They are so easy and quick and pack a real punch of flavour.

I made these little guys as a vegetable side dish for our Easter dinner and they were a total hit. We definitely didn't have any leftovers. You could make these for a great snack or picky food at a party too if you're looking for a healthier dish to put out for health conscious guests.


We're going to keep this post nice and short because its Friday night and I want to relax and unwind from my week at work! So here's the recipe for you to try out this weekend. Pin this one for this summer when you've got an overabundance of zucchini growing in your garden that you don't know what to do with!

Zucchini Parmesan Crisps
Recipe from Blackjack Bake House

Ingredients:
  • 1 lb zucchini (about 2 medium or 3 small)
  • 1/4 cup shredded parmesan
  • 1/4 cup panko bread crumbs
  • 1/2 tbsp olive oil
  • 1/4 tsp kosher salt
  • freshly ground black pepper to taste
Method:
  1. Preheat oven to 400F. Line two baking sheets with parchment paper and set aside.
  2. Slice zucchini into 1/4 inch thick rounds. Toss rounds with oil to coat them well.
  3. In a shallow bowl, combine the parmesan, panko, salt and black pepper.
  4. Place rounds into parmesan breadcrumb mixture and press each side into the mixture to coat well. The mixture won't completely cover the zucchini, but don't worry, it will taste great!
  5. Place rounds on prepared baking trays in a single layer. Sprinkle remaining breadcrumb mixture onto rounds.
  6. Bake in preheated oven for about 15-20 minutes or until golden brown.
Pretty easy right? And as long as you take it easy on the oil and the cheese, these are actually a really healthy dish to serve up. I don't really ever feed kids, but since my hubby eagerly devoured these and he really hates veggies (especially zucchini), I think kids would like them too!

Happy Cooking my Friends!

25.3.12

Green Smoothie {Healthy, gluten-free and Vegan}

 Many of us are becoming more conscious of what we're putting in our bodies every day. With all of the genetically modified foods, chemical treatments and other scary things out there, I'm not surprised. But, it can be hard to find the time and energy to make sure we're purchasing healthy ingredients and making healthy food. That's where this green smoothie comes in - its a great way to start your day and you can feel good knowing that everything that goes into it is good for you and will give you that kick of energy to start the day. Its quick and easy and you can pre portion out the fruit and veggies a few days in advance so all you do is dump in blender and go! Plus, you won't have to worry about getting enough fruit and veggie servings for the day, this one's packed full of whole fruits and veggies!!

The reason I'm sharing this recipe with you is because of my mom. My mom has been struggling with some serious health issues for the past few years and nothing seems to help her much... not the most expensive medicine, expensive doctors or expensive supplements. But a friend of hers recommended that she try going vegan for a while and see if it helps. She thought "what do I have to lose". She has been drinking variations of this smoothie as part of a vegan diet for the past few months and over those month's we've seen a huge transformation in her. No, she's not cured, but she is feeling much better and most days she can get up and walk around and has way more energy than she did before. She asked if I would share this recipe on my blog for anyone out there looking for a healthy and delicious (if you can get over the colour!!) breakfast or snack.  So of course I agreed to share with you. Hope you enjoy!
Green Smoothie {Healthy, gluten-free and Vegan}
Recipe from my Mom

Ingredients:
  • 1 organic banana (make sure its ripe, because you need the sweetness and flavour)
  • 1 organic ambrosia apple, cored and roughly chopped
  • juice of one organic lemon
  • 2 cups roughly torn organic greens (kale, lettuce, swiss chard, or any combination of them)
  • 2 cups cold water
Method:
  1. Combine all ingredients in blender (vita-mix is best, but any blender will do). Blend all ingredients until smooth and vibrant green (colour will vary depending on mixture of greens used in smoothie). Makes two large servings. Store leftovers in the fridge for later.


 You can mix it up a number of different ways to give yourself some variety - vary the type of greens you use (for some crazy colour try some organic purple kale!!), you can put pear in instead of apple, or any other fruit you want! If you find this isn't quite sweet enough for you, try sweetening it with a couple teaspoons of agave syrup. And a little trick to get over the green colour of the smoothie - drink it out of a travel mug through a straw!
Do you have a favorite vegan recipe? Would you like it featured on my blog? Send me an email with the recipe (don't forget to include the source of the recipe) and a photo from last time you made it and I will most definitely feature it on my blog. Can't wait to hear from you.

Happy Cooking my Friends! Stay healthy!

26.2.12

Kale Chips {Gluten Free, Healthy}


Kale Chips. Ew gross!!! Thats what I initially thought when people started talking about these things. Then we went over to my good friend D's place for dinner and she had made these to serve to us along with some other delicious menu items. Not one to be rude and not try something when a guest in someone's house, I of course had to give these a try. To my surprise, they were delicious and addictive! Since then I've been craving these all the time. Who knew they were so easy to make?!

I decided to look into the health benefits of kale since I'd heard it was very good for you. Here's what Web MD says about the health benefits of kale:

"One cup of kale contains 36 calories, 5 grams of fiber, and 15% of the daily requirement of calcium and vitamin B6 (pyridoxine), 40% of magnesium, 180% of vitamin A, 200% of vitamin C, and 1,020% of vitamin K. It is also a good source of minerals copper, potassium, iron, manganese, and phosphorus.
Kale’s health benefits are primarily linked to the high concentration and excellent source of antioxidant vitamins A, C, and K -- and sulphur-containing phytonutrients.
Carotenoids and flavonoids are the specific types of antioxidants associated with many of the anti-cancer health benefits. Kale is also rich in the eye-health promoting lutein and zeaxanthin compounds.
Beyond antioxidants, the fiber content of cruciferous kale binds bile acids and helps lower blood cholesterol levels and reduce the risk of heart disease, especially when kale is cooked instead of raw."

Since kale is so good for you, you should make these - they taste so good and have many health benefits. You can do all kinds of variations to this recipe depending on your tastes and preferences. But this is a good starting place - basic, quick and flavourful.

Kale Chips
Recipe by Erin (me!)

Ingredients:
  • 1 bunch curly green kale, trimmed into bite size pieces (discard the tough stems)
  • 1 tbsp grapeseed oil
  • kosher salt
  • cayenne pepper
  • freshly grated parmesan cheese
Method:
  1. Preheat oven to 375F.
  2. Wash kale pieces, then spin in a salad spinner until dry. Place kale pieces into a large bowl. Drizzle with oil and then toss and scrunch leaves with your hands to make sure they are evenly coated with the oil.
  3. Spread kale chips onto a large cookie sheet in a single layer. Sprinkle with kosher salt (about 1 - 1 1/2 tsp should do it), and cayenne pepper (no more than 1/2 tsp). Then sprinkle with a small amount of parmesan cheese (about 2 - 4 tbsp).
  4. Bake in preheated oven for 10 minutes. Remove from oven and stir the chips. Return to the oven and bake another 10 - 12 minutes until chips are crispy. Watch them carefully toward the end as they tend to burn quickly.

Enjoy these! This is one time when its okay to eat the whole batch. :D

This post has been linked up with Mouthwatering Mondays over at the Sweet Spot. Head on over to check out what other delicious treats bloggers have cooked up this week.
Happy Cooking my Friends!

25.2.12

Coconut & Blueberry Mini Tarts {Dairy & Egg Free}


Lately a lot of my lovely readers (thats you!!) have been asking me if I'll share some healthier recipes with you - some have asked for gluten free, some asked for dairy free, and some asked for low fat. Well, I've been trying to find some recipes that incorporate those diet restrictions but still taste good. I have tried a few recipes that haven't made the cut to be shared here, but this one definitely made the cut - Coconut & Blueberry Mini Tarts! I found the recipe in Anna Olson's new cookbook - Back to Baking. I made one or two very slight changes and arrived at these little beauties. They are delish with or without the blueberries and you could substitute other berries if you wanted to (raspberries would be amazing!!).


And while my tarts don't look perfect, they were a breeze to throw together and tasted quite delicious too. I didn't particularly care for the texture of the custard  - so I've changed the recipe to use about half the original amount of cornstarch to thicken. So if you find your custard isn't thick enough for your liking, just double the amount of cornstarch. :)


Coconut & Blueberry Mini Tarts
Minimally adapted from Anna Olson's Back to Baking

Ingredients:
  • 1 1/2 cups whole wheat flour
  • 1/4 cup vegetable oil
  • 3 tbsp dark brown sugar
  • 3 tbsp honey (or agave would work well too)
  • pinch ground cinnamon
  • pinch salt
  • 1 tin coconut milk
  • 1 vanilla bean and 2 tsp vanilla extract
  • 1/2 cup sugar
  • 1/8 cup cornstarch
  • 1 cup fresh blueberries
Method:
  1. Preheat the oven to 350F and spray a 24 cup mini muffin with non-stick cooking spray.
  2. For the crust, stir together the whole wheat flour, vegetable oil, brown sugar, honey, cinnamon and salt until mixture has a wet and crumbly texture (like wet sand). Press crust mixture into bottom and sides of muffin cups. Bake in preheated oven for 10 minutes, then cool to room temperature.
  3. To make the custard, pour the coconut milk into a saucepan. Scrape in the seeds of the vanilla bean and stir in the vanilla extract. In a bowl, stir together the sugar and the cornstarch. Whisk into the coconut milk, then turn the heat to medium and whisk until the mixture comes to a simmer and thickens, about 6 minutes. Scrape the custard into a bowl, cover the surface of custard with plastic wrap and allow to cool to room temperature.
  4. Once cooled, pipe the coconut filling into the mini tart shells and top each with 3 blueberries. Chill at least two hours in the tin before popping them out to serve.
  5. Tarts will keep in the fridge for up to 3 days. Note: You could also make the filling up to a day ahead of time and chill until you fill your tarts. If you use this make ahead option, be sure to puree the custard in a food processor or with an immersion blender prior to piping into the tarts to ensure it has that perfect, silky smooth texture it had prior to chilling.

Pretty easy right? With minimal ingredients that you probably already have in your pantry! Isn't that the best kind of dessert? Hope you enjoy!


This post has been linked up with Mouthwatering Mondays over at the Sweet Spot. Head on over to check out what kind of deliciousness is going on in the blogosphere this week.
Happy Baking my Friends!

2.2.12

Healthy, Quick & Delicious Roasted Asparagus


In case you haven't noticed, I'm not really a fruit and veggie kind of girl. Yeah, I try to get in the proper servings of fruit and veggies each day (though I don't always succeed), but I don't really enjoy eating those good for you foods. But one vegetable I actually enjoy and I always go for seconds of is asparagus. I think asparagus has got a bad rap due to the fact that the majority of people overcook and underseason it. But its actually really delicious when its done right. Here are some tips and tricks to make sure your asparagus turns out delicious every time.

  1. Pick out good asparagus! Garbage in = garbage out right?! Asparagus gets bitter and tough if the stalks are thick (which is the case with most veggies - the longer you let them grow, the less tender and sweet they are). So pick the skinniest stalks of asparagus you can find. Make sure the tops of each stalk are tight and well in tact - this indicates they are fresh!
  2. Don't cut the ends off the stalks. This will result in woody, inedible parts being left for you to consume and those parts don't taste good. Instead, place one hand at each end of the asparagus and bend the stalk in half. The stalk will break at the point where the woody portion ends, leaving you with only the top tender part of the asparagus (don't worry if it seems to break a lot off - the woody part can actually go up to halfway up the stalk).
  3. Get your oven good and hot! Before you start getting your asparagus ready, preheat your oven to 450F. You want to be able to cook them hot and fast to ensure the inside doesn't get overcooked!
  4. Season well! Lay out your trimmed asparagus in a single layer on a large cookie sheet (line with foil for easy cleanup). Drizzle lightly (go easy here - you want this to stay healthy right?!) with olive oil. Shake the pan a little to coat the asparagus with the oil. Grind lots of fresh black pepper over the asparagus. Sprinkle with coarse salt (I used about 1/2 - 3/4 tbsp of kosher salt for 1 pan of asparagus).
  5. Don't over cook the asparagus! You've gone to all this work to make the perfect asparagus and now you're in the home stretch!! Place the tray into your preheated oven (see step 3) and put your timer on for exactly 5 minutes. At five minutes, pull the pan out and give it a good shake. Then rotate the pan and put back in the oven for another 5 minutes - exactly!! No more, no less.
  6. Finish it with a little extra flavour. If you've got any balsamic reduction, plate the asparagus and then drizzle with a tiny bit of balsamic reduction. If you want that extra decadence (though not as healthy), sprinkle with a little parmesan cheese (freshly grated of course).
So there ya go - easy, healthy, quick and delicious. What more can you ask of a week night veggie dish?! Oh yeah, you could also bust this one out at your next dinner party and you will impress even your foodie friends. :)

This post has been linked up with Fusion Fridays at Jennifer Cooks! Head over there to check out all the amazing Superbowl treats people have baked up this week. :D

Happy Cooking my Friends!

28.1.12

Curry Turkey Burgers with Mango Chutney


Happy Saturday peeps! Hope your weekend is off to a good start. I've been racking my brain trying to come up with a "healthy" post for you this week after my healthy mac and cheese was an epic fail... I guess some things just aren't meant to be low fat and healthy right?! Is that the wrong attitude to have? Maybe I just need a better recipe... Any way, I was browsing through some of my instagram photos and found this one (apologies for the quality of the photo... I still haven't got the hang of taking photos with my iPhone yet) of Curry Turkey Burgers with Mango Chutney and an Asian Slaw Salad. This is definitely a lightened up burger and the asian slaw salad is a delicious substitute from ceasar salad or french fries. So this is going to constitute my healty post for the week - fitting into the light/ lower-fat category.

Even my hubby who has an aversion to lightened up versions of his favorite foods, really liked these burgers, so I am convinced that even your toughest critics will love these burgers and ask you for seconds. Oh yeah, and they're easy and quick to make, so its a win win situation. What are you waiting for? Whip these up tonight and feel good about your dinner.


Curry Turkey Burgers with Asian Slaw
Recipe adapted from Rachael Ray

Ingredients:
For the Burgers
  • 1 1/3 lbs lean ground turkey or chicken (I used a combination of both)
  • A handful of fresh cilantro, finely chopped
  • 1 inch piece fresh ginger, finely minced
  • 2 cloves garlic, finely minced
  • A couple pieces of roasted red peppers, finely chopped
  • coarse salt
  • 2 tbsp mild curry paste or a handful of curry powder
  • Drizzle of extra virgin olive oil
  • Multigrain buns (4-6)
  • lettuce (optional)
  • guacamole (optional)
  • mango chutney
  • Light mayo (optional)
For the Slaw
  • 1 package prepared shredded cabbage mix (coleslaw mix)
  • 1/4 seedless cucumber, chopped
  • 10 fresh basil leaves, shredded
For the Dressing
  • 1/2 tsp crushed red pepper flakes
  • 1 clove garlic, minced
  • 1/4 cup white vinegar
  • 2 tbsp honey
  • 1 tbsp soy sauce
  • 2 tbsp vegetable/ canola oil
Method:
  1. Combine the chicken, cilantro, ginger, garlic, roasted peppers, salt and curry paste in a large bowl. Form into five patties. Brush or drizzle patties on both sides with a tiny bit of olive oil.
  2. Pan fry the patties in a non-stick pan for approximately 6 minutes per side, or until cooked through. Pile patties onto buns and top with lettuce, mango chutney and guacamole (maybe not if you're watching your fat intake), and light mayo (again - go easy on this if you're watching your fat intake).
  3. For the slaw, combine the cabbage, cucumber and basil in a large bowl. Combine dressing ingredients in a small plastic container and shake vigorously for one minute. Drizzle sauce evenly over vegetables and toss to coat. Let stand for 10 minutes and re-toss salad. Garnish with toasted sesame seeds if desired.   Serve with the turkey burgers.
I'm off to start up on my Saturday kitchen project... top secret productions in preparation for the February Secret Recipe Club!! Woot! Can't wait to share with you. :)

Happy Cooking my Friends!

21.1.12

Broccoli & Cheddar Soup

Ahhh Saturday morning! I love sitting and enjoying a nice cup of coffee on the one day of the week I don't have to do anything. A simple thing to take pleasure in, but sometimes its just so nice to sit down and take a little breather. I still have lots to do today and tomorrow in preparation for having some of the office ladies over to my place tomorrow evening, but those things can wait while I drink my coffee. :)

Last night I was feeling a little drained after a busy week at work, so I opted for an easy and healthy dinner that hubby and I could feel good about after eating. I made a Broccoli & Cheddar soup from my new cookbook The Looneyspoons Collection by Janet & Greta Podleski. I have one of their previously published cookbooks called Eat, Shrink and Be Merry and quite honestly, I love both cookbooks. Janet & Greta do a great job lightening up everyday recipes without using obscure or expensive ingredients and this soup was no exception. The short ingredient list, easy preparation instructions and quick cooking time made this soup really appealing (not to mention the fabulous end result).


Broccoli & Cheddar Soup
Recipe adapted from The LooneySpoons Collection

Ingredients:
  • 1 tbsp olive oil
  • 1 cup chopped onions
  • 1/4 cup chopped celery
  • 3 cloves minced garlic
  • 1/2 tsp  each dried tarragon and celery salt
  • 3 cups chicken broth (I used homemade turkey stock)
  • 1 large potato, peeled and diced
  • 3 cups small broccoli florets
  • 1 cup whole milk
  • 2 tbsp all purpose flour
  • 3/4 cup packed shredded old cheddar cheese
  • 1/4 cup freshly grated parmesan cheese
  • 1/2 tsp freshly ground black pepper
  • 1/2 tsp kosher salt
  • 1 tsp hot pepper sauce (or to taste)
Method:
  1. Heat olive oil in large pot over medium heat. Add onions and celery. Cook and stir until veggies begin to soften, about five minutes. Add garlic, tarragon and celery salt. Cook 30 more seconds until fragrant. Add broth and potatoes. Bring to a boil. Reduce heat to medium low. Cover and simmer for five minutes. Add broccoli and simmer for 7 more minutes, until broccoli and potatoes are tender.
  2. Carefully transfer soup to a blender. Puree until smooth and silky. Return pureed soup to pot over low heat. Whisk together milk and flour until smooth. Add to soup. Increase heat to medium and cook until mixture is bubbly and has thickened, stirring constantly. Add both cheeses, pepper, hot pepper sauce and salt. Stir until cheeses are melted. Taste and adjust seasonings if necessary.
Thats all there is to it. I'm pretty excited to enjoy a nice bowl of this leftover soup for lunch on this cold, rainy Saturday. Have a fantastic weekend peeps!

Happy Cooking my Friends!

17.1.12

Pineapple "Ice Cream"

Hey Friends! How is your week going so far? Mine has been pretty busy and COLD! Yep, you heard me - friggin cold. We typically don't get much cold weather here, but tonight it is -8 celcius and I don't think I've seen temperatures that cold since last time I was up in Northern BC a few years ago. Regardless of the cold though, I'm bringing you a nice cold dessert that you can eat and still stay in line with you new years resolutions!!

 Folks - meet my version of pineapple ice cream with very little sugar and zero fat!! I add the spiced whiskey for a little extra flavour and also to keep the mixture from getting too hard in the freezer. If you're going to consume it right away, feel free to leave out the whiskey for an even healthier snack. You could also sweeten this dessert with a couple tablespoons of agave to make this treat with less sugar (other than the naturally occurring sugar in the pineapple that is).

Oh and did I mention how easy this is? Cut up your pineapple, freeze it, then combine frozen pineapple and remaining ingredients into your food processor and whirl until smooth and creamy. Ohhhhhh yes!!!


Pineapple "Ice Cream"
Recipe by Erin

Ingredients:
  • 1 whole pineapple, cut up into bite size chunks and frozen
  • 1/4 cup sugar
  • 3-4 tbsp spiced whiskey
  • 3 heaping tbsp non-fat greek yogurt (preferably Liberte brand)
Method:
  1. Combine ingredients in food processor. Whirl until smooth. Enjoy!


Whats the weather like where you're living? Is it cold and wintery there too? Here's to staying warm this frigid winter week and hoping for warmer weather next week!

Happy Baking my Friends!