Showing posts with label dessert. Show all posts

9.8.13

{Dairy Free} Chocolate Cappuccino Biscotti


Whew! What a week its been so far. Despite being a shorter week than usual, it seems like it was so much more exhausting than it usually is. Part of it is that two of my four days this week were attending training seminars all day and the fact that my car broke down on my way to said training seminar. I think I was also coming back to reality after such a fantastic yoga retreat last weekend which made this week seem even tougher! You know what you need on weeks like that? Delicious and flavourful biscotti. That's what will make it allllll better. Especially biscotti you can indulge in nearly guilt free - these have no added fat (some fat in the chocolate chips, but no oil or butter products added to this dough) and they have no dairy (I substituted almond milk for the milk).


Chocolate Cappuccino Biscotti
Recipe minimally adapted from Joy of Baking

Ingredients:
  • 2 cups all purpose flour (or you could substitute 1 cup whole wheat for one cup of white flour)
  • 1 cup granulated sugar
  • 1/2 tsp baking soda
  • 1/2 tsp baking powder
  • 1/2 tsp salt
  • 1/2 tsp cinnamon
  • 1/4 tsp cloves
  • 1/4 cup strong coffee
  • 1 tbsp finely ground coffee
  • 1 tbsp almond milk
  • 1 egg
  • 2 tsp vanilla extract
  • 3/4 cup semi sweet chocolate chips


Method:
  1. Preheat oven to 350F. Line two baking trays with parchment paper, set aside.
  2. In a small bowl, whisk coffee, ground coffee, almond milk, egg and vanilla.
  3. In the bowl of a stand mixer beat flour, sugar, soda, powder, salt and spices until combined. Gradually mix in coffee mixer until combined. Add chocolate chips and incorporate without overmixing.
  4. With floured hands, divide the dough in half. Roll each portion of dough into a log about 10 inches long and 2 inches wide. Transfer logs to prepared baking sheets (one on each sheet).
  5. Bake in preheated oven until firm to the touch. Remove from oven and cool on wire rack 10 minutes.
  6. Reduce oven temperature to 300F. On a cutting board, cut the logs lengthwise on a diagonal into 3/4 inch slices. Place cut side up on a baking tray. Bake five minutes, flip over and bake five minutes on the other side. Remove from heat, let cool. Store in an airtight container.
 
These were really yummy with all the spices and with the strong coffee flavour. We really enjoyed them dipped in coffee or tea or even just eaten as a snack. What is your favorite kind of biscotti?
 
Here are a few of my favorites:
 
Happy Baking my Friends!

5.6.13

Coconut Chocolate Chip Cookies


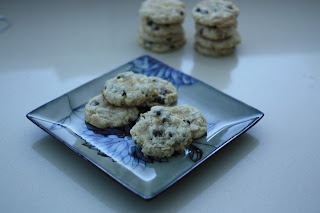
Happy Wednesday peeps! The week is more than half over - you can do it!! These cookies got me revved up about baking again - they're delicious and totally different than any chocolate chip cookie I've ever had. They have a secret ingredient - coconut oil!


 If you're worried about how expensive coconut oil is, let me tell you a little secret! You don't have to pay loads of money for good quality cold pressed coconut oil!! Go down to your local Costco and load up- they had huge jars of really good quality stuff on for around $20! Stop paying the ridiculous prices at grocery stores and health food stores! You absolutely don't need to.


 I found this recipe on the Well Traveled Wife. Head on over there and check out her site - it seems like a good one with lots of yummy recipes. And if this recipe is any testament to the quality of her recipes, her blog is fantastic!


Coconut Chocolate Chip Cookies
Recipe adapted from The Well Traveled Wife

Ingredients:
  • 1/2 cup coconut oil
  • 1 cup white sugar
  • 2 eggs
  • 1 tbsp. vanilla
  • 1 3/4 cup all purpose flour
  • 1/2 tsp kosher salt
  • 1 tsp baking powder
  • 1/4 tsp baking soda
  • 3/4 cup white chocolate chips
  • 3/4 cup semi-sweet chocolate chips
  • 1/2 - 1 cup shredded coconut
Method:
  1. Preheat oven to 375F. Line two baking sheets with parchment paper and set aside.
  2. In the bowl of your mixer, cream the coconut oil and sugar together. Add eggs one at a time beating until incorporated after each addition. Add vanilla and beat til fluffy.
  3. In another bowl, mix the flour, salt, powder and soda. Gradually add to the coconut mixture until just about incorporated (mixing on a very low speed). Add in chocolate chips and coconut and mix til just combined.
  4. Drop by spoonful's onto prepared baking sheets. Bake in pre-heated oven for 8-10 minutes until just lightly browned around the edges and still soft in the middle. Let set on tray for 2-4 minutes after removing from oven, then remove to wire rack to cool completely.

The coconut oil adds such an amazing flavour to these cookies! You really need to try them. The beauty of these cookies is how quick and easy they come together - none of this finicky cookie stuff! Simple and delicious is all you'll find here!


Happy Baking my Friends!
 

29.5.13

Coconut Almond Bars


Howdy friends! How are you this fine, rainy Wednesday evening? I figured you might need a sweet chocolaty pick-me-up! I know I could. I made these quite a while ago and to be honest just never got around to blogging them. But I was flipping through pictures and noticed I had these lovely little shots my hubby took and I just had to share them with you!

This recipe is from one of my favorite baking books - Back to Baking by Anna Olson! I hope you enjoy as much as we did!


Coconut Almond Bars
Minimally adapted from Back to Baking by Anna Olson

Ingredients:

Base:
  • 1/4 cup butter
  • 1 oz unsweetened chocolate, chopped
  • 1/2 cup sugar
  • 1 egg
  • 1 tsp vanilla extract
  • 1/3 cup all purpose flour
Filling:
  • 1 1/3 cup sweetened coconut flakes
  • 1 cup sliced almonds
  • 1 300 ml tin sweetened condensed milk
  • 2 tsp vanilla extract
  • 1/4 tsp salt
Topping:
  • 5 oz semisweet chocolate chips
  • 2 tbsp. butter
Method:
  1. Preheat oven to 350F. Grease and line an 8-inch square pan with parchment paper so paper comes up the sides.
  2. Melt butter and chocolate in a small pan over low heat, stirring until smooth. Remove from heat and stir in sugar. Then add egg and vanilla and stir til blended. Add flour and stir. Spread this mixture into the bottom of prepared an and bake for 10 minutes until it loses its shine. Cool while preparing the filling.
  3. For the filling, stir the coconut, almonds, condensed milk, vanilla and salt to combine. Spread over cooled base. Bake 25 minutes until light golden brown. Cool to room temperature before adding the topping.
  4. For the topping, melt the chocolate and butter in the microwave on low heat, stirring often.  Pour mixture over cooled filling and spread evenly.
  5. Chill the pan for about 2 hours to set the chocolate. Cut the squares while chilled, but then store and enjoy at room temp. I used a small round biscuit cutter to cut mine into cute little round shapes for a fun way to present them!


These bars have amazing chocolaty flavour, but they are a little on the sweet side! If you don't like super sweet treats, then these probably aren't the bars for you! If however you love a little sugar hit - get on making these right away to cure your mid-week blues!

Happy Baking Friends!

19.11.12

Peanut Butter RIce Krispies for SRC

I had a crazy weekend with some very unexpected and exciting news! I can't share details with you yet, but this news totally threw off my plans to tackle my SRC assignment on Sunday as I had originally planned to. It completely slipped my mind and I'm so sorry because I was assigned such a fantastic blog this month!!!


I was assigned Cook with Sara. I chose to make the rice Krispy squares but opted to use a slightly different flavor profile with peanut butter and chocolate rather than the caramel chocolate combo she used. Both I'm sure would be fantastic! Check out the recipe here


I chopped up mini peanut butter cups (approx 1 cup chopped) and stirred them into the Rice Krispies. Then I drizzled the bars with melted peanut butter (1/4 cup) and chocolate (1/4 cup). They were soooo good!

Thanks Sara for the delicious recipe and the many more recipes that I can't wait to try (check out the Cappuccino Crinkles - they're next on my list!!). I apologize for the lateness of my post!


Happy Baking my Friends!


10.11.12

Chocolate Espresso Peanut Butter Chip Cookies

 
A couple weeks ago I was supposed to bake dessert for a cocktail party I was attending - I had planned a couple of delicious show stoppers. The were 1) Chocolate coconut rounds and 2) Marshmallow topped peanut butter pretzel squares. I baked them both the day of the party and as I was portioning them into mini cocktail sized portions, I decided I didn't like how either of them presented, or tasted. So, now with only 1 1/2 hours to finish getting myself ready and find another dessert option, I had to think and do quickly - off to pinterest I went. I found these chocolate espresso brownie cookies, but I didn't have time to get to the store to buy the ingredients I needed, so I made due. Lo and behold, they turned out amazing and were a total hit. Who knew such a simple and easy cookie could be such a superstar. Make these and be prepared to want to eat the whole batch!! They're that good!
 
 
 Chocolate Espresso Peanut Butter Chip Cookies
Recipe minimally adapted from Just a Taste

Ingredients:
  • 3 oz unsweetened chocolate
  • 1 cup semi sweet chocolate chips
  • 1 cup peanut butter chips
  • 8 tbsp butter
  • 3 large eggs
  • 1 cup plus 2 tbsp sugar
  • 2 tsp instant coffee granules
  • 1 cup flour
  • 1/3 tsp baking powder
  • 1/4 tsp salt
Method:
  1. Preheat oven to 350F.
  2. Combine unsweetened chocolate, semi sweet chocolate chips and butter in a microwave safe bowl. Microwave on low heat, stirring at 30 second intervals until melted and smooth. Set aside.
  3. In the bowl of a stand mixer combine the eggs, sugar and coffee granules on high speed until smooth and very thick - about 3 minutes. Slowly add the chocolate mixture to the bowl, whisking until just combined.
  4. Turn off stand mixer and add flour, baking powder and salt to the bowl. Stir until just combined. Add peanut butter chips and stir until just combined.
  5. Place scoopfuls of batter onto parchment lined baking sheets leaving approximately 2 inches in between them. Bake in preheated oven for 15 - 18 minutes or until cookies are puffed. Do not overbake - if in doubt, underbake. Let sit on baking sheet for 2 minutes before transferring to wire rack to cool completely.


Hope you are having a fantastic weekend! I know I am! The sun is shining, I've had a chance to do some baking and some shopping so life is good. To those of you Canadians reading this, be sure to take the time to pause and remember those soldiers who fought and lost their lives for our freedom tomorrow on Remembrance Day. They made it possible for us to have many freedoms not enjoyed by people in all areas of the world and as such, we owe them tribute for their selfless acts. Lest we forget.

Take care and enjoy the rest of your weekend.

Happy Baking my Friends!

13.10.12

Coconut Crusted Salted Caramel Cookies


I follow a great blog called Taking on Magazines written by "the Mom Chef" who is actually Christiane. Its a great blog with loads of delicious recipe ideas. Please check it out right now - I'll be here when you get back. :)

Any way, a while back she posted the recipe for these amazing cookies and I pinned it to try later. Later finally came when I made them a couple weeks ago. They were such a hit!!! Devoured eagerly and quickly that I barely had time to snap a couple of pictures. You've gotta try making them they are absolutely delicious and easy to make. In fact they might be fun to make with your kids if you have them - the kids could help with rolling them into balls and rolling them in the coconut (or nuts if you choose). It would be a fun kitchen project to take on.


Coconut Crusted Salted Caramel Cookies
Recipe adapted from Taking on Magazines

Ingredients:

  • 3 sticks unsalted butter, softened
  • 1 cup sugar
  • 1 tbsp vanilla
  • 3 1/2 cups flour
  • 1/2 tsp kosher salt
  • 2 large eggs, lightly beaten
  • coconut for rolling
  • 1 2/3 cups sugar
  • 1/2 c water
  • a few drops lemon juice
  • 1c whipping cream
Method:
  1. First make the caramel sauce. Put the 1 2/3 cups of sugar into a very clean saucepan. Gently pour the water oer the sugar and add the lemon juice. Place pan over medium high heat with the lid on. Bring to a boil and let boil with lid on, removing and replacing the cover every so often. When all the water is boiled off, the sugar will be boiling with big bubbles breaking on the surface. The bubbles will gradually get smaller as the temperature rises. Remove the lid and pay attention now. The sugar will change colour - when it reaches a nice gold/ amber colour, remove it from the heat - don't let it get too dark or it will taste burnt. Add the cream carefully (it will bubble and steam like crazy). Have a wooden spoon ready and stir until well blended. Set aside to cool and thicken up a bit.
  2. Preheat oven to 350F. Line two baking sheets with parchment paper. Set aside.
  3. Beat together butter with 1 cup sugar until smooth and fluffy. Beat in vanilla.
  4. Add the flour a little at a time, then add the salt. Beat to combine.
  5. Roll dough into 1 1/4 inch balls. Dip each ball in the egg, then roll in coconut to coat. Place on prepared cookie sheet. Press to flatten a bit, then use your thumb to make an indentation in the center of the cookie. Repeat with remaining dough.
  6. Bake in preheated oven for 10 minutes. Repress indent with your thumb and then bake for another 9-10 minutes or until golden. Let cool on wire racks.
  7. When completely cooled fill indentation with a little of the caramel sauce, then sprinkle with sea salt.
 Yep, so that is all!! I am writing this to share with you while enjoying bacon rolls - like cinnamon buns, but savory!! Recipe to follow on world bread day - 3 days left! Can you wait that long?!

Happy Baking my Friends!


27.8.12

Choux Swans for the August 2012 Daring Bakers' Challenge


Hey Friends! How was your weekend? Mine was excellent - had a little fun hiking and baking and got a little accomplished by dejunking and organizing my garage yesterday. Got the satisfaction of hauling an entire truckload full of junk to the dump!! Woohoo! Any way, after a long hiatus, I am finally back and participating in the Daring Bakers' Challenge for the month!

Kat of The Bobwhites was our August 2012 Daring Baker hostess who inspired us to have fun in creating pate a choux shapes, filled with crème patisserie or Chantilly cream. We were encouraged to create swans or any shape we wanted and to go crazy with filling flavors allowing our creativity to go wild!

I didn't go too wild - I kept with the swan shape (or as good as I could manage any way...) and filled them with a mocha (chocolate & coffee) pastry cream. The result was an amazing tasting dessert. The pastry cream was a hit and I will make it over and over again!!


Pate a Choux
Recipe from the Daring Bakers' (can't be doubled)

Ingredients:
  • ½ cup (120 ml) (115 gm) (4 oz) butter
  • 1 cup (240 ml) water
  • ¼ teaspoon (1½ gm) salt
  • 1 cup (240 ml) (140 gm) (5 oz) all-purpose flour
  • 4 large eggs
Method:
  1. Line at least two baking sheets with parchment paper. Preheat oven to moderately hot 375°F/190°C/gas mark 5 .
  2. In a small saucepot, combine butter, water, and salt. Heat over  medium heat until butter melts, then remove from stove.
  3. Add flour all at once and beat, beat, beat the mixture until the dough pulls away from the sides of the pot.
  4. Add one egg, and beat until well combined. Add remaining eggs individually, beating vigorously after each addition. Resulting mixture should be somewhat glossy, very smooth, and somewhat thick.
  5. Using a ¼" (6 mm) tip on a pastry bag, pipe out about 36 swan heads. You’re aiming for something between a numeral 2 and a question mark, with a little beak if you’re skilled and/or lucky.
  6. Remove the tip from the bag and pipe out 36 swan bodies. These will be about 1.5" (40 mm) long, and about 1" (25 mm) wide. One end should be a bit narrower than the other.
  7. Bake the heads and bodies until golden and puffy. The heads will be done a few minutes before the bodies, so keep a close eye on the baking process
  8. Remove the pastries to a cooling rack, and let cool completely before filling.
 
 Next up, make the pastry cream:

Mocha Pastry Cream
Recipe minimally adapted from the Daring Bakers'

Ingredients:
  • 1 cup (225 ml.) whole milk
  • 2 Tbsp. cornstarch
  • 6 Tbsp. (100 g.) sugar
  • 1 large egg
  • 2 large egg yolks
  • 2 Tbsp. (30 g.) unsalted butter
  • 1 Tsp. Vanilla
  • 1/4 cup whole milk
  • 3 oz dark chocolate
  • 1 1/2 tsp instant espresso powder
Method:
  1. Dissolve cornstarch in ¼ cup of milk. Combine the remaining milk with the sugar in a saucepan; bring to boil; remove from heat.
  2. Beat the whole egg, then the yolks into the cornstarch mixture. Pour 1/3 of boiling milk into the egg mixture, whisking constantly so that the eggs do not begin to cook.
  3. Return the remaining milk to boil. Pour in the hot egg mixture in a stream, continuing whisking.
  4. Continue whisking (this is important – you do not want the eggs to solidify/cook) until the cream thickens and comes to a boil. Remove from heat.
  5. Combine 1/4 cup whole milk, chocolate and espresso powder in a small, microwave safe container. Microwave on low heat until chocolate is melted and mixture is smooth. Mix chocolate mixture, butter and vanilla into pastry cream and stir until smooth and incorporated. Chill until ready to use. 

 To assemble your swans:

  1. Take a swan body and use a very sharp knife to cut off the top 1/3rd to ½.
  2. Cut the removed top down the center to make two wings.
  3. Dollop a bit of filling into the body, insert head, and then add wings. 
  4. Your first attempt will probably not look like much, but the more you make, the more your bevy of swans will become a beautiful work of swan art.


Okay, so I'm not going to lie, these were a bit of work, but they weren't nearly as difficult or finicky as I thought they were going to be. My choux swans didn't puff up quite as much as I wanted and they didn't look as seamless as I thought they should once they were all assembled, but I was pleased with the overall result. Probably with a little practice, I could make some pretty cute little swans!!

Thanks so much Kat for hosting such a spectacular challenge! Great idea and it was fun to have something new and challenging to try out. :)

Happy Baking my Friends!

19.8.12

S'mores bars with Nuttella Marshmallows


I've been meaning to make marshmallows  for quite a while now. Then the other day (national s'mores day) Bon Appetit featured the top 10 s'mores recipes from various food blogs and there was one from Cherry Tea Cakes for S'mores bars where you made the marshmallow layer from scratch. I was pretty stoked to make them right away. I changed the recipe slightly by putting nuttella flavour into the marshmallow layer and putting peanut butter in the top chocolate layer, but other than that I was quite true to the original recipe. They are addictive and delicious and you've got to make them this summer. Its well worth the effort.


Graham Layer
Minimally adapted from Cherry Tea Cakes

Ingredients:
  • 2 1/2 cups + 2 tbsp all purpose flour
  • 1 cup golden brown sugar, lightly packed
  • 1 tsp baking soda
  • 3/4 tsp kosher salt
  • 7 tbsp cold, unsalted butter
  • 1/3 cup agave syrup
  • 5 tbsp low fat milk
  • 2 tbsp vanilla extract
Method:
  1. Add flour, sugar, soda, and salt to the large bowl of the food processor. Pulse a couple of times to combine. Add the butter and pulse until the mixture is crumbly and butter is evenly distributed through the dry ingredients.
  2. Whisk together the agave, milk and vanilla until combined. Add to the flour mixture and pulse until just combined.
  3. Press mixture into a 9x13 inch rectangle baking dish that has been lined with parchment paper.
  4. Preheat oven to 350F. Bake in preheated oven for 20-25 minutes or until semi-firm to the touch. Remove from oven and set aside to cool. Make the marshmallow layer while it cools.
Marshmallow Layer
Minimally adapted from Cherry Tea Cakes

Ingredients:
  • 1 1/2 packages unflavoured gelatin
  • 1/2 cup ice cold water, divided
  • 3/4 cup granulated sugar
  • 1/2 cup corn syrup
  • 1/8 tsp kosher salt
  • 1/2 tsp vanilla extract
  • 2 heaping tbsp nuttella
Method:
  1. Fit stand mixer with whisk attachment. Combine 1/4 cup cold water and the gelatin in the bowl of the mixer and leave to sit while you make the syrup.
  2. In a medium saucepan, combine 1/4 cup ice water, sugar, corn syrup and kosher salt. Cover and cook on medium heat for 3 minutes. Don't worry about stirring it.
  3. Remove the lid and attach candy thermometer to the side of the pan. Boil for approximately 7 minutes or until the mixture reaches 240 degrees and then remove from heat immediately.
  4. Put stand mixer on low speed and churn the gelatin mixture for a couple of turns. Then with mixture still on low, slowly pour in the hot syrup mixture (BE CAREFUL, THE MIXTURE IS EXTREMELY HOT AND CAN BURN YOU).  When all the syrup is incorporated, cover the front and sides of the mixer with a tea towel and turn the mixer up to high speed. Continue to whip until mixture is luke warm - 12 minutes. In the last minute of whipping, add vanilla and nuttella and mix until incorporated.
  5. Pour marshmallow cream onto the graham cracker base. Sprinkle lightly with powdered sugar.
  6. Let set for 1 hour before topping with chocolate peanut butter layer.


Chocolate Peanut Butter Layer
Minimally adapted from Cherry Tea Cakes

Ingredients:
  • 3/4 cup semi sweet chocolate chips
  • 4 tbsp peanut butter
  • 1 tbsp corn syrup
  • 1/4 tsp vanilla
Method:
  1. Combine all ingredients in microwave safe bowl. Microwave on low heat at 30 second intervals stirring well each time until mixture is completely melted. Pour over marshmallow layer and spread evenly.
  2. Allow to set for a few hours. Enjoy!

So, these are a little bit of work, but they're delicious. I highly recommend making them as a dessert for one of your end of summer get togethers with friends and family. It makes a nice big pan of squares that will feed lots of people.

Happy Baking my Friends!

13.8.12

Mango Lime Cheesecake

 I had originally planned to make this as part of the most recent Mom's Crazy Cooking Challenge, but didn't have time to get around to it in time for the posting date. My crazy study and exam schedule this summer has really been putting a damper on my blogging efforts! However, I finally got around to making this recipe and just had to share it with you! It's delicious, decadent and flavourful with such a lovely balance of flavours. You simply must try this cheesecake out. :)

I have heavily adapted the recipe from the cookbook No More Secrets - Recipes from the Cow Bay Cafe. Her recipe made a huge cheesecake and had a whole load of cream cheese in it. So I adapted it to be my version of her amazing recipe. The results were spectacular and you must try this recipe out and soon. You won't be sorry!


Mango Lime Cheesecake
Recipe heavily adapted from No More Secrets

Ingredients:

Crust:
  • 1 cup flour
  • 1/2 cup cold unsalted butter
  • 2 tbsp white sugar
  • 1 yolk from large egg
  • 1/2 tsp vanilla extract
Batter:
  • 3 x 250ml cream cheese (I used low fat)
  • heaped 1/2 cup white sugar
  • 3 large eggs
  • 1 can mango pieces, drained except for two tbsp of the juice
  • zest and juice from one lime
Topping:
  • 1 cup sour cream
  • 1/3 cup white sugar
  • zest and juice of 1 large lime
Method:
  1. Preheat oven to 350F. Line the bottom of a 9 inch springform pan with parchment paper.
  2. For the crust: place all crust ingredients in the food processor. Pulse until mixture comes together and is crumbly, but not clumping. Press the crust mixture into the bottom of the pan and a little way up the sides.
  3. For the batter: Place the cream cheese (cube it up) in the bowl of the food processor, add sugar, eggs, mango pieces and reserved juice, lime zest and juice. Pulse until the mixture is smooth. You may need to scrape down the sides a couple of times. Pour the batter over the crust, then put the pan on a cookie sheet and into the preheated oven. Bake for one hour. The cheesecake is done when it is light brownish around the edges, slightly puffed in the pan and a little wobbly when the pan is shaken gently. The top should be rather dull looking in the middle (if it's shiny, it is not done).
  4. For the topping, mix together sour cream, lime zest and juice until the sugar is well dissolved.
  5. Spread the topping mixture on the still-hot cheesecake and let cool to room temperature. Refrigerate for six hours.
This is one of the easiest cheesecakes ever! You don't have to fuss with a water bath because the topping hides cracks in the top and because you don't have to use a waterbath, you don't have to bake on such a low temperature (read - low temp takes forever to bake!!). Pretty rare to find a baked cheesecake that will be outta the oven in an hour! Try it out peeps, you'll love it.


What have you been up to lately? Anything exciting? Do share!! Until then, happy baking my friends!

23.7.12

Homemade Snickers for SRC!

Good Morning friends! Its been a while. :) It is time for our SRC reveal and this month I was assigned a challenge - I was assigned Heidi's blog which is in Danish. I didn't have the proper internet browser (she recommends google chrome) to automatically translate her page so it was quite labour intensive to translate her page manually using google translator, however, it was well worth it. The snickers bars I made were delicious - so delicious in fact that my family devoured them!!

Lets get started -

first make the chocolate bottom

Ingredients:
  • 250 g. good quality milk chocolate
  • 1/2 cup peanut butter
Method:
  1. Melt chocolate in saucepan over low heat. Stir in peanut butter until combined.
  2. Pour mixture into a square pan (I used 8x8) lined with parchment paper. Spread into an even layer. Let the mixture harden in the fridge.
Next make the nougat layer

Ingredients:
  • 50g salted butter
  • 2 1/2 cups sugar
  • 1/2 cup evaporated milk
  • 2 1/2 cups marshmallow fluff
  • 1/2 cup peanut butter
  • 2 1/2 cups salted peanuts, roughly chopped
  • 1 tsp vanilla extract
Method:
  1. Melt butter in sauce pan over medium heat. Once butter is melted, add sugar and evaporated milk and bring mixture to a boil. Stir constantly. Heat through until sugar has dissolved.
  2. Add fluff, peanut butter and vanilla and stir until fluff and peanut butter are melted and mixture is smooth. Remove from heat and fold in chopped peanuts.
  3. Let cool slightly and pour over chocolate base. Place in fridge to set up competely.
Next up, make the caramel layer.

Ingredients:
  • 400g toffee/ caramel (the kraft caramel squares work well here)
  • 1/2 cup whipping cream
Method:
  1. Melt toffee and whipping cream together in saucepan over medium heat until mixture is completely smooth. Remove from heat and pour over hardened nougat layer. Place in fridge to harden completely.
Finally, make the chocolate top:

Ingredients
  • 250 g good milk chocolate
  • 1/2 cup peanut butter
Method:
  1. Melt chocolate over low heat in a medium saucepan. Add peanut butter and stir until melted and mixture is smooth. Pour over hardened caramel layer. Place back in fridge to set up completely.
Once bars have hardened and set up in the fridge, remove from the pan and cut into squares. Enjoy!

My family enjoyed these so much that I didn't get a chance to take any photos, so I borrowed a photo from Heidi's blog. Here's what they look like -
Photo not my own - used from Heidi's blog

I am planning to make them again to photograph them and will update this post with my own photos when I have a chance!

Can't wait to see what all the other group C bloggers came up with this month!

Happy baking my friends!

24.6.12

Decadent Desserts Class with Tina Bacon


About a month ago I had the opportunity to attend a baking class called Decadent Desserts at Well Seasoned. The class was put on by Tina Bacon, owner and founder of the Pink Spatula. Tina is a fantastic pastry chef and creates the most amazing hand crafted marshmallows I've ever tasted (peanut butter ripple marshmallows anyone?!! - try that in a s'more!!). Check our her website for beautiful photos of her dessert offerings and where to find her hand crafted marshmallows.


During the class we made Individual German Chocolate Cakes (pictured above), oreos (pictured below), burnt sugar ganache mini tarts, and butterscotch pots de creme topped with dark chocolate pudding. It was an ambitious evening full of delicious, calorie-laden treats, handy tips and great recipes. Tina kindly allowed me to share the recipe for the burnt sugar ganache mini tarts with you (thanks Tina!!). I made them at home again yesterday to make sure the recipe turned out as well under my hand as Tina's professional hand and sure enough, it was a slam dunk!! Delicious and addictive. :)

First step for these delicious little guys is to make the miniature sweet tart dough (makes about 32 mini tarts):

Miniature Sweet Tart Dough
Recipe by Tina Bacon

Ingredients:
  • 1 cup (8 oz) unsalted butter, at room temperature
  • 1 large egg
  • 1 tsp vanilla
  • 2 3/4 cups (12 1/2 oz) all-purpose flour
  • 1/8 tsp fine sea salt
  • 5 1/2 tbsp (2 1/3 oz) sugar
Method:
  1. Cut butter into small cubes and set aside.
  2. In a small bowl stir together egg and vanilla with a fork.
  3. Measure flour, sugar and salt into a food processor bowl. Pulse together a few times to combine. Add butter and pulse till it's the size of rice. While still pulsing, slowly pour egg/ vanilla mixture through tube and mix just till it begins to form a dough. Turn out onto lightly floured surface and knead a couple times to form a smooth dough.
  4. Portion all of the dough first using a 1 1/2 - 2 tsp measure. Next, roll all the dough into balls and place in a miniature muffin pan (see photo below). Form into tart shells using either a tart tamper or your fingers to form a thin, even crust.
  5. Bake in 350F oven for about 10 minutes or till edges are golden. Allow to cool in pan 10 minutes, then place tart shells on a rack to cool completely. Store airtight. Can be frozen.

Burnt sugar ganache tartlets made by Tina in her class
 Next up, make the burnt sugar ganache. Please note that I have adapted this recipe slightly - it originally called to make the caramel using the dry method, but having had a couple of really bad experiences in the past with this method, I opted instead to use the wet method. :)

Burnt Sugar Ganache
Recipe from Tina Bacon (Tina adapted the recipe from Pierre Herme's Faubourg Pave)

Ingredients:
  • 1 3/4 cups (305g) chopped dark chocolate
  • scant 3/4 cup sugar
  • 1/4 cup water
  • 4 tsp unsalted butter
  • pinch of fine sea salt
  • scant 1 1/4 cups heavy cream
  • 1 1/2 cups (12 oz) unsalted butter, at room temperature
Method:
  1. Place sugar in a pile in the middle of a saucepan. Carefully pour water in around the pile of sugar. Over medium high heat, gently and carefully stir the water and sugar mixture until the sugar is dissolved. Once the sugar has dissolved, stop stirring. Let it bubble until it reaches a nice golden brown colour and remove from heat. Stir in first amount of butter and salt until melted. Add cream (careful - it will bubble like crazy and puff up), stirring well. Return to a boil, remove from heat.
  2. Pour half of caramel over chocolate, stir to create ganache. Stir in remaining caramel till smooth. Set aside to cool till only slightly warm, about 10 minutes. Beat butter till malleable. Gently stir small amounts at a time into ganache with a wooden spoon till smooth. Don't use a whisk for this part - you don't want to incorporate air into this mixture.

Adding butter to the flour for the pastry dough
 To assemble your tarts - pour burnt sugar ganache into each tart until full. Sprinkle with coarse sea salt. Allow to set up. Enjoy!

Dough balls waiting to be formed into tart shells

Baked tart shells (my at home attempt)

Burnt sugar ganache tarts (my at home attempt)
This was a fantastic class and I would highly recommend attending any of Tina's baking classes at well seasoned. You'll learn a lot and get to sample loads of delicious food along the way (remember, calories don't count on cooking class nights).


This post has been linked up with Whatcha Baking Wednesdays over at Cajun Sugar Pie.

Happy Baking my Friends!

11.5.12

Mr. Big Brownies


My hubby was just in Winnipeg visiting his lovely Grandparents. They're the sweetest people and like his mom, they just love to give you little "gifties". Little gifts that don't really cost much and don't seem like much, but they're a little something to brighten your day, often for trivial occasions, or no occasion at all. This time Scott's Grandpa gave him a box of Mr. Big Snack Cakes that he had picked up last time he went to town. I laughed so hard when he brought them back home and thought, oh geez, what are we going to do with these? Well, inspiration struck! Might as well put them in a brownie. So that's what I did.

For this recipe, I adapted one of Anna Olson's recipes from her newest cookbook Back to Baking. Which is a pretty spectacular book (if you haven't already heard my praises for this cookbook, check out my post about me attending a cooking class hosted by Anna that demonstrated recipes from her book here)!!


Mr. Big Brownies
Recipe adapted from Anna Olson's Back to Baking

Ingredients

Brownies:
  • 1/2 cup butter
  • 4 oz semisweet chocolate chips
  • 3 oz unsweetened chocolate, chopped
  • 1 tbsp instant coffee granules
  • 1/2 cup granulated sugar
  • 1/2 cup packed brown sugar
  • 2 eggs
  • 2 tsp vanilla extract 
  • 2/3 cups all purpose flour
  • 1/4 tsp baking soda
  • 1/8 tsp salt
  • 4 Mr. Big Snack Cakes
Frosting:
  • 3 oz milk chocolate chips
  • 2 tbsp butter
  • 1 tsp instant coffee granules
  • 1/2 package cream cheese, softened
  • 1 cup icing sugar
Method:
  1. Preheat oven to 350F. Line an 8 inch square pan with parchment paper so it hangs over the edges slightly.
  2. Melt the butter, chocolates, and instant coffee in a medium saucepan over low heat, stirring constantly until melted. Remove the pot from the heat.
  3. Stir in the sugars, then add the eggs one at a time, stirring well after each addition. Stir in the vanilla.
  4. Stir the flour, baking soda, and salt into the chocolate mixture, mixing just until blended.
  5. Pour half the batter into the pan (just until the bottom of the pan is covered). Top with the Mr. Big Snack Cakes. Pour remaining batter to cover the snack cakes. Smooth top.
  6. Bake in preheated oven for about 35 minutes, until the top of the brownies take on a dull finish. Cool completely in the pan before frosting.
  7. To make the frosting, melt the chocolate, butter, and instant coffee in the microwave, being careful not to burn the chocolate. Beat the cream cheese to soften in the bowl of a stand mixer. Pour in the melted chocolate mixture and beat until blended. Add icing sugar and blend. Remove the brownies from the pan and ice the top of the entire brownie. Let set for an hour before slicing.

These are some seriously delicious brownies! You've got to try them. :) Would probably work well with Wagon Wheels too!! Yah, I'm a little weird, but it works. :D Hope you've got lots to look forward to this weekend. I know I do! Its my Birthday and Mothers' Day on Sunday. So its going to be a good weekend. Wish I lived closer to my Momma though.


Happy Baking my Friends! Enjoy the weekend.

23.4.12

Birthday Cake Oreo Cookie Bark & Zucchini Carrot Cake for SRC


Guess what? Its time for Secret Recipe Club again! And I'm super excited about my assignment this month. This month I was assigned Mom's Crazy Cooking written by Tina. Tina is amazing! I follow her blog regularly and am always in awe of the delicious recipes she makes and how frequently she posts. In addition to her crazy blogging, Tina also hosts the Crazy Cooking Challenge every month which I have recently started participating in. What fun! If you're looking for another cooking challenge to join with supportive and friendly participants, check this challenge out!!

With all of Tina's delicious recipes, I couldn't just choose one... so I made Cookie Bark and Zucchini & Carrot Cake with Lemon Cream Cheese Frosting. I've posted the recipe for Cookie Bark below because I adapted it slightly, but for the Zucchini & Carrot Cake I didn't change a darn thing but the presentation, so I'm going to send you over to Tina's blog for that recipe.

Birthday Cake Oreo Cookie Bark
Recipe minimally adapted from Mom's Crazy Cooking

Ingredients:
  • 1 lb milk chocolate melting wafers
  • 1 lb white chocolate melting wafers
  • 5 birthday cake 100th anniversary oreo cookies
  • 1/3 cup mini chocolate chips
Method:
  1. Melt 1 lb milk chocolate melting wafers in the microwave, stirring at 40 second intervals until mixture is smooth. Spread into a thin layer on a piece of parchment paper. Set aside at room temperature until completely set (mine took about 15 minutes, but can take up to an hour if you live somewhere warm).
  2. Melt 1 lb white chocolate melting wafers using the same method as above. While the chocolate is melting, roughly chop the oreo cookies and set aside.
  3. Spread melted white chocolate onto milk chocolate layer and immediately sprinkle with the oreo cookies and the mini chocolate chips, pressing in lightly. Let set completely - about an hour. Then break into rough pieces to serve.
*NOTE: Don't put chocolate in the freezer to set - otherwise the top layer of chocolate won't adhere as well to the base layer and your bark will break into separate layers when you break it into pieces. Be patient and let it set at room temp!!


It makes quite a lot of bark, but it goes fast!! So if you're having a party with lots of friends, you might want to double the recipe. :)


 And here is a picture of my zucchini carrot cake with lemon cream cheese frosting - I cut out circles of cake using a round cookie cutter and then topped with an ice cream scoop of frosting. Then I finished it with a light sprinkle of icing sugar. Simple and beautiful! This would make the perfect plated dessert to wrap up a dinner party - and just between us - this is super easy to make!!


Happy Baking my Friends! Hope you'll use the  blog hop to check out what all the other Group C'ers made for this month's challenge. You might find a new blog or two to follow!! :)