Showing posts with label cheesecake. Show all posts

30.12.11

Lemon Cheesecake Mousse Tart


I just love being on vacation - I actually have time for blogging and cooking and baking! Its so enjoyable and I feel like I'm a far better blog owner when I'm not just trying to get a post up for the sake of posting.  I've taken some time off between Christmas and New Years and it has been really nice - my family is staying with us so I've had a chance to "show off" with some delicious meals and some new recipes. This lemon cheesecake mousse tart from Anna Olson's cookbook In the Kitchen with Anna is a great dessert for occasions like this - where you want people to ohhh and ahhhh over the dessert and rave about it for a while. Its so delicious and really very simple to whip up. And of course, I have to mention how few ingredients this recipe has in it - you'll probably have a lot of them on hand already.


Lemon Cheesecake Mousse Tart
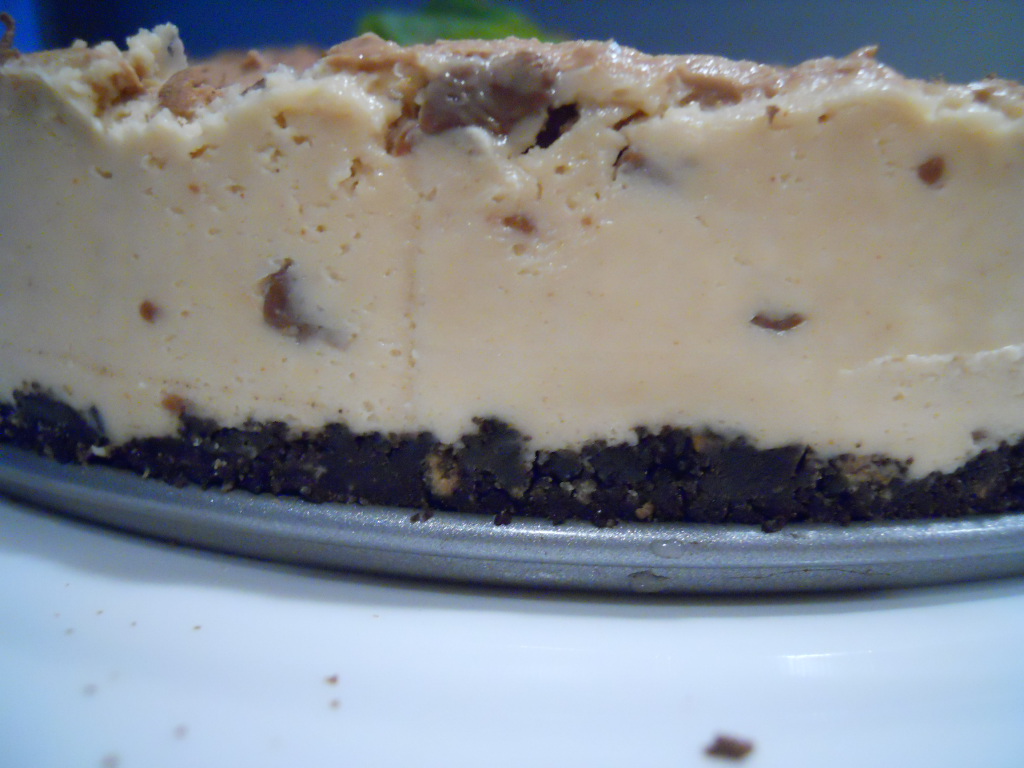
Recipe adapted from In the Kitchen with Anna

Crust Ingredients:
  • 2 cups all purpose flour
  • 1/2 cup sugar
  • 1/2 tsp finely grated lemon zest
  • 1/4 tsp fine salt
  • 1 cup unsalted butter, cut into pieces and chilled
  • 1 large egg
  • 1 large egg yolk
Mousse Ingredients:
  • 1 1/2 cups whipping cream
  • 12 oz cream cheese, at room temperature
  • 2/3 cup sugar
  • 1 tbsp finely grated lemon zest
  • 1/2 cup lemon juice
  • dash vanilla extract
  • raspberries, for garnish
Method:
  1. For the crust, stir the flour, sugar, lemon zest and salt to combine. Pour into the food processor and  add butter. Pulse until the mixture has the texture of coarse meal. Add the egg and the yolk and process just until the dough comes together. Shape the dough into a disk and chill for at least an hour.
  2. On a lightly floured surfact, roll our dough to just less than 1/4 inch thick (this didn't work for me, so I just pressed the dough into the tart pan and up the sides). Sprinkle an 8 inch tart pan with a removable bottom lightly with flour and line with pastry. Trim the edges and chill for an hour.
  3. Preheat oven to 350F. Place tart shell on a baking sheet. Dock the bottom of the pastry with a fork, line the shell with foil and weigh down with dried beans, rice or pie weights. Bake for 15 minutes then remove the weights and bake for another 8-10 minutes, or until the centre of the tart shell appears dry and the edges are browned. Let cool while preparing the mousse.
  4. For the mousse, whip the cream to soft peas and chill. In a separate bowl beat the cream cheese until smooth and beat in the sugar and lemon zest, scraping down the sides of the bowl often. Beat in the lemon juice and vanilla. Fold in the whipped cream in two additions. Dollop the mouse (or pipe with a piping bag) into cooled shells. Garnish with fresh raspberries and chill until ready to serve. Gently remove outside ring and bottom of tart pan before plating.

You could also make 8 4-inch mini tarts instead of one big one if you want something cute for a dinner party. Hope you enjoy this recipe!! I'm heading off to enjoy my last weekend of freedom before I have to head back to work.

I've linked up this post with Whatcha Baking Wednesday over at CajunSugarPie.Com - head on over there to check out some more scrumptious dessert recipes to test out (or even just drool over if you're into that!).

Happy Baking my Friends!

25.6.11

Cheesecake Chocolate Chip Cookie Bars

So I'm pretty sure the first thing you're going to notice about this post is that I don't have any photos of the finished product... I'm pretty sure they disappeared too fast for me to take photos of! Thats my story and I'm sticking to it. For photos of how the dessert looks after its baked, head on over to Tracey's blog aptly named Tracey's Culinary Adventures. On her blog you'll find beautiful photos and all kinds of deliciously yummy recipes. I have a whole list of things bookmarked from her page to bake and cook, but its nearly impossible to get through that list because she keeps adding more and more delicious posts by the day. :)


Now that we've established that, I have to tell you - this recipe is delicious - I mean who wouldn't like a layer of cheesecake sandwiched between chocolate chip cookie goodness right?! Don't overbake these - they're meant to be a little chewy! Make these for that summer BBQ you have to attend or bake them and bring a plate to your neighbor... I promise you'll find yourself making all kinds of friends because of your baking "skills" (even though these bars are so dead easy that you could likely make them in your sleep!!). So? What are you waiting for? Go round up the ingredients and get started!!!


Cheesecake Chocolate Chip Cookie Bars

Recipe adapted from Tracey's Culinary Adventures


  • 1 cup butter

  • 1 cup light brown sugar

  • 1/2 cup granulated sugar

  • 1 tbsp vanilla extract

  • 1/2 tsp salt

  • 1 tbsp cider vinegar

  • 1 egg

  • 1 tsp baking soda

  • 2 cups all-purpose flour

  • 2 cups semi-sweet chocolate chips

  • 8 oz pkg cream cheese, softened

  • 1/2 cup granulated sugar

  • 1 egg

  • 1 tsp vanilla

Method:


  1. Preheat oven to 350F. Spray a 9x13 inch pan with nonstick spray.

  2. In the bowl of a stand mixer, fitted with the paddle attachment, cream the butter, brown sugar, the first amount of white sugar, vanilla and salt on medium speed until fluffy, about 3-4 minutes.

  3. Beat in the first egg until well combined. With the mixer on low speed, mix in the flour and the baking soda and mix until just incorporated. Stir in the chocolate chips. Divide the dough in half and press one half of the dough into the bottom of your prepared pan. Set aside the other half of the dough.

  4. In the bowl of a stand mixer fitted with the paddle attachment, beat the cream cheese until fluffy, about 2-3 minutes. Beat in the second amount of sugar, second egg, and the second amount of vanilla until just incorporated. Pour the cream cheese mixture over the cookie layer in the pan and spread to the edges of the dish so you have one smooth, even layer.

  5. Use the second half of the cookie dough (that you set aside earlier) and press in a layer over the cream cheese. The easiest way to do this is to take chunks of the dough, flatten into disks, and layer over the cream cheese mixture. It doesn't matter if the cream cheese part is completely covered, because the cookie dough will spread during baking. See below for a couple pictures of what mine looked like before I baked it.

  6. Bake in preheated oven for 35-40 minutes, or until the top is brown and cooked through (the bars will begin to pull away slightly from the sides of the pan). Transfer pan to a wire rack to cool completely. Store in the refrigerator.

Absolute deliciousness! My sister couldn't stop eating them. I think I'll likely make these for the next treat day I do for our office. :) Hope you are having a nice weekend and getting some nice weather.

Happy Baking my Friends!

3.4.11

Caramel Apple Cheesecake

Alright, let me just start this post off with a little disclaimer: This is another Bobby Flay Throwdown recipe, so that means it requires a lot of ingredients, lots of time, and a whole lot of effort. This is another all-out recipe... but the time it takes to make all the components from scratch is well worth it! This cheesecake is so light and fluffy and decadently rich. A little bit goes a long way and this cheesecake will feed a lot of people. So if you're up for a culinary challenge, get on board with this recipe and make a plan to make it for your next dinner party. I made it for our Superbowl party in February and it was well received by all our guests. :)
Be sure to read the entire recipe before starting out and plan out your timeline accordingly. I say this because I didn't do that and it ended up with me almost pulling an all-nighter to finish this cheesecake before our Superbowl party the next day!!!


This recipe is from one of my most recent cookbook additions - Bobby Flay's Throwdown. There are three components to this recipe including the cheesecake, the apples and the apple-caramel sauce. Make them in the order specified below for best results.


Cheesecake


Ingredients:


  • cooking spray

  • 8 whole graham crackers

  • 1 cup lightly toasted walnuts, coarsely chopped

  • 2 tbsp light brown sugar

  • 5 tbsp unsalted butter, melted

  • 1/2 cup plus 2 tbsp granulated sugar

  • 1 tbsp grated orange zest

  • 3 (8-oz) packages cream cheese, at room temperature

  • 1/2 cup plus 2 tbp finely packed light muscovado sugar (brown sugar works too)

  • 4 large eggs, at room temperature

  • 1 large vanilla bean, seeds scraped out, seeds and pods reserved

  • 1 tsp pure vanilla extract

  • 1/2 tsp fine salt

  • 1/2 cup heavy cream

Method:


  1. To make the cheesecake, preheat the oven to 350F. Spray the bottom and sides of a 9-inch springform pan with cooking spray.

  2. Combine the graham crackers, 1/2 cup of the walnuts, and the brown sugar in a food processor and process until finely ground. With the motor running, add the butter through the feed tube and process until themixture just comes together. Pat the mixture evenly into the prepared pan, place it on a baking sheet, and bake in the oven until light golden brown and just set, about 8 minutes. Cool completely on a wire rack.

  3. Combine 1/4 cup of the granulated sugar and the orange zest in a food processor and process until combined.

  4. Put the cream cheese in the bowl of a stand mixer fitted with the paddle attachment, and beat until light and fluffy, 3-4 minutes. Add the orange sugar, remaining 1/4 cup plus 2 tbsp of granualted sugar, and the muscovado sugar, and beat until sugar is incorporated and the mixture is light and fluffy. Add the eggs one at a time, and mix until just incorporated, scraping the sides and bottom of the bowl. Add the vanilla seeds (save the pod for the apples), vanilla extract and salt and beat until combined. Add the heavy cream and mix until just combined.

  5. Scrape the mixture into the cooled crust. Set the springform pan on a large piece of heavy duty aluminum foil, and fold the foil up the sides to surround it. Set the pan in a large roasting pan. Pour hot tap water into the roasting pan until it reaches about halfway up the sides of the springform pan. Bake until the edges of the cake are slightly puffed and set and the center still jiggles, about 55 minutes.

  6. Turn off the heat, prop the oven door open with a wooden spoon, and leave the cheesecake in the water bath in the oven for 1 hour.

  7. Remove the springform pan from the water bath, place it on a wire rack, and cool to room temperature, 2 hours. Then cover the pan and refrigerate until the cheesecake is chilled through, at least 4 hours and up to 24 hours.


Apples


Ingredients:


  • 2 cups apple juice

  • 1/4 cup granulated sugar

  • 1 tbsp unsalted butter, cold

  • 3 granny smith apples, peeled, cored and thinly sliced

  • 3 fuji apples, peeled, cored, and thinly sliced

  • 1/4 cup calvados or other apple brandy

  • 1/2 cup creme fraiche

Method:


  1. Bring the apple juice, sugar and the reserved vanilla bean pod to a boil in a large saute pan over high heat. Cook until slightly thickened and reduced to 1/2 cup, 10 minutes. Remove the vanilla bean pod and discard.

  2. Stir in the butter until melted. Add the apples and cook, stirring occasionally, until lightly carmelized and soft, 8-10 minutes. Add the calvados and simmer until reduced by half. Transfer the apples to a plate and let cool slightly.

  3. To serve, remove the foil and sides from the springform pan. Spread the creme fraiche over the cheesecake. Top with the warm apple topping, drizzle liberally with the caramel sauce, and sprinkle with the remaining 1/2 cup chopped walnuts. Serve additional caramel sauce on the side.

Apple-Caramel Sauce

Ingredients:


  • 1 1/2 cups granulated sugar

  • 3/4 cup heavy cream, hot

  • pinch of fine salt

  • 3 tbsp calvados or other apple brandy

  • 1/2 tsp pure vanilla extract

Method:


  1. Combine the sugar and 1/2 cup water in a medium saucepan and bring to a boil over high heat. Cook, swirling the pot occasionally to even out the colour, until amber, 10-12 minutes.

  2. Slowly add the heavy cream and salt to the caramel. Whisk until smooth. Remove from teh heat, and stir in te calvados and vanilla extract. Serve warm.
If you decide to try out this recipe, I would recommend halfing the recipe for the apples and the apple-caramel sauce. Otherwise you'll be stuck with lots of leftover apples and caramel sauce and no more cheesecake to eat them with!! I loved this recipe, the quality of the cheesecake was absolutely spectacular and the addition of the creme fraiche on top of the cheesecake really helped to counter the sweetness of the cheesecake and the caramel sauce. I hope you get a chance to try out this recipe and that you enjoy it as much as we did. Happy Baking my Friends!

26.1.11

The Daring Bakers Challenge - January 2011 - Biscuit Joconde Imprime/ Entremet

Since I joined the Daring Bakers in August I have constantly been amazed at the cool things we've made. I have conquered a number of culinary adventures that I never dreamed I would be able to complete. And then this challenge came along... it seemed so complex, so difficult, and as though I would never be able to successfully complete the challenge. I spent a few sleepless nights worrying about how this dessert would turn out...

The January 2011 Daring Bakers' challenge was hosted by Atheroshe of the blog accro. She chose to challenge everyone to make Biscuit Joconde Imprime to wrap around an Entremets dessert. You should check out her blog for some beautiful entremets - she is so very talented and really did host an amazing challenge!


Now, despite being more terrified and stressed out about a challenge than I have been since I joined, I really enjoyed making this dessert and most definitely will try it again. I would love to perfect this technique - it is such a beautiful way to present desserts for special occasions and always leaves people wondering how you achieved such beauty in a dessert! I chose to make individual desserts as I was having a dinner party that weekend, so I figured I may as well make them. Even if they looked ugly, at least they would taste good!
I layered a no-bake vanilla bean cheesecake which I adapted from my mother-in-law's go-to cheesecake recipe, with a chocolate-kahlua mousse. I topped with sweetened whipped cream and a small piece of joconde imprime. I found the mousse to be far too rich for my taste, however my husband really loved it as did my dinner party guests, so I think this may just come down to my personal preference. However, I would highly recommend the no-bake cheesecake recipe (please see below for details).
Since this is going to be such a long post, lets get on with the instructions. Be sure to read through all the instructions prior to attempting this recipe!!!! Maybe read through them a couple of times... :)


Step 1: Make the Joconde Sponge

Ingredients:

  • 3/4 cup almond flour
  • 1/2 cup plus 2 tbsp icing sugar
  • 1/4 cup cake flour
  • 3 large eggs
  • 3 large egg whites
  • 2 1/2 tsp white granulated sugar
  • 2 tbsp unsalted butter, melted

Method:

  1. In a clean mixing bowl whip the egg whites and white granulated sugar to firm, glossy peaks. Reserve in a separate clean bowl to use later.
  2. Sift almond flour, confectioners sugar, cake flour in the dirty egg white bowl.
  3. On medium speed, add the eggs a little at a time. Mix well after each addition. Mix until smooth and light. Fold in 1/3 of reserved egg whites to lighten the batter. Fold in the remaining egg whites. Do not overmix.
  4. Fold in melted butter.
  5. Reserve batter to be used later.

Next Step: Make the Joconde Paste to pattern your sponge:

Ingredients:

  • 14 tbsp unsalted butter, softened
  • 1 1/2 cups + 1 1/2 tbsp icing sugar
  • 7 large egg whites
  • 1 3/4 cup cake flour
  • food colouring gel or paste

Method:

  1. Cream butter and sugar until light and fluffy. Gradually add egg whites. Beat continuously. Fold in sifted flour. Tint batter to desired colour (colours).
  2. Pipe batter into desired patterns on a silicone baking mat placed on an upside down baking sheet.
  3. Slide the baking sheet with the paste into the freezer for 15 minutes until hard.
  4. Remove from freezer. Quickly pour the joconde batter over the design. Spread evenly to completely cover the pattern of the decore paste.
  5. Bake at 475F until the joconde bounces back when slightly pressed, approx 15 minutes. It will bake fairly quickly, so do keep an eye on it.
  6. Cool. Do not leave too long or it will stick to the mat.
  7. Flip cooled cake onto parchment paper dusted with icing sugar, remove silpat carefully. Cake should be right-side up with your pretty pattern showing.


Next Step: Prepare the Molds for the Entremets:

  1. You can use a spring-form pan, biscuit cutter, ring molds, or PVC pipe cut approximately 3 inches high.
  2. Lay a piece of parchment paper on a baking tray. Stretch cling wrap over the bottom of the mold and up the sides. Be sure to pull it tight so it creates a smooth base for your dessert. Line the inside of the ring with a curled piece of parchment paper. Cut the paper to the top of the mold as this will make spreading the entremet layers easier.

Next Step: Preparing the Joconde for the Molds:

  1. Trim the cake of any dark, crispy edges. You should have a nice rectangle shape.
  2. Decide how high you want your joconde wrapper. Traditionally it should be about 1/2 the height of the mold.
  3. Once your height is measured, cut with a ruler into nice even strips. Besure strips are cut cleanly and ends are perfectly straight.
  4. Press the cake strips inside of the mold, decorative side facing out. Push and press the ends together to make a beautiful seamless ring around the mold.
  5. The mold is done and ready to fill.

No-Bake Vanilla Bean Cheesecake

Ingredients:

  • 1 pkg light cream cheese
  • 1/2 cup sugar
  • 2 tsp vanilla
  • 1 envelope dream whip
  • 1 vanilla bean

Method:

  1. Beat cream cheese & sugar until smooth & fluffy. Stir in vanilla and vanilla bean seeds. Prepare dessert topping according to package directions. Fold into cream cheese mixture.
  2. Spoon into individual molds until cream cheese mixture comes up about 1/2 way to the top.
  3. Leave in fridge overnight to let cheesecake set. Then make the mousse.


Make the Kahlua-Chocolate mousse based on the mousse part of this recipe. Spoon on top of set cheesecake mixture and level the tops as best you can. Mousse should come all the way to the tops of each mold.

Serve by garnishing with whipped cream & chocolate shavings. Enjoy!

Wow! What a lot of work and a lot of steps! But it really was worth the effort. Despite not being perfect, they really were beautiful and so much fun to serve at my dinner party. Thank you so much Atheroshe for sharing such an amazing technique with us Daring Bakers. This challenge was oh-so-daring, but I learned so much and enjoyed every step of the way.


Happy Baking my Friends!

2.1.11

Toblerone Cheesecake

Got some leftover Toblerone? Almost sick of eating that leftover holiday chocolate? Well, use it for this delicious Toblerone cheesecake! Bring it to the office and be done with it. Your co-workers will eagerly gobble it up and you will have solved your I-don't-feel-like-eating-another-chocolate problem! Its that easy my friends!


And I guarantee you; this recipe is dead easy. It is one my sister found on the Kraft Canada website - minimal ingredients and minimal effort are required for this recipe! And it tastes sooooo good! I'm sure your co-workers (or your chocolate-loving family) will love it. Or you may decide it looks so good that you could probably consume more chocolate afterall.


Peanut Butter Toblerone Cheesecake
Recipe from KraftCanada.com

Ingredients:

  • 1 1/4 cups oreo baking crumbs
  • 1/4 cup butter, melted
  • 2 pkg (250 g each) cream cheese, softened
  • 1 cup smooth peanut butter
  • 1 cup sugar
  • 200 g toblerone swiss milk chocolate, chopped
  • 1 1/2 cups thawed cool whip topping

Method:

  1. Mix oreo crumbs and butter. Press into bottom of 9 inch springform pan. Refrigerate 10 minutes.
  2. Beat cream cheese, peanut butter, and sugar with a mixer until well blended. Add half the chocolate, mix well. Whisk in one cup of cool whip. Spoon over crust. Refrigerate 3 hours.
  3. Microwave remaining cool whip and chocolate in small bowl on high for one minute. Cool slightly. Pour over cheesecake. Refrigerate until firm.

Thats it! I hope this provides you with a great way to use up leftover chocolate after the holiday season. And if you do decide to make this for yourself, rest assured - its delicious!

Happy Baking my Friends!