24.6.12

Decadent Desserts Class with Tina Bacon


About a month ago I had the opportunity to attend a baking class called Decadent Desserts at Well Seasoned. The class was put on by Tina Bacon, owner and founder of the Pink Spatula. Tina is a fantastic pastry chef and creates the most amazing hand crafted marshmallows I've ever tasted (peanut butter ripple marshmallows anyone?!! - try that in a s'more!!). Check our her website for beautiful photos of her dessert offerings and where to find her hand crafted marshmallows.


During the class we made Individual German Chocolate Cakes (pictured above), oreos (pictured below), burnt sugar ganache mini tarts, and butterscotch pots de creme topped with dark chocolate pudding. It was an ambitious evening full of delicious, calorie-laden treats, handy tips and great recipes. Tina kindly allowed me to share the recipe for the burnt sugar ganache mini tarts with you (thanks Tina!!). I made them at home again yesterday to make sure the recipe turned out as well under my hand as Tina's professional hand and sure enough, it was a slam dunk!! Delicious and addictive. :)

First step for these delicious little guys is to make the miniature sweet tart dough (makes about 32 mini tarts):

Miniature Sweet Tart Dough
Recipe by Tina Bacon

Ingredients:
  • 1 cup (8 oz) unsalted butter, at room temperature
  • 1 large egg
  • 1 tsp vanilla
  • 2 3/4 cups (12 1/2 oz) all-purpose flour
  • 1/8 tsp fine sea salt
  • 5 1/2 tbsp (2 1/3 oz) sugar
Method:
  1. Cut butter into small cubes and set aside.
  2. In a small bowl stir together egg and vanilla with a fork.
  3. Measure flour, sugar and salt into a food processor bowl. Pulse together a few times to combine. Add butter and pulse till it's the size of rice. While still pulsing, slowly pour egg/ vanilla mixture through tube and mix just till it begins to form a dough. Turn out onto lightly floured surface and knead a couple times to form a smooth dough.
  4. Portion all of the dough first using a 1 1/2 - 2 tsp measure. Next, roll all the dough into balls and place in a miniature muffin pan (see photo below). Form into tart shells using either a tart tamper or your fingers to form a thin, even crust.
  5. Bake in 350F oven for about 10 minutes or till edges are golden. Allow to cool in pan 10 minutes, then place tart shells on a rack to cool completely. Store airtight. Can be frozen.

Burnt sugar ganache tartlets made by Tina in her class
 Next up, make the burnt sugar ganache. Please note that I have adapted this recipe slightly - it originally called to make the caramel using the dry method, but having had a couple of really bad experiences in the past with this method, I opted instead to use the wet method. :)

Burnt Sugar Ganache
Recipe from Tina Bacon (Tina adapted the recipe from Pierre Herme's Faubourg Pave)

Ingredients:
  • 1 3/4 cups (305g) chopped dark chocolate
  • scant 3/4 cup sugar
  • 1/4 cup water
  • 4 tsp unsalted butter
  • pinch of fine sea salt
  • scant 1 1/4 cups heavy cream
  • 1 1/2 cups (12 oz) unsalted butter, at room temperature
Method:
  1. Place sugar in a pile in the middle of a saucepan. Carefully pour water in around the pile of sugar. Over medium high heat, gently and carefully stir the water and sugar mixture until the sugar is dissolved. Once the sugar has dissolved, stop stirring. Let it bubble until it reaches a nice golden brown colour and remove from heat. Stir in first amount of butter and salt until melted. Add cream (careful - it will bubble like crazy and puff up), stirring well. Return to a boil, remove from heat.
  2. Pour half of caramel over chocolate, stir to create ganache. Stir in remaining caramel till smooth. Set aside to cool till only slightly warm, about 10 minutes. Beat butter till malleable. Gently stir small amounts at a time into ganache with a wooden spoon till smooth. Don't use a whisk for this part - you don't want to incorporate air into this mixture.

Adding butter to the flour for the pastry dough
 To assemble your tarts - pour burnt sugar ganache into each tart until full. Sprinkle with coarse sea salt. Allow to set up. Enjoy!

Dough balls waiting to be formed into tart shells

Baked tart shells (my at home attempt)

Burnt sugar ganache tarts (my at home attempt)
This was a fantastic class and I would highly recommend attending any of Tina's baking classes at well seasoned. You'll learn a lot and get to sample loads of delicious food along the way (remember, calories don't count on cooking class nights).


This post has been linked up with Whatcha Baking Wednesdays over at Cajun Sugar Pie.

Happy Baking my Friends!

18.6.12

Pistachio Cranberry Icebox Cookies for SRC!


Hi Everyone! Thanks for stopping by to check out this month's Secret Recipe Club's Group C reveal. Its pretty much one of the best days ever - its when we get to reveal our top secret blog assignment for the month and our selected recipe from that blog. :) If you're interested in learning more about SRC or joining, check out what its all about here.


This month, my assignment was The World in my Kitchen written by Mindy. Mindy is from Kentucky, but she has lived and traveled to many different places over the years. Her blog is a great testament to the different places she has lived and she has so many cool recipes to share. You've got to stop by and check if out if you haven't been there before. I can't wait to pop back over there and make some more of Mindy's recipes given the wild success of the one I selected for SRC.


I made the Cranberry, Pistachio Icebox Cookies - they were so perfect because they're easy (and not at all finicky) and they used ingredients I already had in my pantry (woot!). Mindy had a really cute story about how these cookies pulled her out of a string of unsuccessful cookie baking attempts, so I knew the recipe must be a winner. And it was! You've got to try it out ASAP. :D


Cranberry, Pistachio Icebox Cookies
Minimally adapted from The World in my Kitchen

Ingredients:
  • 1 1/2 cups flour
  • 1 tsp vanilla extract
  • grated zest of one lemon
  • 1/4 tsp salt
  • 3/4 cup unsalted butter, softened
  • 1/4 cup sugar + 2 tbsp for sprinkling
  • 1/2 cup shelled pistachios, roughly chopped
  • 1/3 cup dried cranberries, roughly chopped
  • 1 egg, lightly beaten
Method:
  1. Stir together the flour and the salt in a small bowl.
  2. Beat together the butter, lemon zest, vanilla, and 1/4 cup of the sugar about 3 minutes (or until pale and fluffy). Reduce speed to low and add flour mixture in three separate additions, mixing well after each addition. Mix until dough starts to come together in clumps. Add pistachios and cranberries and stir til evenly distributed through dough (it will be very crumbly still).
  3. Gather and press dough together and divide into two equal portions. Using a piece of plastic wrap, gather and form each piece into a log (about 1 1/2 inches in diameter). Chill, wrapped tightly in plastic wrap until firm - minimum two hours, but up to three days.
  4. Once chilled, preheat oven to 350F and line two large baking trays with parchment paper.
  5. Brush egg over the log covering all surfaces except the two ends of the log. Sprinkle liberally with remaining two tbsp of sugar (or use turbinado sugar).
  6. Slice each log into 1/4 inch rounds and place on the prepared cookie sheets. Bake in preheated oven for about 15 minutes, or until edges are lightly browned. Cool completely on a cooling rack.
 And thats it! These are super easy and they taste delicious. They also look great because of the beautiful colours added by the pistachios and cranberrys. Thanks Mindy for such a lovely recipe. Can't wait to try out many more. :)

This post has been linked up with Whatcha Bakin Wednesdays over at Cajun Sugar Pie. Head over and check out what other mouthwatering desserts other bloggers have come up with this week.

15.6.12

What I've been up to this week

Happy Friday peeps! You may have noticed I've been more absent than usual the past week. Well, that's cuz I've been working on something super special that is wayyyyy out of my comfort zone - I made and decorated a cake for my friend's hubby's 40th birthday!! Here's some pics for those of you who don't follow my Facebook page. Recipes to follow next week!!

The cake is a decadent chocolate buttermilk cake - 3 layers of it filled with an Oreo cream filling. Frosted with chocolate buttermilk frosting. Cake decorations (except the guitar picks) made from white chocolate.


Cake with crumb coat


Another view of crumb coat


Guitar made out of white chocolate

Finished cake! Not perfect, but I'm pleased with how it turned out :)


9.6.12

Potato Buns


Remember last week when I shared that recipe for Balsamic Pulled Pork with you? And remember those yummy looking potato rolls I served them on? Well I'm here to share the recipe for those potato rolls today!

These rolls are super easy to throw together and use pretty basic ingredients. Perfect recipe for a beginner bread baker because you can't really mess them up. :)


Potato Rolls
Recipe from Mennonite Girls Can Cook

Ingredients:
  • 2 cups very warm water
  • 1/4 cup instant mashed potato flakes
  • 1/2 cup sugar
  • 1 tbsp kosher salt
  • 2 eggs, beaten
  • 1/2 cup butter, softened
  • 4 1/2 - 6 cups flour
  • 2 tbsp instant yeast
Method:
  1. Stir together the water, potato flakes, sugar and salt.
  2. Add eggs and butter, then yeast mixed with 3 cups flour. Beat with mixer on high speed.
  3. Add remaining flour, 1/2 cup at a time, until the dough can be easily handled. Knead well (I did this in my stand mixer with a dough hook, but you can knead by hand if you so desire!!).
  4. Place in a greased, covered bowl in the fridge to rest for 2 hours (or overnight).
  5. Pinch 2-3 inch balls off the main piece of dough and form into round roll shapes. Place on parchment paper lined baking tray. Let rise until doubled in size, at least 1 hour.
  6. Bake at 375F for 12 - 15 minutes (buns are done when they sound hollow when you tap on them).

Hope you're enjoying your weekend so far! I'm stuck in a course all weekend :( Booo!! But next weekend I'm excited to head over to Alberta for my good friend's wedding. Can't wait!!

Happy Baking my Friends!

2.6.12

Summer Recipe Roundup!

Happy Saturday peeps! Hope you've had a chance to pour your first cup of coffee before sitting down to check out whats going on in the blogosphere. :) I'm just about to pour my second cup! For today's post I feel like celebrating summer, so even though by looking outside you'd never know it is June, I am feeling summery! In light of that summery feeling, I'm going to share some of my favorite past recipe posts that have a summery feel. Hope you enjoy!

Sips

The best iced coffee


Appetizers

Kale Chips


Gourmet Guacamole

Salads & Sides

Skinny Caesar Salad

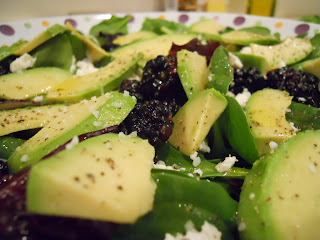
Blackberry Avocado Salad

Mains

Meatball Souvlaki

Monster Burger

Desserts

Coconut Blueberry Mini Tarts

Lime & Blackberry Italian Meringue Pie
I hope this post gives you some new recipes to try out this summer! Most of them use really fresh, summery ingredients and they're all super delish. Let me know which ones you try!

Happy Baking my Friends! Enjoy your weekend. :)

31.5.12

Balsamic Pulled Pork Sandwiches


Wow! I am finally getting another blog post up. Feels like forever! Sorry about that folks. But I'll make up for it with this amazing recipe Balsamic Pulled Pork. Its spectacular. It was supposed to be balsamic honey pulled pork, but funny thing - my "well stocked" pantry did not contain an ounce of honey. HAHA whoops! So, I did without and this recipe was still great. Make it this weeked - you'll love it because its one of those slow cooker recipes where you just throw it all in and walk away (well, until the last hour any way, then it takes a little bit of effort, what with making the sauce and all). But it is honestly worth the little bit of effort. I promise!


Balsamic Pulled Pork Sandwiches
Recipe adapted from Better Homes and Gardens

Ingredients:
  • 1 3lb boneless pork shoulder roast
  • 1 large onion, chopped
  • 1 1/2 tbsp each ground cumin and smoked paprika
  • 1 cup chicken broth
  • 1/2 cup balsamic vinegar
  • 1/2 cup ketchup
  • 1/2 cup garlic bbq sauce
  • 1/4 cup packed brown sugar
  • 1 tbsp worcestershire sauce
  • 1 tbsp dijon mustard
  • 1 clove garlic, minced
  • 1/2 tsp freshly ground black pepper
  • 12 fresh buns
  • coleslaw and pickles to garnish, if desired
Method:
  1. Rub pork roast all over with cumin and smoked paprika. Set aside. Place chopped onion on the bottom of the slow cooker. Place pork roast on top of onion and slowly pour over 1/2 cup of the chicken broth. Place lid on slow cooker and cook on high for 5 hours.
  2. During the last half hour of cooking, make the sauce. Combine the remaining 1/2 cup chicken broth, vinegar, ketchup, bbq sauce, brown sugar, worcestershire sauce, dijon mustard, garlic and pepper in a medium saucepan. Bring to a boil then reduce heat to low. Simmer for 25 minutes, or until sauce has thickened slightly. Taste sauce, if sauce is too vinegary, add more chicken stock.
  3. Remove pork from slow cooker and shred. Remove juice and onions from the bottom of the slow cooker and place shredded pork back in the slow cooker.  Pour sauce over and stir to combine. Replace lid and cook on low for one hour.
  4. Top buns with pulled pork, coleslaw and pickles. Enjoy!


This was unbelievably good! I love pulled pork, but this one was just over the top. I made these potato buns - stay tuned - I will post the recipe soon. :) Also coming up - details and a recipe from my most recent cooking class at Well Seasoned and the Crazy Cooking Challenge. Hope to see you soon!


Happy Cooking my Friends!

21.5.12

Penne Alla Salsiccia for Secret Recipe Club


It is the start of the May Long Weekend and I'm just writing my post for Monday's Secret Recipe Club reveal. I feel like the last few months have just got away on me!! But with each month that passes, I can tell you one thing - I'm always thrilled with my assignment for Secret Recipe Club. Whether its a blog that challenges me with recipes that are out of my comfort zone, not my usual fare, or too many delicious recipes to choose from, its always fun browsing through that blog trying to pick what you're going to make! Some of my past choices for SRC have been:

Salted Caramel Filled Brownies
Quinoa & Black Bean Chili 
Birthday Cake Oreo Cookie Bark
Zucchini Carrot Cake
Pizza Bites
Chocolate Peanut Butter Pretzels
Lime & Blueberry Scones

All of them were absolutely delicious and so worth the effort of making. :)


This month I was assigned Cookin' with Moxie written by Jamie. Jamie is a beautiful Italian girl who absolutely loves to cook and loves to eat! Her love for cooking, particularly for cooking meals true to her Italian heritage totally shows through when you look through her blog. It was so hard to pick a recipe because I wanted to try everything!!! After looking through loads of recipes, I finally settled on Spaghetti Alla Salsiccia, for which I didn't have any spaghetti on hand, so I used penne pasta instead and it worked like a charm! Oh man was it good! My homemade pasta sauce doesn't very often end up tasting 10x better than the stuff you buy in a jar, so I usually avoid making it. But this recipe is a keeper. With a short list of easy to find ingredients, you'll be on your way to an authentic tasting pasta dish in no time at all. I made a couple of small changes to the recipe based on what I had on hand in the house, but other than that, I left the recipe as is!


Penne Alla Salsiccia
Recipe minimally adapted from Cookin' with Moxie

Ingredients:
  • 1 lb penne
  • 2 tsp olive oil, divided
  • 1 16oz package of sliced crimini mushrooms
  • 1 lb mild italian sausage (can use mild italian flavoured turkey sausage for lower fat dish)
  • kosher salt and freshly ground black pepper
  • 3/4 cup red wine
  • 2 tbsp worcestershire sauce
  • 1 small can of tomato paste
  • 1 1/2 cups pasta water, reserved from cooking penne
  • shredded provolone to finish dish
Method:
  1. Bring a pot of salted water to a boil. Cook pasta until al dente according to the directions on the box. Reserve 1 1/2 cups cooking water for later. Drain pasta and set aside.
  2. While pasta is cooking, heat 1 tsp olive oil in a saute pan. Saute mushrooms over medium heat until lightly browned, about 5-8 minutes. Season with salt and pepper. Stir to distribute seasonings and then remove from pan. Set aside.
  3. Add the remaining 1 tsp olive oil (I found I didn't need this as the sausage was oily enough) and saute the sausage until just about cooked through. Add the red wine and cook until reduced by half. Once the wine is reduced, add the mushrooms, worcestershire sauce and tomato paste. Cook stirring 1-2 minutes so everything gets coated.
  4. Add reserved pasta water and stir to combine. Simmer sauce uncovered, until slighly thickened 20-30 minutes. Season with additional pepper to taste.
  5. Combine pasta and sauce and stir to evenly distribute.
And as Jamie would say Tutti Mangia!


Loved my SRC assignment this month and loved the recipe I picked! Thanks Jamie for the lovely selection of recipes. :) Can't wait to try some more.

Happy Cooking my Friends!