Showing posts with label daring bakers challenge. Show all posts

27.8.12

Choux Swans for the August 2012 Daring Bakers' Challenge


Hey Friends! How was your weekend? Mine was excellent - had a little fun hiking and baking and got a little accomplished by dejunking and organizing my garage yesterday. Got the satisfaction of hauling an entire truckload full of junk to the dump!! Woohoo! Any way, after a long hiatus, I am finally back and participating in the Daring Bakers' Challenge for the month!

Kat of The Bobwhites was our August 2012 Daring Baker hostess who inspired us to have fun in creating pate a choux shapes, filled with crème patisserie or Chantilly cream. We were encouraged to create swans or any shape we wanted and to go crazy with filling flavors allowing our creativity to go wild!

I didn't go too wild - I kept with the swan shape (or as good as I could manage any way...) and filled them with a mocha (chocolate & coffee) pastry cream. The result was an amazing tasting dessert. The pastry cream was a hit and I will make it over and over again!!


Pate a Choux
Recipe from the Daring Bakers' (can't be doubled)

Ingredients:
  • ½ cup (120 ml) (115 gm) (4 oz) butter
  • 1 cup (240 ml) water
  • ¼ teaspoon (1½ gm) salt
  • 1 cup (240 ml) (140 gm) (5 oz) all-purpose flour
  • 4 large eggs
Method:
  1. Line at least two baking sheets with parchment paper. Preheat oven to moderately hot 375°F/190°C/gas mark 5 .
  2. In a small saucepot, combine butter, water, and salt. Heat over  medium heat until butter melts, then remove from stove.
  3. Add flour all at once and beat, beat, beat the mixture until the dough pulls away from the sides of the pot.
  4. Add one egg, and beat until well combined. Add remaining eggs individually, beating vigorously after each addition. Resulting mixture should be somewhat glossy, very smooth, and somewhat thick.
  5. Using a ¼" (6 mm) tip on a pastry bag, pipe out about 36 swan heads. You’re aiming for something between a numeral 2 and a question mark, with a little beak if you’re skilled and/or lucky.
  6. Remove the tip from the bag and pipe out 36 swan bodies. These will be about 1.5" (40 mm) long, and about 1" (25 mm) wide. One end should be a bit narrower than the other.
  7. Bake the heads and bodies until golden and puffy. The heads will be done a few minutes before the bodies, so keep a close eye on the baking process
  8. Remove the pastries to a cooling rack, and let cool completely before filling.
 
 Next up, make the pastry cream:

Mocha Pastry Cream
Recipe minimally adapted from the Daring Bakers'

Ingredients:
  • 1 cup (225 ml.) whole milk
  • 2 Tbsp. cornstarch
  • 6 Tbsp. (100 g.) sugar
  • 1 large egg
  • 2 large egg yolks
  • 2 Tbsp. (30 g.) unsalted butter
  • 1 Tsp. Vanilla
  • 1/4 cup whole milk
  • 3 oz dark chocolate
  • 1 1/2 tsp instant espresso powder
Method:
  1. Dissolve cornstarch in ¼ cup of milk. Combine the remaining milk with the sugar in a saucepan; bring to boil; remove from heat.
  2. Beat the whole egg, then the yolks into the cornstarch mixture. Pour 1/3 of boiling milk into the egg mixture, whisking constantly so that the eggs do not begin to cook.
  3. Return the remaining milk to boil. Pour in the hot egg mixture in a stream, continuing whisking.
  4. Continue whisking (this is important – you do not want the eggs to solidify/cook) until the cream thickens and comes to a boil. Remove from heat.
  5. Combine 1/4 cup whole milk, chocolate and espresso powder in a small, microwave safe container. Microwave on low heat until chocolate is melted and mixture is smooth. Mix chocolate mixture, butter and vanilla into pastry cream and stir until smooth and incorporated. Chill until ready to use. 

 To assemble your swans:

  1. Take a swan body and use a very sharp knife to cut off the top 1/3rd to ½.
  2. Cut the removed top down the center to make two wings.
  3. Dollop a bit of filling into the body, insert head, and then add wings. 
  4. Your first attempt will probably not look like much, but the more you make, the more your bevy of swans will become a beautiful work of swan art.


Okay, so I'm not going to lie, these were a bit of work, but they weren't nearly as difficult or finicky as I thought they were going to be. My choux swans didn't puff up quite as much as I wanted and they didn't look as seamless as I thought they should once they were all assembled, but I was pleased with the overall result. Probably with a little practice, I could make some pretty cute little swans!!

Thanks so much Kat for hosting such a spectacular challenge! Great idea and it was fun to have something new and challenging to try out. :)

Happy Baking my Friends!

27.3.12

Daring Bakers' Challenge March 2012 - Dutch Crunch Bread


Well, its time for this month's Daring Baker's Challenge again. This challenge wasn't all that daring, but it was delicious. Sara and Erica of Baking JDs were our March 2012 Daring Baker hostesses. Sara and Erica challenged us to make Dutch Crunch Bread, a delicious sandwich bread with a unique, crunchy topping. Sara and Erica also challenged us to make a one of a kind sandwich with our bread.

The bread is quite interesting - it is a white sandwich bread topped with a thick layer of a mixture of rice flour, yeast and water. This mixture cracks and turns golden as the loaf bakes, giving the bread it's unique appearance. I'm going to send you over to the Daring Baker's website for the recipe since I didn't change a thing. I used the white sandwich bread recipe and topped it with the dutch crunch topping.

 I decided to make my bread into a Muffuletta sandwich. I adapted the recipe from Bobby Flay's Throwdown cookbook (which is a stellar cookbook, well worth the purchase!!).

 Muffuletta
Recipe adapted from Bobby Flay's Throwdown

Ingredients:
  • 1 round loaf of dutch crunch bread
  • 1/3 lb thinly sliced genoa salami
  • 1/3 lb thinly sliced serrano ham
  • 1/3 lb thinly sliced lean capicola
  • 1/3 lb thinly sliced spanish salami
  • 1/4 lb thinly sliced provolone cheese
  • 1/4 lb thinly sliced swiss cheese
  • 1 recipe special dressing
Special Dressing:
  • 1/2 cup mayonnaise
  • 1 1/2 tbsp dijon mustard
  • 1 tbsp sherry cooking wine
  • 1/2 tbsp white vinegar
  • 1 cup pitted green olives
  • 1 roasted red bell pepper
  • 2 cloves garlic, minced
  • 4 pepperocini peppers
  • 1 tbsp capers
  • salt and pepper
Method:
  1. First, make the special dressing. Combine all ingredients except the capers in the bowl of a food processor. Whirl until mixture is almost smooth, but still a little chunky. Stir in the capers.
  2. Slice the bread in half horizontally. Spread both halves of the bread generously with the dressing. Layer the meats and cheeses on the bottom half of the bread and cover with the top half.
  3. Serve cold. Serves 8 - 10 people.

 Here are some pictures of this monster sandwich. Don't worry about the olives in that dressing... my hubby hates olives, but he was madly in love with this sandwich. It all goes together so perfectly with no flavour overwhelming the others.


 It was a little hard to cut due to all of the toppings, but it still tasted great.

This post has been yeast spotted!

This post has been linked up with Fusion Fridays over at Jennifer Cooks. Head over to check out other delicious goodies other bloggers have whipped up this week.

Thanks Sara and Erica for hosting an interesting challenge. I can't wait to go around and check out what kind of sandwiches everyone else made. Happy Baking my Friends!

27.2.12

February 2012 Daring Bakers' Challenge: Quick Breads


Seems like this month has just flown by... I know, I say that every single time I post a challenge, but its true. It is amazing how quickly so much time can pass while it feels as though I haven't had a chance to blink! This month's challenge was really easy and something I've made a lot of. So I decided to try out some flavours and recipes I haven't experimented with much - first - Whole Wheat Soda bread with Oats & Rosemary and second - Coconut Banana Muffins. They both turned out deliciously.


The Daring Bakers’ February 2012 host was – Lis! Lisa stepped in last minute and challenged us to create a quick bread we could call our own. She supplied us with a base recipe and shared some recipes she loves from various websites and encouraged us to build upon them and create new flavor profiles.


First, I'll share the savory recipe with you -  its delicious. Prepare yourself so you don't end up eating two loaves of this stuff all by yourself. Find someone to give it away to, or put it in the freezer, whatever you have to do! Because if you leave it on the counter, you will eat it!!

Whole Wheat Soda Bread with Rosemary &Oats
Recipe minimally adapted from No More Secrets by Adrienne Johnston

Ingredients:
  • 2 1/4 cups all purpose flour, plus extra for dusting
  • 2 tsp baking soda
  • 1 tsp baking powder
  • 2 tsp kosher salt, plus extra for sprinkling
  • 2 cups whole wheat flour
  • 1 cup rolled oats, plus extra for sprinkling
  • 2 cups buttermilk
  • 1 large egg, lightly beaten
  • 2 tbsp + 1 tsp finely chopped fresh rosemary 
Method:
  1. Preheat oven to 350F.
  2. Stir together the flours, salt, baking soda, baking powder and 2 tbsp of the rosemary. Add the oats and stir well. Mix together the buttermilk and the egg. Add wet ingredients to dry ingredients and stir until it forms a dough.
  3. Turn dough out onto lightly floured surface and knead briefly until a sticky, but manageable dough is formed. Divide into two and form into flattish rounds about six inches in diameter. Place the loaves on parchment lined baking sheet, sprinkle with oats, remaining tsp fresh rosemary, kosher salt, and a bit of flour. Bake in the middle of the preheated oven for about 30 minutes, until lightly browned. They should sound hollow when tapped on the bottom.

See what I have to resort to in order to get photos? Leaving threatening letters to my family: "Eat & Die!! No Touch!! Needs to be Photographed" LOL!! A girl's gotta do what a girl's gotta do right?!


Next up, these delectable muffins... coconut, banana and lime! It doesn't get any better than that for breakfast. Get ready to feel like you're somewhere tropical, because these babies will make you feel like you're on the beach!


Coconut Banana Muffins
Recipe adapted from Anna Olson's Back to Baking

Ingredients:
  • 2 large, ripe bananas, mashed
  • 1/2 cuppacked dark brown sugar
  • 1 egg
  • finely grated zest of one lime
  • 2 tsp vanilla extract
  • 1/2 cup coconut milk - refrigerate the can, scrape off the thick white portion and use the clear liquid from the bottom of the can for this recipe.
  • 1 1/4 cups flour
  • 1 tsp baking powder
  • 1/4 tsp salt
  • 1/2 cup sweetened, flaked coconut
Method:
  1. Preheat oven to 375F and line a muffin tin with paper liners.
  2. Stir the bananas and sugar together, then stir in the egg, lime zest, and vanilla. Stir in the coconut milk.
  3. In a separate bowl, mix the flour, baking powder, and salt, then add the flour mixture to the banana mixture and stir until combined. Mix in the coconut and spoon the batter into the prepared muffin tin.
  4. Bake for 20 - 25 minutes, until the muffins spring back when gently pressed. Let muffins cool for 10 minutes before removing from the tin to cool completely. The muffins will keep in an airtight container for up to three days.

Yep, these recipes are pretty delicious. You should try them out when you get a chance!

Thanks Lis for hosting a back to the basics challenge. Sometimes simple is a refreshing change from complex and time consuming. I really enjoyed the break this month, but hopefully back with a more "daring" challenge for March!! :)

This blog has been linked up with Mouthwatering Mondays over at the Sweet Spot. Head on over there to check out what other delicious treats bloggers have baked up this week.
Happy Baking my Friends!

27.1.12

January 2012 Daring Bakers' Challenge: Scones, aka Biscuits

Its time for the Daring Bakers' Challenge again! Last month you probably noticed I didn't post a Daring Bakers' challenge... I participated, but my attempt was such an epic fail that I couldn't bring myself to try again. Last months' challenge was to make sourdough bread - like real sourdough where you make your own starter to rise the bread without yeast. Mine bubbled away for a couple days on the counter, then the temperature dropped a lot one night and the house got too cold... I tried to revive it the next day, but it was not meant to be. My poor starter died!! Thus, no December 2011 challenge for me!
Oh well, this is a new month and something very familiar to me - scones, aka biscuits. I've made biscuits and scones many, many times using many different recipes. My standby recipe is still my baking powder biscuit recipe out of my (mom's) Better Homes and Gardens cookbook. These biscuits raise up mile high and always receive rave reviews whenever I serve them to guests. I have to say that the challenge recipe doesn't quite live up to my baking powder biscuit recipe, but its a pretty close second! It was fun to experiment with something new.


Blog Checking Lines: Audax Artifex was our January 2012 Daring Bakers' host. Aud worked tirelessly to master light and fluffy scones (aka biscuits) to help us create delicious and perfect batches in our own kitchens.

I've posted some pictures of the scones I made with Audax's recipe. They turned out well, but they weren't quite as good as my ultimate biscuit recipe (check back in February for a post with my ultimate biscuit recipe). Check out the Daring Kitchen website for the recipe or to join in with these great monthly challenges. You can further your baking skills in a constructive and supportive community of fellow bakers!!


One thing I found interesting was mixing up a batch of biscuits by hand. I never make my biscuits by hand - I always use my food processor. Thats where I get the best results! But do try whatever works for you.

Lastly, I grew up eating baking powder biscuits - my mom always made them for us, so they are a type of comfort food for my sister and I. I'm not sure if this is a Canadian tradition or just a family tradition, but we always served our biscuits warm, with some salted butter and drizzled with Roger's Golden Syrup. Mmmmm! Delicious. :)


In addition to checking out Aud's recipe, do check out the biscuit and scone recipe roundup I've posted below - these are some of my favorite biscuits and scones from previous blog posts I've done.

Blueberry & Lime Scones
Cranberry Oat Scones
Chocolate Scones
Banana Biscuits
Savory Scones
Almond Apricot Scones

Happy Baking Friends! Thanks for stopping by. :)

27.11.11

November 2011 Daring Bakers' Challenge - Filipino Desserts!

I'm on a roll! I've completed two Daring Bakers' Challenges in a row!! October's challenge was to make Povitica and it was a great success.  This month was equally successful! Catherine of Munchie Musings was our November Daring Bakers' host and she challenged us to make a traditional Filipino dessert - the delicious Sans Rival cake! And for those of us who wanted to try an additional Filipino dessert (not me unfortunately - ran out of time!!), Catherine also gave us a bonus recipe for Bibingka which comes from her friend Jun of Jun-Blog.

 This was probably the quickest and easiest DB challenge I've participated in since I started the club back in August of 2010. While being quite easy and not really containing any new techniques, the end result was absolutely delicious and I got to experience a desert from a different culture that I've never had the privilege of tasting. This is something that is easily achievable in an evening (I started at 8pm and finished by 10:30) and uses pretty basic ingredients.

The recipe has two main components: baked meringue layers (four of them), and french buttercream. Both recipes can be found on the Daring Kitchen website.  I'm not going to reproduce it here. I omitted the cocoa powder in the meringue and flavoured the buttercream with vanilla extract. If I was going to make this recipe again (which I think I will!!), I would bake the meringue layers longer to crisp them up a little bit more, but either way, this dessert was delish. Even hubby enjoyed it thoroughly!

 Hope you enjoy the pics!! I certainly had a great evening making this last night and I wasn't exhausted by the time I was finished, so that is always a nice thing. :)


 Thanks Catherine for a wonderful challenge! I love the creativity of this challenge and the lovely flavours. I have just one regret: that I didn't have time to try both dessert recipes!! Eventually I will get around to it. :)

Happy Baking my Friends!

27.10.11

The Daring Bakers' Challenge - October 2011 - Povitica!

Wow!! Can you believe it? For the first time in a few months I'm finally participating in a Daring Bakers' Challenge. And how I've missed this group... the wonderful challenges, the encouragement of fellow Daring Bakers and the general sense of accomplishment that comes from from tackling a new challenge in the kitchen and learning from the experience.

The Daring Bakers' Challenge for October 2011 was Povitica, hosted by Jenni of the Gingered Whisk. Povitica is a traditional eastern European dessert bread that is as loverly to look at as it is to eat! 

Jenni definitely hit the nail on the head with this recipe! It was absolutely divine. The dough was fantastic to work with and the traditional walnut filling was heavenly. :) I will definitely be making this one over and over and over again! All the while experimenting with different fillings of course... I couldn't resist making four different loaves, but our family definitely had their favorites.

 First off - if you're looking for the recipe, I'm going to send you over to the Daring Kitchen website. There are a few components to the recipe and many steps, so I'm going to save myself some effort (what?? its getting late okay?!). :) Browse around the archives... you might stumble across something else you want to make... oh yeah and if you haven't already done so, maybe you should sign up and participate in our monthly challenges! Its fun, you'll learn things and you'll probably be able to cross things off your baking "bucket list"!!
 If I'm not posting the recipe you might be wondering what I plan to fill this post with... well, how about some step-by-step pictures? And maybe a few suggestions for fillings for your yummy bread (afterall, a full batch of this recipe makes four whole loaves of this delicious bread!!).

 I had to make one loaf with the traditional walnut filling as posted by Jenni. And it was amazing! I would probably make two of the loaves with the walnut filling when I make this recipe again. This bread is so delicate and flavourful without being overwhelmingly sweet. Can you tell I liked it?!

 Then I tried a combination of spinach, feta and fresh chopped oregano. MMMMMM!!!! This one was awesome too - it was the favorite in our house. Hubby and sister couldn't get enough. I used one package of frozen chopped spinach (thawed and thoroughly drained), about 200-300 g of feta crumbled, and about 3-4 tbsp fresh chopped oregano for one loaf of the bread. Premix the fillings then just sprinkle the mixture over your dough once it's been rolled out.


 I also made a roasted garlic, cheddar and carmelized onion loaf.... mmmm!! Super yummy! And lastly I made a loaf with roasted garlic, goats cheese and cranberry jalepeno jelly! All were delish and I can't wait to experiment with different fillings in my "cough" spare time! :D

 Thank you to Jenni for hosting such an amazing challenge! I had never even heard of Povitica... to think I've been missing out on such a good thing all these years... guess I've got some catching up to do.


Happy Baking my Friends! Thanks for stopping by.

27.7.11

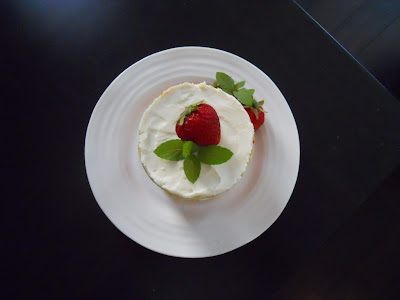
The Daring Bakers Challenge - July 2011 - Fresh Fraisiers!!!

This month has been crazy... I know, I know I've been on vacation so how can things be crazy? I will save the boring excuses for later. I just returned from Mexico late on July 24th realizing I hadn't yet started the Daring Bakers July 2011 challenge... so yesterday, the day before the deadline, I made all of the components then ran out of steam and didn't assemble the dessert. Thus, on the due date (today) I was madly assembling the desserts this morning so I could photograph them this evening and still post within the deadline! How is that for crazy? I have NEVER saved a challenge this late and likely never will again. I should have rebaked my cake... it was gross, but more on that later!


The end result was quite pretty (in my opinion any way) and tasted pretty darn good too. For those of you wondering what I'm crazily rambling on and on about, Jana of Cherry Tea Cakes was our July Daring Bakers' host and she challenged us to make Fresh Fraisiers inspired by recipes written by Elisabeth M. Prueitt and Chad Robertson in the beautiful cookbook Tartine.


I'm not going to reproduce the recipe this time because I think you would be better off using the recipes exactly as provided by Jana on her website. So please hop on over to her blog and use those recipes if you decide you want to attempt this delicious dessert.


So, my pastry cream element was AMAZING!!! So delicious and it set up beautifully! I overwhipped the cream a tad bit, but I think that actually helped with the stability of the cream mixture, so in the end it worked out. I doubled the amount of vanilla in the recipe which I think was a good call! It gave it a delightful flavour that stood in with the strawberries very nicely.


The problem lies with the cake in my case... pretty bad!! Instead of following the recipe and the suggested alterations to arrive at a coconut chiffon cake, I decided to make my own creative adaptations to the recipe. A friend had given me some coconut flour which I was very excited to use... so excited in fact that I substituted it 100% for all of the regular flour in the recipe. Rookie mistake!!! My friend had even cautioned me against doing that very thing! Any way, the coconut flour absorbed moisture like crazy, so I just continued adding coconut milk until the batter was what I thought was the right consistency. WRONG!! The cake baked all the way through but was very wet; so wet that I couldn't cut it in half and transfer half back to the springform pan for molding. So to salvage the cake, I cut out shapes to fit in my ring molds and popped them in the freezer to firm up prior to handling them and putting them in the molds. It worked out well, but I still didn't like the texture of the cake for eating, though it was alright as long as all of the other components were included in that particular bite.


Despite my cake issues, the dessert turned out well and tasted delicious! The pastry cream is to die for!! I made some additional parfaits with fresh strawberries and pastry cream and boy were they good! I've already eaten one tonight and I would really like to eat another... but I will restrain myself!


Thank you Jana for hosting a wonderful challenge and introducing us to Fresh Fraisiers. They are so delicious and the perfect summer dessert. I can't wait to try it again and hopefully this time perfect the cake component as well. :)


Happy Baking my Friends!