Showing posts with label Bread Baking. Show all posts

19.10.12

Bavarian Style Soft Pretzels!


 So the first thing you probably noticed is that my pretzels are ugly... like super ugly. But, what they lack in beauty, the made up for in taste! These guys were delicious. They're a little bit of work, but most of the work is down time waiting for them to rise, freeze, then rise again, then the worst part - waiting for them to bake - its so hard when they smell sooooo delicious!

If you have a rainy Saturday with not much planned, these are a perfect way to spend the day! You can make them at a leisurely pace and enjoy the process and the fruits of your labour!

 We'll get on to the recipe and th process ASAP since its a bit longer than most recipes I post on my blog. :)

Bavarian Style Soft Pretzels
Minimally adapted from Fine Cooking - Oct/Nov 2012 Issue

Ingredients:
  • 1 1/2 tsp active dry yeast
  • 19 1/2 oz (4 1/2 cups) flour
  • 2 tbsp packed light brown sugar
  • 2 1/4 tsp kosher salt
  • vegetable oil or cooking spray
  • 3 tbsp baking soda
  • 1 large egg, lightly beaten
  • 1 tbsp pretzel or coarse salt
Method:
  1. In a stand mixer fitted with the dough hook, combine the yeast and 1 1/2 cups lukewarm water and let stand until dissolved, about 5 minutes. Add the flour, sugar, oil and salt. Mix on low speed until the ingredients are hydrated and form a coarse ball of dough, 2-3 minutes. Add more water as needed, 1 tsp at a time, if all of the flour isn't incorporated into the dough.
  2. Increase the speed to medium low and mix until the dough becomes smooth, supple and elastic, about 3 minutes. The dough should be soft but only slightly tacky; if it seems sticky or very tacky, sprinkle in more flour, as needed.
  3. Form te doug into a ball, transfer to a large, lightly oiled bowl, cover with plastic wrap and let rise at room temperature until it is about 1 1/2 times its original size, 1 - 1 1/2 hours.
  4. Lightly mist a work surface with oil and transfer the dough to it. Divide the dough into 6 equal pieces (about 6 oz each). Form each piece into a smooth, round ball, lightly mist wit oil, and cover with plastic wrap. Let rest on the work surface at room temperature for 20-30 minutes to allow the gluten to relax.
  5. Line a large baking sheet with lightly oiled parchment paper and set aside (I needed two of them). Lightly mist a work surface and using your palms and fingers, roll each piece ofdough on the work surface into a rope that is about 30 inches long and 1/3 - 1/2 inch thick (note, this is why mine are ugly - I didn't roll my ropes long or thin enough). If the doug resists or shrinks back, let it rest for a few minutes while you work on other pieces; short rests will let the gluten relax enough to allow for the full rollout.
  6. Working with 1 dough rope at a time, shape it into a large U that is 5-7 inches across with the curved side closest to you. Take the two ends of the rope in your fingers and cross one over the other so ends overhang the cross by about 3 inches. Twist the ends of the rope, shortening the overhang to about 2 inches. Next, pull the twisted section toward you and fold it down over the bottom curve of the U so the ends are a couple inches apart and overhand the bottom by about 1/4 inch.
  7. Carefully transfer the partzels to the prepared baking sheet, spacing them evenly and reshaping as needed. Cover with plastic wrap and freeze til hard, at least 2 hours and up to three weeks.
  8. Bring 2 cups of water to a boil in a small saucepan. Remove from the heat and add the baking soda and stir til completely dissolved. Transfer to a bowl and let cool to lukewarm, about 30 minutes.
  9. Using stainless steel tongs, dip one pretzel into the baking soda bath at a time and soak for five seconds. If the liquid doesn't completely cover the pretzel, turn it over and submerge the other side for five seconds. Remove pretzel from liquid and allow excess to drip off. Return to baking sheet.
  10. Brush tops and sides of pretzels with some of the beaten egg. Let pretzels thaw and rise at room temperature until they are soft and puffy, 1 1/2 to 2 hours.
  11. Position a rack in the center of the oven and heat to 400F. Brush pretzels once more with egg. Lightly sprinkle with salt. Bake until dark golden-brown, approximately 20-22 minutes. Transfer to rack and cool for at least 15 minutes before serving.

So, like I said, a little labour intensive, but well worth the effort. Hope you enjoy!

Happy Baking my Friends!

27.10.11

The Daring Bakers' Challenge - October 2011 - Povitica!

Wow!! Can you believe it? For the first time in a few months I'm finally participating in a Daring Bakers' Challenge. And how I've missed this group... the wonderful challenges, the encouragement of fellow Daring Bakers and the general sense of accomplishment that comes from from tackling a new challenge in the kitchen and learning from the experience.

The Daring Bakers' Challenge for October 2011 was Povitica, hosted by Jenni of the Gingered Whisk. Povitica is a traditional eastern European dessert bread that is as loverly to look at as it is to eat! 

Jenni definitely hit the nail on the head with this recipe! It was absolutely divine. The dough was fantastic to work with and the traditional walnut filling was heavenly. :) I will definitely be making this one over and over and over again! All the while experimenting with different fillings of course... I couldn't resist making four different loaves, but our family definitely had their favorites.

 First off - if you're looking for the recipe, I'm going to send you over to the Daring Kitchen website. There are a few components to the recipe and many steps, so I'm going to save myself some effort (what?? its getting late okay?!). :) Browse around the archives... you might stumble across something else you want to make... oh yeah and if you haven't already done so, maybe you should sign up and participate in our monthly challenges! Its fun, you'll learn things and you'll probably be able to cross things off your baking "bucket list"!!
 If I'm not posting the recipe you might be wondering what I plan to fill this post with... well, how about some step-by-step pictures? And maybe a few suggestions for fillings for your yummy bread (afterall, a full batch of this recipe makes four whole loaves of this delicious bread!!).

 I had to make one loaf with the traditional walnut filling as posted by Jenni. And it was amazing! I would probably make two of the loaves with the walnut filling when I make this recipe again. This bread is so delicate and flavourful without being overwhelmingly sweet. Can you tell I liked it?!

 Then I tried a combination of spinach, feta and fresh chopped oregano. MMMMMM!!!! This one was awesome too - it was the favorite in our house. Hubby and sister couldn't get enough. I used one package of frozen chopped spinach (thawed and thoroughly drained), about 200-300 g of feta crumbled, and about 3-4 tbsp fresh chopped oregano for one loaf of the bread. Premix the fillings then just sprinkle the mixture over your dough once it's been rolled out.


 I also made a roasted garlic, cheddar and carmelized onion loaf.... mmmm!! Super yummy! And lastly I made a loaf with roasted garlic, goats cheese and cranberry jalepeno jelly! All were delish and I can't wait to experiment with different fillings in my "cough" spare time! :D

 Thank you to Jenni for hosting such an amazing challenge! I had never even heard of Povitica... to think I've been missing out on such a good thing all these years... guess I've got some catching up to do.


Happy Baking my Friends! Thanks for stopping by.

25.7.11

I'm Back with Rollkuchen (fried bread)!!

So you may have noticed I have not been blogging... well that would be due to the fact that I was just in Mexico for a week. Hubby & I went to a beautiful adults only resort on the Mayan Riviera! It was awesome and I would go back there in a heartbeat! Check out the resort and maybe you'll decide you want to go there too... It was beautiful and all the restaurants served delicious tasting and beautifully presented food! I thought I would share a couple of pictures from our trip with you! Above is a picture of the palm tree I enjoyed laying under... right by the beautiful pool! Below is a picture of me all dressed up for a dinner at one of the lovely restaurants at the resort.


And lastly, but definitely not least, a picture of the beautiful beach at the resort. The colour of the Caribbean Sea and the soft white sand is just breathtaking! If you haven't been, you should try to go because it really is worth the trip. :) Any way, back to blogging and the reason you came to check out this post... food!


Hubby is a Mennonite, well at least his family is. As such, he grew up eating Mennonite food when he would visit his grandparents and he has fond memories of said food. That being said, my family is also Mennonite, although I wasn't aware of this until my hubby pointed that out to me! You can tell I haven't been raised by a family still observing many Mennonite traditions!! So to do something nice, I decided to try my hand at making rollkuchen which he loves! It turned out beautifully! You can roll just fried pieces in cinnamon sugar for dessert or serve plain rollkuchen along with salted watermelon as is traditional among Mennonite families. But I just served mine with homemade freezer jam like hubby's Grandma showed me how to make! :)


The recipe I have is from my wonderful cookbook Mennonite Girls Can Cook. Check out their blog for many of their delicious recipes, or better yet, check out their cookbook and buy yourself a copy today! Proceeds go to a good cause and you'll have lots of delicious recipes to try your hand at.

I was surprised how easy it was to make the bread - even with the required deep frying! Check out the recipe here. I made mine in my mixer with the dough hook and that seemed to work great and required very little effort. Hope you enjoy!


Happy Baking my Friends!

29.5.11

Bread Baking Day #40 - Bread with Curd

I've had a hard time getting myself organized enough to participate in the monthly Bread Baking Day for the last couple of months, but I promised myself I would actually participate this month! I was pleasantly surprised that this month's challenge, hosted by Zorra Kochtopf of the blog kochtopf.twoday.net , was to bake bread with curd. Zorra noted that any curd could be used in making this bread and it could be homemade or store bought.

I chose to make mine with dry curd cottage cheese. I made this recipe for Dill Cottage Cheese Batter Bread. It was very easy and called for very basic ingredients. This was a great challenge, so thank you to Zorra for hosting!


I thought the bread dough looked a little yucky to start with and before it was baked, but the change that took place while baking was incredible. The bread is light and airy in texture with considerable flavour from the dill and the onions and the curds of cottage cheese browned up so nicely to add beautiful colour to the loaf of bread.


Do try out this recipe if you get a chance! And if you don't get a chance to try this recipe out, at least take a minute to check out the roundup of recipes the week after June 1st on Zorra's website. You will be amazed at all of the creativity of the members of this great group. And maybe, just maybe, you will be inspired to participate next month!!


Happy Baking my Friends!

And happy bread baking day #40 to all my bread baking day friends too!! :)

3.2.11

Pita Bread - Attempt #2 & Hummus Ma Lahma

Alright, it has taken me a while, but I've finally got up the nerve to try my hand at making pita breads again! I took the advice of a couple of my great blog followers and upped the temperature of my oven and rolled them thinner. And the results were far improved! Still not perfect, but definitely much improvement! I saw partial pockets form this time where last time I got no pockets! Soooo I will keep trying. I do have a bit of a tale to tell about this one though...

Have you ever broken a rolling pin? Didn't think so! Well, while I was making these, my rolling pin broke. I had been using this cheap wooden one I picked up from ikea when I first moved out on my own and it had always done the trick. I tidied up my kitchen prior to starting to make the pitas so I would have a nice clean counter to roll them out on. When i started rolling out the second pita, I noticed some brown dust on the dough which looked like coffee grounds. So I'm like, I already wiped down the counter... where the heck is this coming from??? Well i look a little closer and the "coffee grounds" are actually pouring out of the middle of my rolling pin. NOT GOOD!!! So I had to be creative and roll the rest of my pitas out with a big can of chickpeas! So that is my kitchen disaster tale with a happy ending! Maybe I can blame the less than perfect results on the lack of a rolling pin? :D


I have wanted to try something like this for a while, but I just got around to trying it out! I found the recipe on the Food Network website. Emeril Lagasse developed the recipe and it sure is delicious. I would highly recommend this to anyone who likes hummus and making home made pita breads just amp up the delicious factor!
You can find the recipe here. It is late and I'm not up for typing up the recipe. So please accept my apologies for my laziness!!!
I didn't change a thing other than add additional liquid (mixture of olive oil and water) to the hummus to get it to the consistency I wanted it. You can definitely play around with it til you get it the way you like it. Hummus is great like that! You can also mix up the spices you use on the beef. I think next time I'm going to try out a yummy curry spice mixture on the beef. Lots of ways to personalize this recipe and make it how you and your family like it! Have fun playing with it!
Happy Cooking my Friends!

30.1.11

BBD #36 - Corn Jalepeno Lava Bread

Well - this is my first time participating in Bread Baking Day! It is a monthly event where people who are passionate about baking bread make bread that falls within a specific theme. Participant entries are rounded up on the first of each month and posted on the host's blog. This month the theme was "Corny Bread" hosted by Girlichef .

I didn't want to just make corn bread (although I love cornbread), so I settled for making Corn Jalepeno Lava Bread. I found the recipe on CookingBread.Com. I had never seen that website before, but it really is a great resource for people who like to bake bread or people who would like to learn or improve their skills. There are so many great recipes with step-by-step instructions and photos! Do check it out when you have a minute.

This bread was a bit time consuming to make - you make a mixture the night before and leave it sit overnight, then there are two 2 hour rises and another 1/2 hour rise prior to baking for 35 minutes. So definitely do this on a day when you have all day! But I promise - its worth it! The bread is absolutely delicious - so tender and flavourful and don't forget cheesey. And don't cut back on the jalepeno - it sounds like a lot, but trust me, it is not spicy at all - the jalepenos must mellow out as they are baked in the oven because they add a lot of flavour, but not much heat!

Now, on to the recipe:
Corn Jalepeno Lava Bread
Recipe from CookingBread.Com
Ingredients:

The night before:

  • 1 1/4 cup bread flour (I used regular all purpose)
  • 3/4 cup water
  • 1/4 tsp instant yeast

The day of:

  • 1 3/4 cup luke warm water
  • 1/4 cup cornmeal
  • 2 tbsp butter
  • 2 tbsp honey
  • 2 tsp salt
  • 1 tsp instant yeast
  • 3 - 3 1/2 cups bread flour (I used regular all purpose flour)
  • 1 cup diced, seeded jalepeno peppers
  • 3/4 cup corn niblets
  • 1 1/2 cups mozzarella cheese, shredded
  • 1 1/2 cups gruyere cheese, shredded

Method:

  1. The night before, combine the night before ingredients in a small bowl. Cover and let stand at room temperature 12-18 hours or overnight.
  2. In the morning combine the water and cornmeal in a small saucepan. Bring to a low boil then turn the heat down and simmer for five minutes. Stir frequently so mixture doesn't burn. Remove from heat and add the butter and honey. Stir until well incorporated.
  3. Pour into stand mixer and let stand until cooled to 110F. Once cooled, add the night before mixture, yeast and one cup of flour. Mix on low speed until well blended.
  4. Add the salt, 3/4 cup of the jalepenos and 1/2 cup of corn. Mix til blended.
  5. Start to add the flour slowly. The dough needs to be sticky, so don't add too much. While mixing on low speed, you want the dough to stick to the bottom of the bowl, but not the sides. Continue to knead on low spead for 8 minutes more. Afterwards, leave in bowl and spray with oil spray.
  6. Cover with plastic wrap and let rise for 1-2 hours until doubled in bulk.
  7. Using a wooden spoon, punch down dough, then cover with plastic wrap again and leave to rise for another 1-2 hours or until doubled in bulk. After second rise, sprinkle good amount of flour on counter (remember, dough is sticky). Take the cheese and mix in remaining jalepenos and corn. Put the dough onto floured surface and sprinkle more flour on top. Using your hands, lightly press the dough into a 12x12 square. Sprinkle the cheese on top of the dough. Roll the dough as you would if you were making cinnamon buns - you should have a nice log shaped loaf. Pinch the seam and ends closed.
  8. Take a large tea towel and sprinkle it generously down the middle with flour. Place the dough on the floured tea towel and sprinkle more flour on top. Wrap the dough with the tea towel and leave on the counter to rise for another half an hour.
  9. Before you cut the dough, preheat the oven to 425F. When oven is ready, cut the dough into 4 even pieces. Spread open the tops so the cheese is exposed. Place onto parchment lined baking tray with cheese side up. Bake in oven for 30-35 minutes. Remove and cool on a wire rack.

What great bread! I have never made bread with cornmeal before, and this was delicious! I love that there was cornmeal and whole corn in the recipe. :) This is a bit labour intensive, but sure is worth the effort. Such a unique bread and something you could mix up the flavours in over and over again. I bet some chipotle peppers would be delicious in this recipe too... the possibilities are endless. I will be making this one again!


Happy Baking my Friends! Enjoy. :)

22.11.10

Rustic Roasted Garlic Bread

I'm really out of the loop in the blogging world sometimes... apparently there is a World Bread day - in October!! Next year I'm going to be on top of this. Any way, I was browsing some of the finished products of World Bread Day and found Deeba's post on her blog Passionate about Baking. It looked amazing - Rustic Roasted Garlic Bread! Of course I was all over that one - I set to making it all of 15 minutes after reading the recipe. I was definitely not disappointed and it was really easy to make.


If you tend to shy away from bread making, don't! Its not as hard as it looks or sounds. Just remember to allow adequate time for the bread to rise. :) This bread smelled amazing while it was cooking - honestly, it was difficult to wait for it to cook all the way through because it smelled so good we all just wanted to devour it - immediately. I may have even burned off some of my tastebuds because I didn't wait for it to cool enough before popping a piece in my mouth.


Rustic Roasted Garlic Bread

Ingredients:

  • 3 cups all-purpose flour + more as needed
  • 2 tsp instant yeast
  • 2 tsp coarse salt + more for sprinkling
  • 1 to 1 1/4 cups water
  • 2 heads roasted garlic
  • 4 tbsp + 1 tsp olive oil

Method:

  1. Squeeze the roasted garlic out into a bowl and mash with a fork.
  2. Combine the yeast, flour, roasted garlic and 2 tsp of salt in the bowl of a stand mixer. Turn on the mixer and add 1 cup of water and 4 tbsp olive oil. Add more water until the dough just comes together into a ball and is slightly sticky to the touch.
  3. Turn out dough onto a lightly floured surface and knead lightly by hand for a few seconds until the dough forms a smooth, round ball. Grease a bowl with the remaining olive oil and place the dough into the bowl, turning to coat all over with the oil. Cover with plastic wrap or a damp tea towel and place in a warm, draft-free place to rise for 1-2 hours or until doubled in bulk.
  4. About an hour before you plan to bake the bread, take the dough out and divide it evenly into two pieces. Dust your workplace lightly with flour and shape the two pieces into loaves that will fit on your baking tray. Line the baking sheet with parchment paper and place loaves on baking sheet. Cover with cling film and leave to rest in a warm place for about an hour.
  5. Preheat your oven to about 375F. Just before popping into the oven, give the loaves about 4-5 slashes with a knife. Place baking sheet into the oven and place a small bowl of water in the bottom of the oven below the bread. Bake 35-40 minutes or until loaves are nice and brown , and make a hollow sound when tapped on the bottom.

Enjoy this post and definitely check out Deeba's lovely blog Passionate about Baking. She makes the most beautiful desserts and if you've ever looking for food blogger activities, she is always posting about ways to get involved, so do check back regularly.
Thanks for stopping by! Happy Baking my Friends!

12.10.10

Pane Bianco - 3 Ways


Alright, get ready for a show stopper - literally! This bread is spectacular to look at and even more spectacular in your mouth. A good friend of mine who is definitely a culinary genius just celebrated a milestone birthday (something like 20 I think ;) ) and her hubby planned her a birthday party. He said we could feel free to bring a dish that we made... well of course I had to bring something, but could I decide what to bring? Of course not! It had to be something that travelled well, didn't take too long to make and tasted and looked amazing. Then I came across this blog post at Living in the Kitchen with Puppies for Tomato, Basil and Garlic Filled Pane Bianco. The photos were beautiful. So, about 3 hours before we were supposed to go to this birthday party, I started making this bread! Pulled it out of the oven and headed out the door. Any way, long story short, pretty much all conversation ceased when my friend pulled the bread out of the bag I had it wrapped in and everyone needed a rendition of how I made it and what was inside! It was an absolute hit.


I was so thrilled with the bread that I decided to play around with fillings. The three types I tried were:
  • Sundried tomato, roasted garlic, goat cheese, cheddar cheese, fresh rosemary and basil
  • Roasted garlic, goat cheese, and fig and walnut wine preserves
  • Cream cheese and jalepeno cranberry jelly

I would also like to try a cinnamon and brown sugar filling similar to cinnamon bun filling as I think it would bake up beautifully and taste absolutely divine!

Any way, on to what you came here for: the recipe!

Tomato, Basil & Garlic Pane Bianco

Recipe adapted from Living in the Kitchen with Puppies

Ingredients:

  • 1/2 cup warm water
  • 1/4 cup sugar
  • 4 teaspoons instant yeast
  • 1 cup warm low-fat milk
  • 1/3 cup extra-virgin olive oil
  • 2 large eggs
  • 2 teaspoons salt
  • 6 cups bread flour
  • 1 (8 1/2-ounce) jar oil-packed sun-dried tomatoes
  • 1 large head (or two small) roasted garlic
  • 1 1/2 cups shredded Italian blend cheese, divided (or any cheese you have on hand - I used cheddar, goat cheese and parmesan)
  • 2/3 cup chopped fresh basil (or any fresh mixed herbs - basically whatever you have on hand)

Method:

  1. Combine the water, sugar, yeast, milk, olive oil, eggs, salt, and flour, and mix and knead by hand, stand mixer, or bread machine until you've made a cohesive, soft dough. If you're kneading in a stand mixer, it should take 5 to 7 minutes at second speed, and the dough should barely clean the sides of the bowl, perhaps sticking a bit at the bottom. In a bread machine (or by hand), it should form a smooth ball. Place the dough in a greased bowl, and turn to grease the top. Cover and let rise in a warm place until double, about 45 minutes.
  2. Meanwhile, thoroughly drain the sun-dried tomatoes; lay them on a paper towel to absorb any excess oil. Using kitchen shears, finely chop the tomatoes.
  3. Line two baking sheets with parchment. Gently deflate the dough and divide it in half. Roll one piece into a 22" x 8 1/2" rectangle. Rub with half the garlic, cheese, basil, and tomatoes.
  4. Starting with one long edge, roll the dough into a log the long way. Pinch the edges to seal.
  5. Place the log seam-side down on a baking sheet. Using a small sharp knife, start 1/2" from one end and cut the log lengthwise down the center about 1" deep, to within 1/2" of the other end.
  6. Keeping the cut side up, form an "S" shape. Tuck both ends under the center of the "S" to form a "figure 8"; pinch the ends together to seal. Cover and let rise in a warm place until double, 45 to 60 minutes. Repeat with the remaining dough.
  7. While the loaves are rising, preheat the oven to 350°F.
  8. Bake the loaves for 35 to 40 minutes. Tent the loaf with foil after 15 to 20 minutes to prevent over-browning.
  9. Remove loaves from their baking trays; cool on racks. Store any leftovers well-wrapped, at room temperature.

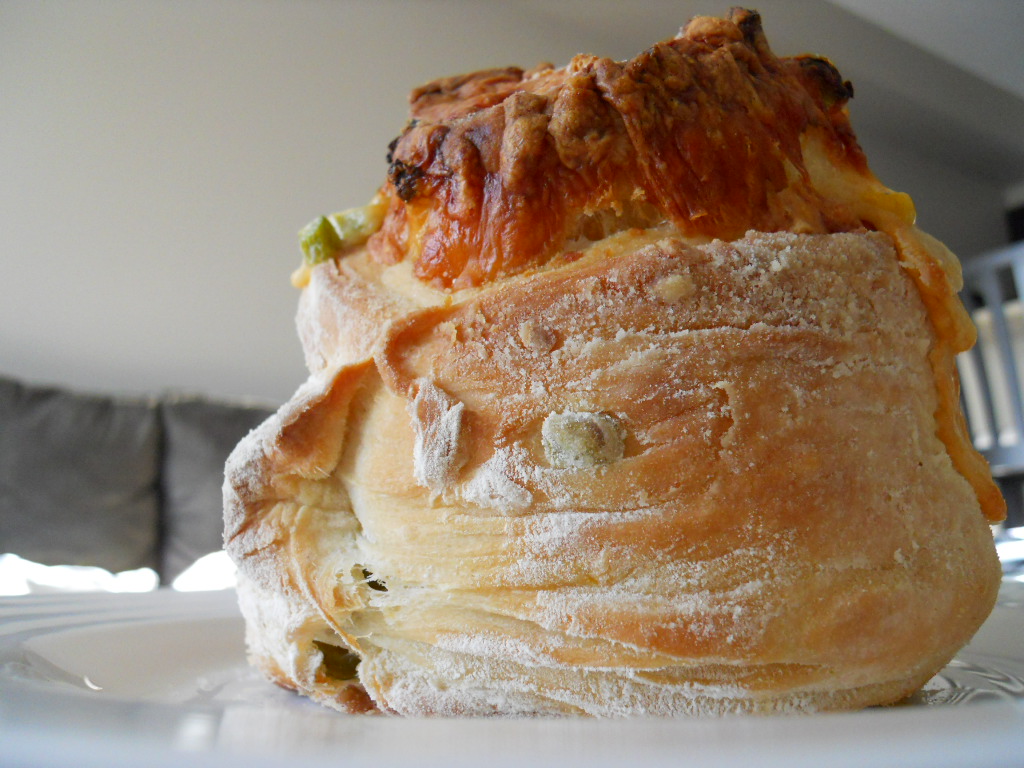
Experiment with fillings and toppings - though in my experiments dry toppings seem to work better than wet! And colourful fillings look very nice when your bread puffs up and opens so beautifully to show off its fillings.:) I really enjoyed this recipe and despite how technical the rolling and shaping sounds, it is really easy. Just be patient and remember, practice makes perfect.

Happy Baking my Friends!