8.2.11

Not-too-Special Grilled Cheese

Well folks, I have some earth-shattering news for you!!!!! I made it through cooking my entire Superbowl menu without some sort of accident (knock on wood that next year goes as smoothly). Some highlights from the menu include: slow cooker chicken wings, stuffed mushrooms, ginger sandwich cookies with lemon cream and drum-roll please..... Caramel Apple Cheesecake that some of you may have seen on an episode of Bobby Flay's Throwdown! It was a great night and recipes will most likely follow (although, no promises about how quickly they will be posted)! All in all it was a good time and definitely good food. But, after all that luck, of course everything can't be perfect right? I woke up sick, sick, sick on Monday morning and of course its busy at work so I have to drag myself in there and do my job. :( Poor me! haha

So I'm laying in bed "resting" right now while I post a short post to let you know I'm still alive after all the Superbowl cooking and definitely feeling a little sorry for myself (which I shouldn't be - there are people out there feeling a heck of a lot worse than me right now!!!).

When you're sick you want a little comfort and for me that came in the form of coming home to dinner being all ready for me - tomato soup (yes, from a can) and grilled cheese sandwich. Hubby felt bad that I had to go to work sick, so he made me my favorite "sick meal". :) What a nice guy!

So tonight, I made another grilled cheese - that of course I took a couple pictures of! Here is what is in my not-too-special grilled cheese (recipe by me!) haha if you can call it a recipe.

Take a couple pieces of bread, butter one side of each slice. Spread a thin layer of mayo on the other side of one of the slices of bread. Put a nice layer of shredded old cheddar cheese on top of the mayo, top with some crisp fried bacon, sprinkle with garlic powder and a few red chilli flakes then top with a bit of shredded parmesan cheese. Top with other slice of bread (buttered side out) and place in frying pan heated over medium heat. Fry until golden brown on one side, flip and fry until the other side is golden brown. Remove to plate, cut in half on the diagonal and serve with bucket-loads of ketchup (or not, but thats how I roll!). Enjoy while wallowing in your own self-pity.

Heres to feeling better tomorrow!!! Happy Cooking my Friends! More exciting posts to follow later in the week. :)

5.2.11

More Mac & Cheese... and peas & bacon!

All I have to say about this recipe is YUM!!!! It was sooooo good. I know the photos aren't great and there aren't very many of them, but thats because I was far to excited to just eat this mac & cheese. Its nothing fancy and mine is really low class because I ran out of macaroni and just substituted broken up spaghetti instead... oh well, its the taste that matters right? And cheesy goodness can cover up a multitude of sins!

I am in the middle of prepping for my Superbowl party which as most of you are aware (or should be aware in hubby's opinion) is happening tomorrow - like ALL DAY! I am definitely not a football fan, nor will I ever be, but I am always game for having people over and cooking and baking for them! Its so fun and it gives me an excuse to try out new recipes and spend exhorbitant sums of money on food without hubby getting after me! Entertaining is the one time its acceptable to go all out in the kitchen! WAHOO!!! I will be tired on Monday, but it will be worth it.
Last year while prepping for the Superbowl party I burned myself really badly by stupidly picking up a hot pan... I had to hold ice packs on my hands for the next two days and my hands blistered. :( It was not fun, but the food was still delish!! So far, this year's prep work is going far better than last year... will keep you posted because I still have a lot to do!
On to the mac & cheese though...
The Ultimate Macaroni & Cheese with Peas & Bacon
Recipe from Tyler's Ultimate


Ingredients:

  • kosher salt
  • 1 lb elbow macaroni
  • 3 tbsp unsalted butter
  • 3 tbsp flour
  • 4 cups warm milk
  • 5 1/2 cups shredded sharp white cheddar cheese
  • freshly ground black pepper
  • 1/4 cup chopped fresh flat,leaf parsley
  • extra virgin olive oil
  • 4 slices bacon, cut crosswise into thin strips
  • 1 large onion, diced
  • 2 garlic cloves, smashed
  • leaves from 1/4 bunch of fresh thyme
  • 2 cups froze peas, thawed in a colander under cool water

Method:

  1. Bring a pot of salted water to a boil over high heat. Add macaroni and cook 8-9 minutes, until al dente. Drain.
  2. Preheat oven to 400F.
  3. Melt the butter in large, deep skillet over medium heat. Whisk in flour and cook for about 1 minute, stirring constantly to keep lumps from forming. Gradually whisk in the milk and, whisking vigorously, cook until the mixture is thick and smooth. Stir in 4 cups of the cheese and continue to cook and stir to melt the cheese. Season with salt and pepper. Add cooked macaroni and the parsley and folt that all in to coat the macaroni with the cheese mixture. Scrape into a 3 quart baking dish and sprinkle with remaining 1 1/2 cups cheese. Bake for 30 minutes, or until hot and bubbly.
  4. While thats going on, heat a 2 count of olive oil in a saute pan. Add the bacon, onion, garlic, and thyme and cook for 5 minutes to soften the onion. Fold in the peas and season with salt and pepper (I cooked mine longer to make sure the bacon was a little crisp).

Enjoy!!!


Happy Cooking my Friends! Hope you get a chance to take in some Superbowl festivities and maybe do some cooking and baking! :D

3.2.11

Pita Bread - Attempt #2 & Hummus Ma Lahma

Alright, it has taken me a while, but I've finally got up the nerve to try my hand at making pita breads again! I took the advice of a couple of my great blog followers and upped the temperature of my oven and rolled them thinner. And the results were far improved! Still not perfect, but definitely much improvement! I saw partial pockets form this time where last time I got no pockets! Soooo I will keep trying. I do have a bit of a tale to tell about this one though...

Have you ever broken a rolling pin? Didn't think so! Well, while I was making these, my rolling pin broke. I had been using this cheap wooden one I picked up from ikea when I first moved out on my own and it had always done the trick. I tidied up my kitchen prior to starting to make the pitas so I would have a nice clean counter to roll them out on. When i started rolling out the second pita, I noticed some brown dust on the dough which looked like coffee grounds. So I'm like, I already wiped down the counter... where the heck is this coming from??? Well i look a little closer and the "coffee grounds" are actually pouring out of the middle of my rolling pin. NOT GOOD!!! So I had to be creative and roll the rest of my pitas out with a big can of chickpeas! So that is my kitchen disaster tale with a happy ending! Maybe I can blame the less than perfect results on the lack of a rolling pin? :D


I have wanted to try something like this for a while, but I just got around to trying it out! I found the recipe on the Food Network website. Emeril Lagasse developed the recipe and it sure is delicious. I would highly recommend this to anyone who likes hummus and making home made pita breads just amp up the delicious factor!
You can find the recipe here. It is late and I'm not up for typing up the recipe. So please accept my apologies for my laziness!!!
I didn't change a thing other than add additional liquid (mixture of olive oil and water) to the hummus to get it to the consistency I wanted it. You can definitely play around with it til you get it the way you like it. Hummus is great like that! You can also mix up the spices you use on the beef. I think next time I'm going to try out a yummy curry spice mixture on the beef. Lots of ways to personalize this recipe and make it how you and your family like it! Have fun playing with it!
Happy Cooking my Friends!

30.1.11

BBD #36 - Corn Jalepeno Lava Bread

Well - this is my first time participating in Bread Baking Day! It is a monthly event where people who are passionate about baking bread make bread that falls within a specific theme. Participant entries are rounded up on the first of each month and posted on the host's blog. This month the theme was "Corny Bread" hosted by Girlichef .

I didn't want to just make corn bread (although I love cornbread), so I settled for making Corn Jalepeno Lava Bread. I found the recipe on CookingBread.Com. I had never seen that website before, but it really is a great resource for people who like to bake bread or people who would like to learn or improve their skills. There are so many great recipes with step-by-step instructions and photos! Do check it out when you have a minute.

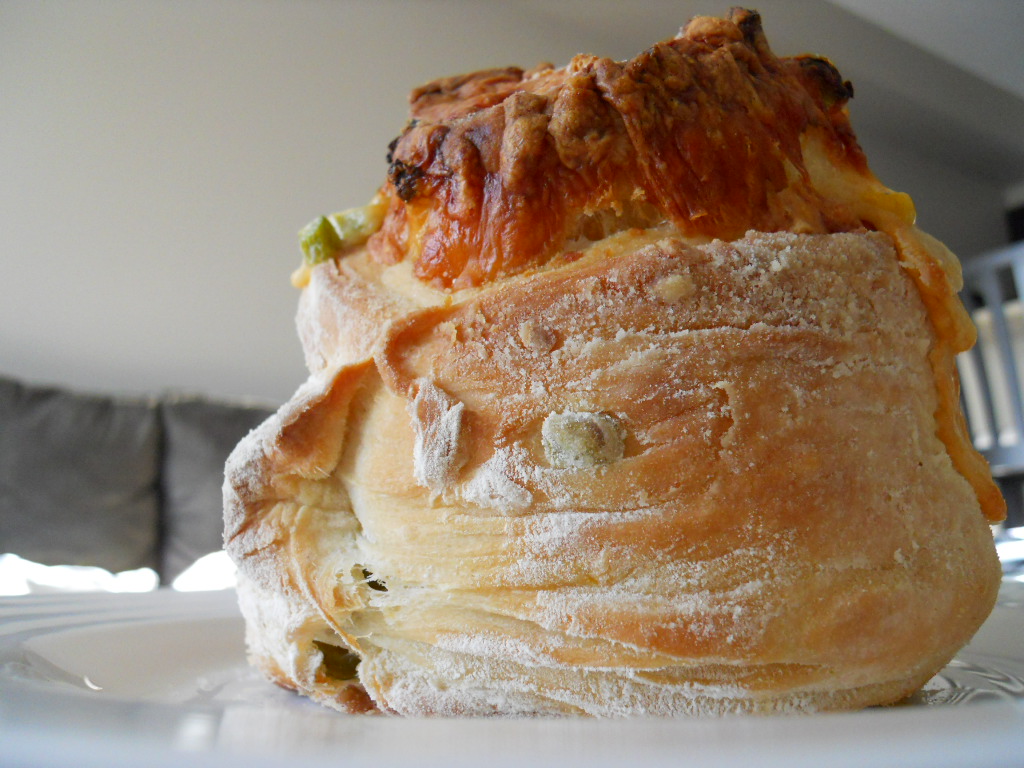
This bread was a bit time consuming to make - you make a mixture the night before and leave it sit overnight, then there are two 2 hour rises and another 1/2 hour rise prior to baking for 35 minutes. So definitely do this on a day when you have all day! But I promise - its worth it! The bread is absolutely delicious - so tender and flavourful and don't forget cheesey. And don't cut back on the jalepeno - it sounds like a lot, but trust me, it is not spicy at all - the jalepenos must mellow out as they are baked in the oven because they add a lot of flavour, but not much heat!

Now, on to the recipe:
Corn Jalepeno Lava Bread
Recipe from CookingBread.Com
Ingredients:

The night before:

  • 1 1/4 cup bread flour (I used regular all purpose)
  • 3/4 cup water
  • 1/4 tsp instant yeast

The day of:

  • 1 3/4 cup luke warm water
  • 1/4 cup cornmeal
  • 2 tbsp butter
  • 2 tbsp honey
  • 2 tsp salt
  • 1 tsp instant yeast
  • 3 - 3 1/2 cups bread flour (I used regular all purpose flour)
  • 1 cup diced, seeded jalepeno peppers
  • 3/4 cup corn niblets
  • 1 1/2 cups mozzarella cheese, shredded
  • 1 1/2 cups gruyere cheese, shredded

Method:

  1. The night before, combine the night before ingredients in a small bowl. Cover and let stand at room temperature 12-18 hours or overnight.
  2. In the morning combine the water and cornmeal in a small saucepan. Bring to a low boil then turn the heat down and simmer for five minutes. Stir frequently so mixture doesn't burn. Remove from heat and add the butter and honey. Stir until well incorporated.
  3. Pour into stand mixer and let stand until cooled to 110F. Once cooled, add the night before mixture, yeast and one cup of flour. Mix on low speed until well blended.
  4. Add the salt, 3/4 cup of the jalepenos and 1/2 cup of corn. Mix til blended.
  5. Start to add the flour slowly. The dough needs to be sticky, so don't add too much. While mixing on low speed, you want the dough to stick to the bottom of the bowl, but not the sides. Continue to knead on low spead for 8 minutes more. Afterwards, leave in bowl and spray with oil spray.
  6. Cover with plastic wrap and let rise for 1-2 hours until doubled in bulk.
  7. Using a wooden spoon, punch down dough, then cover with plastic wrap again and leave to rise for another 1-2 hours or until doubled in bulk. After second rise, sprinkle good amount of flour on counter (remember, dough is sticky). Take the cheese and mix in remaining jalepenos and corn. Put the dough onto floured surface and sprinkle more flour on top. Using your hands, lightly press the dough into a 12x12 square. Sprinkle the cheese on top of the dough. Roll the dough as you would if you were making cinnamon buns - you should have a nice log shaped loaf. Pinch the seam and ends closed.
  8. Take a large tea towel and sprinkle it generously down the middle with flour. Place the dough on the floured tea towel and sprinkle more flour on top. Wrap the dough with the tea towel and leave on the counter to rise for another half an hour.
  9. Before you cut the dough, preheat the oven to 425F. When oven is ready, cut the dough into 4 even pieces. Spread open the tops so the cheese is exposed. Place onto parchment lined baking tray with cheese side up. Bake in oven for 30-35 minutes. Remove and cool on a wire rack.

What great bread! I have never made bread with cornmeal before, and this was delicious! I love that there was cornmeal and whole corn in the recipe. :) This is a bit labour intensive, but sure is worth the effort. Such a unique bread and something you could mix up the flavours in over and over again. I bet some chipotle peppers would be delicious in this recipe too... the possibilities are endless. I will be making this one again!


Happy Baking my Friends! Enjoy. :)

26.1.11

The Daring Bakers Challenge - January 2011 - Biscuit Joconde Imprime/ Entremet

Since I joined the Daring Bakers in August I have constantly been amazed at the cool things we've made. I have conquered a number of culinary adventures that I never dreamed I would be able to complete. And then this challenge came along... it seemed so complex, so difficult, and as though I would never be able to successfully complete the challenge. I spent a few sleepless nights worrying about how this dessert would turn out...

The January 2011 Daring Bakers' challenge was hosted by Atheroshe of the blog accro. She chose to challenge everyone to make Biscuit Joconde Imprime to wrap around an Entremets dessert. You should check out her blog for some beautiful entremets - she is so very talented and really did host an amazing challenge!


Now, despite being more terrified and stressed out about a challenge than I have been since I joined, I really enjoyed making this dessert and most definitely will try it again. I would love to perfect this technique - it is such a beautiful way to present desserts for special occasions and always leaves people wondering how you achieved such beauty in a dessert! I chose to make individual desserts as I was having a dinner party that weekend, so I figured I may as well make them. Even if they looked ugly, at least they would taste good!
I layered a no-bake vanilla bean cheesecake which I adapted from my mother-in-law's go-to cheesecake recipe, with a chocolate-kahlua mousse. I topped with sweetened whipped cream and a small piece of joconde imprime. I found the mousse to be far too rich for my taste, however my husband really loved it as did my dinner party guests, so I think this may just come down to my personal preference. However, I would highly recommend the no-bake cheesecake recipe (please see below for details).
Since this is going to be such a long post, lets get on with the instructions. Be sure to read through all the instructions prior to attempting this recipe!!!! Maybe read through them a couple of times... :)


Step 1: Make the Joconde Sponge

Ingredients:

  • 3/4 cup almond flour
  • 1/2 cup plus 2 tbsp icing sugar
  • 1/4 cup cake flour
  • 3 large eggs
  • 3 large egg whites
  • 2 1/2 tsp white granulated sugar
  • 2 tbsp unsalted butter, melted

Method:

  1. In a clean mixing bowl whip the egg whites and white granulated sugar to firm, glossy peaks. Reserve in a separate clean bowl to use later.
  2. Sift almond flour, confectioners sugar, cake flour in the dirty egg white bowl.
  3. On medium speed, add the eggs a little at a time. Mix well after each addition. Mix until smooth and light. Fold in 1/3 of reserved egg whites to lighten the batter. Fold in the remaining egg whites. Do not overmix.
  4. Fold in melted butter.
  5. Reserve batter to be used later.

Next Step: Make the Joconde Paste to pattern your sponge:

Ingredients:

  • 14 tbsp unsalted butter, softened
  • 1 1/2 cups + 1 1/2 tbsp icing sugar
  • 7 large egg whites
  • 1 3/4 cup cake flour
  • food colouring gel or paste

Method:

  1. Cream butter and sugar until light and fluffy. Gradually add egg whites. Beat continuously. Fold in sifted flour. Tint batter to desired colour (colours).
  2. Pipe batter into desired patterns on a silicone baking mat placed on an upside down baking sheet.
  3. Slide the baking sheet with the paste into the freezer for 15 minutes until hard.
  4. Remove from freezer. Quickly pour the joconde batter over the design. Spread evenly to completely cover the pattern of the decore paste.
  5. Bake at 475F until the joconde bounces back when slightly pressed, approx 15 minutes. It will bake fairly quickly, so do keep an eye on it.
  6. Cool. Do not leave too long or it will stick to the mat.
  7. Flip cooled cake onto parchment paper dusted with icing sugar, remove silpat carefully. Cake should be right-side up with your pretty pattern showing.


Next Step: Prepare the Molds for the Entremets:

  1. You can use a spring-form pan, biscuit cutter, ring molds, or PVC pipe cut approximately 3 inches high.
  2. Lay a piece of parchment paper on a baking tray. Stretch cling wrap over the bottom of the mold and up the sides. Be sure to pull it tight so it creates a smooth base for your dessert. Line the inside of the ring with a curled piece of parchment paper. Cut the paper to the top of the mold as this will make spreading the entremet layers easier.

Next Step: Preparing the Joconde for the Molds:

  1. Trim the cake of any dark, crispy edges. You should have a nice rectangle shape.
  2. Decide how high you want your joconde wrapper. Traditionally it should be about 1/2 the height of the mold.
  3. Once your height is measured, cut with a ruler into nice even strips. Besure strips are cut cleanly and ends are perfectly straight.
  4. Press the cake strips inside of the mold, decorative side facing out. Push and press the ends together to make a beautiful seamless ring around the mold.
  5. The mold is done and ready to fill.

No-Bake Vanilla Bean Cheesecake

Ingredients:

  • 1 pkg light cream cheese
  • 1/2 cup sugar
  • 2 tsp vanilla
  • 1 envelope dream whip
  • 1 vanilla bean

Method:

  1. Beat cream cheese & sugar until smooth & fluffy. Stir in vanilla and vanilla bean seeds. Prepare dessert topping according to package directions. Fold into cream cheese mixture.
  2. Spoon into individual molds until cream cheese mixture comes up about 1/2 way to the top.
  3. Leave in fridge overnight to let cheesecake set. Then make the mousse.


Make the Kahlua-Chocolate mousse based on the mousse part of this recipe. Spoon on top of set cheesecake mixture and level the tops as best you can. Mousse should come all the way to the tops of each mold.

Serve by garnishing with whipped cream & chocolate shavings. Enjoy!

Wow! What a lot of work and a lot of steps! But it really was worth the effort. Despite not being perfect, they really were beautiful and so much fun to serve at my dinner party. Thank you so much Atheroshe for sharing such an amazing technique with us Daring Bakers. This challenge was oh-so-daring, but I learned so much and enjoyed every step of the way.


Happy Baking my Friends!

24.1.11

Maple Pecan Shortbread

So I know shortbread cookies are associated with the holiday season, but really, you can make shortbread any time of the year. I would encourage you not to make it all the time since it is quite high in fat and calories, but as a treat once in a while it should be just fine. This shortbread is extra special with the addition of maple syrup, toasted pecans and a little bit of orange zest. The cookies have a bit of an exotic edge to them while still maintaining the traditional shortbread texture and richness. Be sure to cut these cookies small - they're rich and you won't need more than a couple of bites to be satisfied.

These cookies are quick to whip up and they taste great - they're a real treat. Bring them to work and share them with your co-workers. They'll be really pleased - and if you cut them small, they won't be worried about not sticking to their healthy eating new years resolution!


Maple Pecan Shortbread
Recipe from Holiday Cookies (www.cuisineathomespecials.com)

Ingredients:

  • 1 1/4 cups cake flour
  • 1/4 cup cornstarch
  • 1/4 tsp table salt
  • 1 stick unsalted butter, softened (1/2 cup)
  • 2 tbsp brown sugar
  • minced zest of 1/2 an orange
  • 1/4 cup pure maple syrup
  • 1/2 tsp maple extract
  • 1/4 cup pecans, toasted, chopped
  • icing sugar for dusting

Method:

  1. Whisk flour, cornstarch and salt together in a bowl. Set aside. Cream butter, brown sugar, and zest together in a bowl with a mixer until blended. With the mixer running, slowly drizzle in syrup and extract; beat until incorporated.
  2. Add flour mixture to butter mixture in 2 or three additions, beating at low speed just until combined. Fold in the nuts.
  3. Pat dough into an 8" square about 3/4" thick on the prepared baking sheet. Bake 30-40 minutes, or until richly brown around edges and golden in the center. Sprinkle a thick layer of icing sugar over the shortbread
  4. While hot, trim edges, then cut into 1" squares and let cool on the pan to room temperature. To serve, transfer shortbread to platter.

*Note: These cookies can be frozen for up to one month.

*Note: as you pat the dough onto the baking sheet, periodically dip your fingertips in a bowl of water. This will help keep them from sticking to the dough.

Give this recipe a try! You will love how quick it is to whip up and how deliciously unique this shortbread is.

Happy Baking my Friends!

23.1.11

Sauteed Mushrooms on Crostini

Starting to think about your Super Bowl party? Looking for some classy and delicious appetizers to serve to your guests that aren't the typical natchos that Superbowl parties are known for? Make this appetizer! It is so yummy tasting and quick and easy to make. This recipe is also versatile - pile it onto crosini for a simple appetizer, garnish a creamy soup with it, or top your barbequed steak with it! I am drooling right now thinking about how good this was.

Since I know you're busy and its a week night I will keep this post short! So - on to the recipe.

The Mushroom Thing
Recipe minimally adapted from The Girl Can't Cook

Ingredients:
  • 2 tbsp olive oil
  • 3 cloves garlic, minced
  • 1/2 cup minced onion
  • 500g fresh wild and/or domestic mushrooms, sliced
  • salt and freshly ground black pepper
  • 1/4 cup white wine
  • 1/4 cup whipping cream
  • 1 tbsp minced fresh rosemary
  • a bit of fresh thyme

Method:

  1. In a nonstick pan, heat the oil over medium-high heat. Add the garlic and saute for 1 minute, until the garlic just begins to colour lightly (not brown). Add the onion and cook a minute longer, then stir in the mushrooms and season with salt and pepper.
  2. If you are using any dried mushrooms in the mixture, cover them with cold water or white wine and microwave for 1 minute, then let them sit in hot liquid until they've rehydrated. Drain and combine with the fresh sliced mushrooms in the pan. Cook until the mushrooms give up their liquid and begin to colour, about 5-10minutes, then stir in the white wine. Cook until most of the liquid is gone.
  3. If using cream, stir it in now and continue cooking until the sauce is reduced and thickened. Season with the fresh herbs and serve with toasts or crusty bread. Makes approximately 2 cups.

Happy Cooking my Friends! Wishing you a great week... only 4 days left til the weekend! :D