31.7.12

Foodie Pen Pals - July 2012


 Soooo lately, I haven't had time to keep up with all of my online foodie clubs, so I did the logical thing and joined another one!! What?!! Don't judge me! ;) This one sounded too cool not to join.

Did you have a pen pal when you were growing up? I did, and it was pretty sweet. We both loved horses and we would send each other letters talking about our horses and send each other pictures of our beloved horses. It was fun and the coolest part is that we still keep in touch and have a lot in common! Any way, when the opportunity to get a foodie pen pal came up, I couldn't say no! How cool is it to have a foodie pen pal? :)

If you've never heard of foodie pen pals, here's the low down:

On the 5th of every month, you will receive your penpal pairing via email. You then have until the 15th of the month to fill your box with fun foodie things, local food items or even homemade treats ($15 spending limit) and put them in the mail! On the last day of the month, you will post about the goodies you received from your penpal!

Foodie Penpals is open to blog readers as well as bloggers. If you’re a reader and you get paired with a blogger, you can write a short guest post for your penpal to post on their blog about what you received. Anyone from the US and Canada can join the fun!

 If you’re interested in participating for August, please check out the foodie pen pals link above and submit your information by August 4th.

Any way,  now that you know what it is, I'll tell you about what I got this month. My pen pal was Helene over at the Healthy Frenchie and she is from Fernie, British Columbia which isn't all that far from where I live (well, we're in the same province at least!!). She is super sweet, honest and straight forward and her blog reflects that. I think the only thing we would disagree on is who's dog is cuter!! ;) We are both overly biased cute-dog owners! Ha!

Helene was so sweet this month and sent me some neat things including:

  • Some vegan candy which is locally made in Fernie with all natural juices and fruits. It was delicious and didn't make it into the pictures in this post!!
  • A waffle and pancake mix made by a coffee shop owner in Fernie - I haven't tried it out yet, but I can't wait - it looks delicious.
  • Organic sweet and sour sauce that came with very high praises - can't wait to give it a try.
  • Home made date chocolate truffles that Helene made for me (delicious - can't say enough good things about them)
  • Brown sticky rice - I had never heard of it before, but I cooked it up the day after I got it and boy, it is soooo good. I can't wait to go buy more!
Thanks Helene for introducing me to some new ingredients, brands and products. What a lovely little package to receive with so many delightful things in it. Can't wait to try out the pancake mix this weekend. :)

This really is a fab way to meet other bloggers and make new friends! Do stop by Helene's blog and check it out! She's got lots of great posts that are charmingly written and give you an interesting look into her day to day life and lots of info about her workout routines (which I thoroughly appreciated!!).

Happy Baking my Friends!

28.7.12

Ancho-Marinated Pork & Mango Skewers


Hi friends! I recently remembered I have a blog and I haven't updated it much (other than mandatory posts) in the last little while. ;) I thought I would show you what I've been up to and share my favorite recipe that I tried while I was back home in Northern British Columbia visiting my family. It was a big hit all around! My favorite dinner was Ancho-Marinated Pork and Mango Skewers. I found the recipe in the Best of Fine Cooking magazine's Summer Eats 2012 issue (there are sooooo many good recipes in there so best to check it out if you haven't already! Its well worth the 12 bucks!).


My favorite part about this recipe was learning to barbeque! My hubby always mans the BBQ when we are home, but since he didn't come up north with me, and it was just my Mom and I out at their cabin, I had to "man up" and figure out how to light the BBQ and do the grilling. Surprise, surprise, it went just fine! And I was pretty darn proud of myself for figuring it out. :)

Ancho-Marinated Pork and Mango Skewers
Recipe from The Best of Fine Cooking Summer Eats 2012

Ingredients:
  • 1/4 cup fresh orange juice
  • 2 tbsp fresh lime juice
  • 2 tbsp olive oil and more fore the grill
  • 2 tsp dark brown sugar
  • 2 tsp ancho chile powder
  • 2 medium cloves garlic, minced
  • pinch of crushed red pepper flakes
  • kosher salt
  • 1 lb pork tenderloin trimmed and cut into one inch cubes
  • 2 medium ripe mangos, peeled, pitted and cut into 1 inch cubes
  • 6 metal skewers
  • 1 tbsp fresh cilantro for garnish (optional)
Method:
  1. In a medium bowl, whisk the orange juice, lime juice, olive oil, sugar, ancho chile powder, garlic, red pepper flakes and 1/2 tsp salt. Add the pork, toss to coat, cover and refrigerate for at least one hour and up to 4 hours (I did two hours and it was plenty).
  2. Thread the pork and mango cubes onto the skewers, alternating them and beginning and ending with a piece of pork. Each skewer should have about 5 pieces of pork and four pieces of mango.
  3. Heat BBQ to medium heat and rub down with a paper towel dipped in oil o grease the grill. Cook the skewers, turning once or twice, until the meat is nicely browned on the outside but still slightly pink in the center, about 8 minutes per skewer (may vary depending on the temp of your grill). Serve garnished with the cilantro if desired.
I served mine over an avocado and blackberry salad dressed with a roasted garlic dressing and some yummy feta cheese!

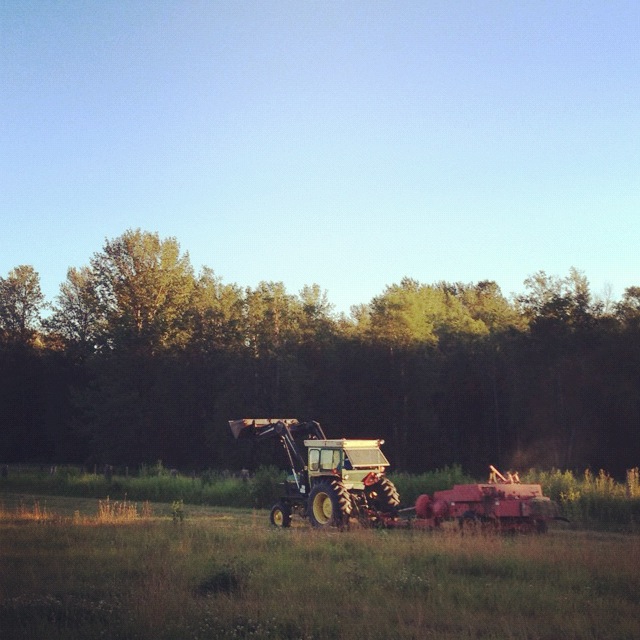
While I was up north visiting family, I got put to work. Turns out my timing was perfect and I was in time for haying! So I drove the tractor, slung some hay bales and otherwise worked my butt off!


I also got to hang out with my momma lots (and Dad too, but he had to work while I was there, so didn't get to spend as much time with him)!


We had some sweet camp fires out at the cabin at the lake in the evenings and even made S'Mores a coupla times. Let me tell you - we discovered some delicious chocolate to use in S'mores - one was a coconut & toasted almond milk chocolate bar and the other was a dark chocolate with sea salt. Both were spectacular, but definitely the favorites of the week!


Also got to take in a hike with my sister and my cousin! It was a great hike to Clearwater Lake & Upper Clear Water lake. Somewhere I had never hiked before. What a beautiful lake! And a beautiful day too.


And finally, I just got some time to sit and relax and enjoy the sunshine. It was a much needed break and was so lovely that my parents shared their beautiful place at the lake with me. We laid out on the dock and soaked up some rays!


 And also enjoyed some of the beautiful evenings!!


Thats all I have for you today! But stay tuned for a super special post tomorrow. I have something really neat and delicious to share with you. :)

Happy Cooking my Friends!

23.7.12

Homemade Snickers for SRC!

Good Morning friends! Its been a while. :) It is time for our SRC reveal and this month I was assigned a challenge - I was assigned Heidi's blog which is in Danish. I didn't have the proper internet browser (she recommends google chrome) to automatically translate her page so it was quite labour intensive to translate her page manually using google translator, however, it was well worth it. The snickers bars I made were delicious - so delicious in fact that my family devoured them!!

Lets get started -

first make the chocolate bottom

Ingredients:
  • 250 g. good quality milk chocolate
  • 1/2 cup peanut butter
Method:
  1. Melt chocolate in saucepan over low heat. Stir in peanut butter until combined.
  2. Pour mixture into a square pan (I used 8x8) lined with parchment paper. Spread into an even layer. Let the mixture harden in the fridge.
Next make the nougat layer

Ingredients:
  • 50g salted butter
  • 2 1/2 cups sugar
  • 1/2 cup evaporated milk
  • 2 1/2 cups marshmallow fluff
  • 1/2 cup peanut butter
  • 2 1/2 cups salted peanuts, roughly chopped
  • 1 tsp vanilla extract
Method:
  1. Melt butter in sauce pan over medium heat. Once butter is melted, add sugar and evaporated milk and bring mixture to a boil. Stir constantly. Heat through until sugar has dissolved.
  2. Add fluff, peanut butter and vanilla and stir until fluff and peanut butter are melted and mixture is smooth. Remove from heat and fold in chopped peanuts.
  3. Let cool slightly and pour over chocolate base. Place in fridge to set up competely.
Next up, make the caramel layer.

Ingredients:
  • 400g toffee/ caramel (the kraft caramel squares work well here)
  • 1/2 cup whipping cream
Method:
  1. Melt toffee and whipping cream together in saucepan over medium heat until mixture is completely smooth. Remove from heat and pour over hardened nougat layer. Place in fridge to harden completely.
Finally, make the chocolate top:

Ingredients
  • 250 g good milk chocolate
  • 1/2 cup peanut butter
Method:
  1. Melt chocolate over low heat in a medium saucepan. Add peanut butter and stir until melted and mixture is smooth. Pour over hardened caramel layer. Place back in fridge to set up completely.
Once bars have hardened and set up in the fridge, remove from the pan and cut into squares. Enjoy!

My family enjoyed these so much that I didn't get a chance to take any photos, so I borrowed a photo from Heidi's blog. Here's what they look like -
Photo not my own - used from Heidi's blog

I am planning to make them again to photograph them and will update this post with my own photos when I have a chance!

Can't wait to see what all the other group C bloggers came up with this month!

Happy baking my friends!

24.6.12

Decadent Desserts Class with Tina Bacon


About a month ago I had the opportunity to attend a baking class called Decadent Desserts at Well Seasoned. The class was put on by Tina Bacon, owner and founder of the Pink Spatula. Tina is a fantastic pastry chef and creates the most amazing hand crafted marshmallows I've ever tasted (peanut butter ripple marshmallows anyone?!! - try that in a s'more!!). Check our her website for beautiful photos of her dessert offerings and where to find her hand crafted marshmallows.


During the class we made Individual German Chocolate Cakes (pictured above), oreos (pictured below), burnt sugar ganache mini tarts, and butterscotch pots de creme topped with dark chocolate pudding. It was an ambitious evening full of delicious, calorie-laden treats, handy tips and great recipes. Tina kindly allowed me to share the recipe for the burnt sugar ganache mini tarts with you (thanks Tina!!). I made them at home again yesterday to make sure the recipe turned out as well under my hand as Tina's professional hand and sure enough, it was a slam dunk!! Delicious and addictive. :)

First step for these delicious little guys is to make the miniature sweet tart dough (makes about 32 mini tarts):

Miniature Sweet Tart Dough
Recipe by Tina Bacon

Ingredients:
  • 1 cup (8 oz) unsalted butter, at room temperature
  • 1 large egg
  • 1 tsp vanilla
  • 2 3/4 cups (12 1/2 oz) all-purpose flour
  • 1/8 tsp fine sea salt
  • 5 1/2 tbsp (2 1/3 oz) sugar
Method:
  1. Cut butter into small cubes and set aside.
  2. In a small bowl stir together egg and vanilla with a fork.
  3. Measure flour, sugar and salt into a food processor bowl. Pulse together a few times to combine. Add butter and pulse till it's the size of rice. While still pulsing, slowly pour egg/ vanilla mixture through tube and mix just till it begins to form a dough. Turn out onto lightly floured surface and knead a couple times to form a smooth dough.
  4. Portion all of the dough first using a 1 1/2 - 2 tsp measure. Next, roll all the dough into balls and place in a miniature muffin pan (see photo below). Form into tart shells using either a tart tamper or your fingers to form a thin, even crust.
  5. Bake in 350F oven for about 10 minutes or till edges are golden. Allow to cool in pan 10 minutes, then place tart shells on a rack to cool completely. Store airtight. Can be frozen.

Burnt sugar ganache tartlets made by Tina in her class
 Next up, make the burnt sugar ganache. Please note that I have adapted this recipe slightly - it originally called to make the caramel using the dry method, but having had a couple of really bad experiences in the past with this method, I opted instead to use the wet method. :)

Burnt Sugar Ganache
Recipe from Tina Bacon (Tina adapted the recipe from Pierre Herme's Faubourg Pave)

Ingredients:
  • 1 3/4 cups (305g) chopped dark chocolate
  • scant 3/4 cup sugar
  • 1/4 cup water
  • 4 tsp unsalted butter
  • pinch of fine sea salt
  • scant 1 1/4 cups heavy cream
  • 1 1/2 cups (12 oz) unsalted butter, at room temperature
Method:
  1. Place sugar in a pile in the middle of a saucepan. Carefully pour water in around the pile of sugar. Over medium high heat, gently and carefully stir the water and sugar mixture until the sugar is dissolved. Once the sugar has dissolved, stop stirring. Let it bubble until it reaches a nice golden brown colour and remove from heat. Stir in first amount of butter and salt until melted. Add cream (careful - it will bubble like crazy and puff up), stirring well. Return to a boil, remove from heat.
  2. Pour half of caramel over chocolate, stir to create ganache. Stir in remaining caramel till smooth. Set aside to cool till only slightly warm, about 10 minutes. Beat butter till malleable. Gently stir small amounts at a time into ganache with a wooden spoon till smooth. Don't use a whisk for this part - you don't want to incorporate air into this mixture.

Adding butter to the flour for the pastry dough
 To assemble your tarts - pour burnt sugar ganache into each tart until full. Sprinkle with coarse sea salt. Allow to set up. Enjoy!

Dough balls waiting to be formed into tart shells

Baked tart shells (my at home attempt)

Burnt sugar ganache tarts (my at home attempt)
This was a fantastic class and I would highly recommend attending any of Tina's baking classes at well seasoned. You'll learn a lot and get to sample loads of delicious food along the way (remember, calories don't count on cooking class nights).


This post has been linked up with Whatcha Baking Wednesdays over at Cajun Sugar Pie.

Happy Baking my Friends!

18.6.12

Pistachio Cranberry Icebox Cookies for SRC!


Hi Everyone! Thanks for stopping by to check out this month's Secret Recipe Club's Group C reveal. Its pretty much one of the best days ever - its when we get to reveal our top secret blog assignment for the month and our selected recipe from that blog. :) If you're interested in learning more about SRC or joining, check out what its all about here.


This month, my assignment was The World in my Kitchen written by Mindy. Mindy is from Kentucky, but she has lived and traveled to many different places over the years. Her blog is a great testament to the different places she has lived and she has so many cool recipes to share. You've got to stop by and check if out if you haven't been there before. I can't wait to pop back over there and make some more of Mindy's recipes given the wild success of the one I selected for SRC.


I made the Cranberry, Pistachio Icebox Cookies - they were so perfect because they're easy (and not at all finicky) and they used ingredients I already had in my pantry (woot!). Mindy had a really cute story about how these cookies pulled her out of a string of unsuccessful cookie baking attempts, so I knew the recipe must be a winner. And it was! You've got to try it out ASAP. :D


Cranberry, Pistachio Icebox Cookies
Minimally adapted from The World in my Kitchen

Ingredients:
  • 1 1/2 cups flour
  • 1 tsp vanilla extract
  • grated zest of one lemon
  • 1/4 tsp salt
  • 3/4 cup unsalted butter, softened
  • 1/4 cup sugar + 2 tbsp for sprinkling
  • 1/2 cup shelled pistachios, roughly chopped
  • 1/3 cup dried cranberries, roughly chopped
  • 1 egg, lightly beaten
Method:
  1. Stir together the flour and the salt in a small bowl.
  2. Beat together the butter, lemon zest, vanilla, and 1/4 cup of the sugar about 3 minutes (or until pale and fluffy). Reduce speed to low and add flour mixture in three separate additions, mixing well after each addition. Mix until dough starts to come together in clumps. Add pistachios and cranberries and stir til evenly distributed through dough (it will be very crumbly still).
  3. Gather and press dough together and divide into two equal portions. Using a piece of plastic wrap, gather and form each piece into a log (about 1 1/2 inches in diameter). Chill, wrapped tightly in plastic wrap until firm - minimum two hours, but up to three days.
  4. Once chilled, preheat oven to 350F and line two large baking trays with parchment paper.
  5. Brush egg over the log covering all surfaces except the two ends of the log. Sprinkle liberally with remaining two tbsp of sugar (or use turbinado sugar).
  6. Slice each log into 1/4 inch rounds and place on the prepared cookie sheets. Bake in preheated oven for about 15 minutes, or until edges are lightly browned. Cool completely on a cooling rack.
 And thats it! These are super easy and they taste delicious. They also look great because of the beautiful colours added by the pistachios and cranberrys. Thanks Mindy for such a lovely recipe. Can't wait to try out many more. :)

This post has been linked up with Whatcha Bakin Wednesdays over at Cajun Sugar Pie. Head over and check out what other mouthwatering desserts other bloggers have come up with this week.

15.6.12

What I've been up to this week

Happy Friday peeps! You may have noticed I've been more absent than usual the past week. Well, that's cuz I've been working on something super special that is wayyyyy out of my comfort zone - I made and decorated a cake for my friend's hubby's 40th birthday!! Here's some pics for those of you who don't follow my Facebook page. Recipes to follow next week!!

The cake is a decadent chocolate buttermilk cake - 3 layers of it filled with an Oreo cream filling. Frosted with chocolate buttermilk frosting. Cake decorations (except the guitar picks) made from white chocolate.


Cake with crumb coat


Another view of crumb coat


Guitar made out of white chocolate

Finished cake! Not perfect, but I'm pleased with how it turned out :)


9.6.12

Potato Buns


Remember last week when I shared that recipe for Balsamic Pulled Pork with you? And remember those yummy looking potato rolls I served them on? Well I'm here to share the recipe for those potato rolls today!

These rolls are super easy to throw together and use pretty basic ingredients. Perfect recipe for a beginner bread baker because you can't really mess them up. :)


Potato Rolls
Recipe from Mennonite Girls Can Cook

Ingredients:
  • 2 cups very warm water
  • 1/4 cup instant mashed potato flakes
  • 1/2 cup sugar
  • 1 tbsp kosher salt
  • 2 eggs, beaten
  • 1/2 cup butter, softened
  • 4 1/2 - 6 cups flour
  • 2 tbsp instant yeast
Method:
  1. Stir together the water, potato flakes, sugar and salt.
  2. Add eggs and butter, then yeast mixed with 3 cups flour. Beat with mixer on high speed.
  3. Add remaining flour, 1/2 cup at a time, until the dough can be easily handled. Knead well (I did this in my stand mixer with a dough hook, but you can knead by hand if you so desire!!).
  4. Place in a greased, covered bowl in the fridge to rest for 2 hours (or overnight).
  5. Pinch 2-3 inch balls off the main piece of dough and form into round roll shapes. Place on parchment paper lined baking tray. Let rise until doubled in size, at least 1 hour.
  6. Bake at 375F for 12 - 15 minutes (buns are done when they sound hollow when you tap on them).

Hope you're enjoying your weekend so far! I'm stuck in a course all weekend :( Booo!! But next weekend I'm excited to head over to Alberta for my good friend's wedding. Can't wait!!

Happy Baking my Friends!