4.1.12

Kabobs: Thai Coconut Curry Pork Kabobs & Satay Chicken


I've never made kabobs before. Don't get me wrong - I like a good kabob, and I've tried a few of the recipes before, but I've never actually gone to the effort of actually cutting up the meat and threading it onto skewers. I'm torn about whether I would go through with the effort again. It was kind of neat, but I'm not that excited about eating off a skewer - I'm find with little chunks of meat that I can just eat with a fork. So you can decide what you want to do with these recipes - you can cut the meat up, marinate and then cook, or thread it onto skewers and cook it that way!!

We'll go easy on the blabbing today because I have two recipes to share with you!! Hope you enjoy.

Pork Skewers with Thai Coconut Curry Sauce
Recipe from the Guy Can't Cook by Cinda Chavich

Ingredients:
  • one 398ml can light coconut milk
  • 2 tsp hot asian chili paste
  • 1/4 cup chopped cilantro
  • 2 tbsp oyster sauce
  • 2 tsp curry powder
  • 1 tbsp brown sugar
  • 2 cloves garlic, minced
  • 1 pork tenderloin (about 500g), cut into long, thin strips
Method:
  1. In a food processor or blender, combine the coconut milk, chilipaste, cilantro, oyster sauce, curry powder, brown sugar, and garlic. Whirl until pureed.
  2. Place the pork strips in a ziploc bag and add half of the marinade. Marinate the pork in the refrigerator for several hours. Cover the remaining marinade and refrigerate.
  3. Thread pork, accordion-style onto wooden skewers. Grill pork over medium-high heat for 8 minutes, turning several times, until its just cooked. Be sure to soak your wooden/ bamboo skewers in water for at least 30 minutes prior to cooking so they don't burn on the grill.
  4. Meanwhile, put the reserved marinade into a small pot and boil for 10 minutes to thicken. Brush some of the curry sauce over the pork as it comes off the grill. Serve the pork skewers over basmati rice, drizzled with the remaining curry sauce and sprinkled with more fresh cilantro.
This one was definitely my favorite - I just can't resist a yummy thai curry sauce (actually, pretty much any thai food is irresistable to me).

Satay Sticks with Peanut Sauce
Recipe from the Guy Can't Cook by Cinda Chavich

Ingredients:
  • 1 lb boneless, sinless chicken, pork, or lamb, cut into thin strips
  • Marinade:
    • 1/4 cup kecap manis (sweet indonesian soy sauce)
    • 1 tbsp freshly squeezed lime juice
    • 1 clove garlic
    • 1 tsp honey
  • Peanut Sauce
    • 1 clove garlic, minced
    • 1/2 cup natural peanut butter
    • 1 tbsp kecap manis
    • 1/4 cup chicken broth or water
    • 1 tbsp freshly squeezed lime juice
    • 1/2 tsp asian chili paste
Method:
  1. In a large ziploc bag, combine the meat with the marinade ingredients. Seal and marinate in the refrigerator overnight.
  2. Drain the marinated meat and thread onto skewers. Grill over medium-high heat until browned on all sides, about 10 minutes in total.
  3. To make the sauce, whisk the garlic, peanut butter, kecap manis, chicken broth, lime juice, and chili paste together in a small bowl.
  4. Set the sauce in the center of a round platter, and arrange the skewers like spokes around the edges if you are feeling artistic & fancy.

Both of these recipes are quite simple, just be sure you allow time for the meat to marinade because that's where the flavour comes from. You could probably bake the kabobs in the oven too if your weather conditions don't allow you to grill outside. :) Bake on a fairly high heat and broil a little at the end to get a little bit of browning on the meat.

Happy Cooking my Friends!

3.1.12

Chicken Taquitos!

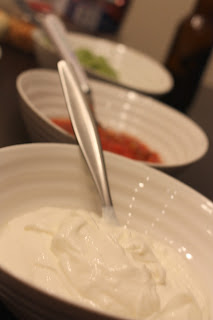
 I have been meaning to make these for a long time. I originally saw them on Tracey's Culinary Adventures a while back (think March - yep I've been procrastinating for a while), but then I totally forgot about them with the busyness of life. Well, lucky for me, Tracey posted a New Years post roundup of all of the favorite recipes of 2011 and these made the list. That was all the motivation I needed to make these Creamy Baked Chicken Taquitos. You could easily make these on a weeknight - just buy a rotisserie chicken from the grocery store so you don't have to cook your own chicken and you can whip these up in under 45 minutes.


I've made a couple of changes, but the recipe is mostly the same as Tracey's because it is really delicious and flavourful without an arm-load of ingredients. I served mine with a green salad, spanish rice and guacamole, salsa & sour cream. It made for a tasty and filling meal. You could totally serve these up as part of a dinner party if you wanted - make up a pitcher of margaritas and serve some cold Coronas and you've got yourself your own little mexican fiesta party!


Creamy Baked Chicken Taquitos
Recipe adapted from Tracey's Culinary Adventures

Ingredients:
  • 3 oz cream cheese, softened
  • 1/4  cup salsa verde
  • juice of 1/2 lime
  • 1 tsp chile powder
  • 1/2 tsp ground cumin
  • pinch of cayenne pepper
  • 1/2 tsp onion powder
  • 3 cloves garlic, minced
  • 1/4 cup fresh cilantro, chopped
  • 3 tbsp chopped green onions
  • 2 cups cooked, shredded chicken
  • 1/2 cup shredded sharp cheddar cheese
  • 1/2 cup shredded montery jack cheese
  • 8-12 flour tortillas (recipe called for corn tortillas, but I couldn't find them in my grocery store!!). Corn tortillas will make it so these crisp up more and brown more evenly in your oven.
Method:
  1. Preheat oven to 425F. Spray a baking tray with non-stick cooking spray.
  2. In a large bowl, stir together the cream cheese, salsa verde, lime juice, chile powder, cumin, cayenne, onion powder, garlic, cilantro, green onions and 1/4 tsp kosher salt. Add chicken and cheeses and stir until evenly distributed. Season mixture to taste with salt and pepper.
  3. Spoon 2-3 tbsp of the filling onto the lower third of the tortilla, and then roll tightly. Place seam side down on prepared baking tray. Repeat until all filling is used.
  4. Spray taquitos with cooking spray and then sprinkle with kosher salt. Bake 15-20 minutes until tortillas are crisp and filling is hot. Delicious served with salsa, sour cream and fresh guac!


Yum, yum, yum!! What are your favorite Mexican recipes? If you have one you really like, I'd love to hear about it. Mexican cooking is fairly new to me and I would love to have some tried and true recipes to start out with. Hope you enjoy this recipe!

Happy Cooking my Friends!

1.1.12

Cranberry, Rosemary and Toasted Pecan Bread


Happy New Year!! I hope you all had a great evening ringing in the New Year last night. We had a fairly quiet night here - complete with a Harry Potter movie marathon and a family nacho making competition (post, complete with pictures and an announcement of the winner to follow soon!!). Despite being quiet, it was very enjoyable and gave us a great chance to reflect on the year just past and set some goals/ resolutions for the new year.

In some ways this has been a really challenging year and in other ways it has been a spectacular year. We've had a number of difficulties within our family including a number of health issues, but we're getting by. We've also been blessed with being able to take some beautiful vacations together and enjoyed success in our studies and careers. I hope you and your family have been blessed this year and haven't encountered too many challenges. Thanks for following along on my blogging journey and checking back regularly to see what I'm up to. You guys really keep me going some times. :)


With some of my time off over the holidays, I've had time to reflect, cook and bake! One of my baking escapades included this cranberry, rosemary and toasted pecan bread. It was absolutely spectacular!!! This is probably the best bread I've made all year (and if you look back, you'll notice I make quite a lot of bread). The bread is beautifully moist, light and flavourful and is delicious on its own, or toasted and spread with a little butter. It would also probably make great grilled cheese sandwiches with some proscuitto and gruyere cheese.


Cranberry, Rosemary and Toasted Pecan Bread
Recipe adapted from Amy's Kitchen Table

Ingredients:
  • 1 cup toasted pecans, coarsely chopped
  • 1 1/3 cups warm water
  • 1 pkg active dry yeast (1/4 oz)
  • 2-3 cups bread flour
  • 1 cup whole wheat flour
  • 1 tbsp kosher salt (2 tsp would be enough if you aren't a big fan of salt - the bread is fairly salty)
  • 1 tbsp granulated sugar
  • 3 tbsp fresh rosemary, chopped
  • 1/2 pkg of fresh cranberries
  • 1/4 cup red wine
  • 1/3 cup brown sugar
  • 1 large egg
  • 1 tbsp water
  • coarse salt for sprinkling
Method:
  1. First, make the cranberry sauce you will use in the dough and when assembling the bread. Place cranberries, red wine and brown sugar in a small saucepan. Cook over medium-low heat until cranberries are popping and the sauce is very thick (about 15 minutes). Set aside to cool while you prepare the dough.
  2. Stir together warm water and yeast. Cover with plastic wrap and let stand for five minutes or until frothy. Place in the bowl of a stand mixer fitted with a dough hook attachment. Add 2 cups all purpose flour and the whole amount of whole wheat flour, salt, sugar and rosemary and mix until dough comes together. Knead with dough hook for 4-5 minutes until smooth and elastic. Add 1/4 - 1/2 of the cranberry mixture and work into bread. You may need to add up to one cup of additional all purpose flour in order to make the dough the correct consistency (should be smooth and just slightly tacky). Mix in the pecans. Some pecans may stay in the bottom of the bowl, just turn the dough out onto the counter and knead in those pecans with your hands, using fingers to push them into the dough. Place the dough in a lightly oiled bowl, cover tightly with plastic wrap and place in a warm place to rise for one hour.
  3. Line a baking sheet with parchment paper. Combine egg and 1 tbsp water to make egg wash and set aside.
  4. Turn dough out onto lightly floured surface and roll out until about 1/2 inch thick (roughly into a 12 x 12 inch square. Fold in 1" flaps on each side of the dough. Spread the dough with the remaining cranberry sauce. Then starting at the top, roll the dough tightly (as you would if making cinnamon buns). Pinch the seam so that the roll stays together.
  5. Lay the roll seam side down on the prepared baking sheet. Cover with plastic wrap and place back in warm place to rise for 45 minutes. During the last 10 minutes of the rise time, preheat oven to 350F. Brush dough with egg wash. Then using a sharp knife, make slashes diagonally across the dough at two inch intervals all the way down the loaf. Sprinkle with coarse salt.
  6. Bake in preheated oven for 40 minutes or until loaf sounds hollow when you perform the "knock test". Cool completely before slicing.  

Make this bread! You won't be disappointed and it will disappear very quickly in your house.

This post has been Yeast Spotted!

Happy Baking my Friends! All the best to you in 2012!


30.12.11

Lemon Cheesecake Mousse Tart


I just love being on vacation - I actually have time for blogging and cooking and baking! Its so enjoyable and I feel like I'm a far better blog owner when I'm not just trying to get a post up for the sake of posting.  I've taken some time off between Christmas and New Years and it has been really nice - my family is staying with us so I've had a chance to "show off" with some delicious meals and some new recipes. This lemon cheesecake mousse tart from Anna Olson's cookbook In the Kitchen with Anna is a great dessert for occasions like this - where you want people to ohhh and ahhhh over the dessert and rave about it for a while. Its so delicious and really very simple to whip up. And of course, I have to mention how few ingredients this recipe has in it - you'll probably have a lot of them on hand already.


Lemon Cheesecake Mousse Tart
Recipe adapted from In the Kitchen with Anna

Crust Ingredients:
  • 2 cups all purpose flour
  • 1/2 cup sugar
  • 1/2 tsp finely grated lemon zest
  • 1/4 tsp fine salt
  • 1 cup unsalted butter, cut into pieces and chilled
  • 1 large egg
  • 1 large egg yolk
Mousse Ingredients:
  • 1 1/2 cups whipping cream
  • 12 oz cream cheese, at room temperature
  • 2/3 cup sugar
  • 1 tbsp finely grated lemon zest
  • 1/2 cup lemon juice
  • dash vanilla extract
  • raspberries, for garnish
Method:
  1. For the crust, stir the flour, sugar, lemon zest and salt to combine. Pour into the food processor and  add butter. Pulse until the mixture has the texture of coarse meal. Add the egg and the yolk and process just until the dough comes together. Shape the dough into a disk and chill for at least an hour.
  2. On a lightly floured surfact, roll our dough to just less than 1/4 inch thick (this didn't work for me, so I just pressed the dough into the tart pan and up the sides). Sprinkle an 8 inch tart pan with a removable bottom lightly with flour and line with pastry. Trim the edges and chill for an hour.
  3. Preheat oven to 350F. Place tart shell on a baking sheet. Dock the bottom of the pastry with a fork, line the shell with foil and weigh down with dried beans, rice or pie weights. Bake for 15 minutes then remove the weights and bake for another 8-10 minutes, or until the centre of the tart shell appears dry and the edges are browned. Let cool while preparing the mousse.
  4. For the mousse, whip the cream to soft peas and chill. In a separate bowl beat the cream cheese until smooth and beat in the sugar and lemon zest, scraping down the sides of the bowl often. Beat in the lemon juice and vanilla. Fold in the whipped cream in two additions. Dollop the mouse (or pipe with a piping bag) into cooled shells. Garnish with fresh raspberries and chill until ready to serve. Gently remove outside ring and bottom of tart pan before plating.

You could also make 8 4-inch mini tarts instead of one big one if you want something cute for a dinner party. Hope you enjoy this recipe!! I'm heading off to enjoy my last weekend of freedom before I have to head back to work.

I've linked up this post with Whatcha Baking Wednesday over at CajunSugarPie.Com - head on over there to check out some more scrumptious dessert recipes to test out (or even just drool over if you're into that!).

Happy Baking my Friends!

29.12.11

Anna Olson's Back to Baking Book Tour & Cooking Class

 I recently had the pleasure of attending a cooking class at Well Seasoned in Langley, BC that was taught by Anna Olson herself!! Anna was touring around for the launch of her new cookbook Back to Baking and so she stopped in at Well Seasoned to demonstrate some of the recipes from her book for a small group of lucky people. This was seriously one of the most exciting and inspiring experiences I've ever had! And I got to sit right in the front row and chat with Anna on the break (yeah, I'm a baking nerd/ groupie)! So very exciting.

Anna's famous Raisin Butter Tarts

 This post just captures some of my favorite photos of the night, some baking tips I picked up and photos of the recipes she demonstrated for us. :) Hope you enjoy!


I learned that I have been committing a very, very bad baking sin during the cooking class!! I usually use salted butter in all of my baking because unsalted butter is so darn expensive up here (5-6 bucks per pound adds up pretty quick if you do as much baking as I do). But, Anna explained some really great information regarding why its important to use unsalted butter in your baking. Here are the facts:
  • Unsalted butter is fresher - salt is a preservative and therefore is added to butter to make it keep longer. Thus unsalted butter has a shorter shelf life and will always be fresher than salted butter.
  • Salt content in salted butter varies by brand and even by production batch. Therefore when you bake with salted butter, you don't really know how much salt is already in the butter and if you add any salt you run the risk of oversalting your baked goods. Consistency is key, and baking with salted butter will make it difficult to be consistent due to varied salt content.
  • Too much sodium is unhealthy - if you start with unsalted butter and add the desired amount of salt, you control how much sodium goes into your baking and therefore you control your sodium intake.
Those facts convinced me! Hope they convince you too. It sounds like unsalted butter is worth the extra money to me! :)
Raspberry & White Chocolate Rugelach

Yep, thats right, I got to sit this close to her!!


One other tidbit I took from Anna's class - tapered french rolling pins are ideal for rolling out pastry into round shapes. They're easier to work with and maneuver than the block rolling pins and the tapering allows you to put an angle on the pin while rolling that will enable you to make round shapes really nicely and easily. I will be doing a demonstration soon because I received a beautiful french rolling pin for Christmas from my brother-in-law. Stay tuned!!
Boozy apple crisp trifle

Low fat, low sugar pumpkin muffins

Anna Olson & Me
 Meeting Anna was such a pleasure - she was so personable and down to earth. I didn't really know what to expect when going to her class, but it was so great! Each time I open her cookbook I'm amazed at the quality of the recipes in the book and the variety of the recipes. She has things as easy as chocolate chip cookies and then you flip to the next section and its far more technical - think wedding cake dressed in fondant. This is a cookbook for all levels, so if you like to bake, head out and pick up one of these books for yourself!
So excited - I finally own an autographed cookbook!
Happy Baking my Friends!

28.12.11

Apple Cider Pork Chop Sammies with Apple Slaw


Yesterday I finally had the chance got motivated enough to go around and check out some of the Secret Recipe Club Group C reveals from the December reveal. Wow! There were some great posts - what a talented group of people. Some of my favorites were Saltine Cracker Toffee over at Allie's Clean Plate Club, Salmon Creme at the Kitchen Witch Blog, and the Chocolate Peppermint Brownie at Foodness Gracious. But I think my absolute favorite of the bunch was the Apple Cider Pork Chop Sammies with Apple Slaw over at Cookin with Moxie, in fact, I was so excited about these "sammies" that I just had to make them last night for dinner!

It was sooooo worth it! The house smelled amazing, they were quite easy, but the only thing they weren't was quick. The key to the deliciousness of these sammies is the slow simmering of the pork chops. I tweaked the recipe a bit, and I think I will tweak it a bit more next time I make it (because there will most definitely be a next time when I'm through with all these turkey leftovers!!). Here is the recipe, because I can tell you're dying to give it a try. I've noted the changes (though there aren't many) that I will make next time I make it in blue.

Apple Cider Pork Chop Sammies
Recipe adapted from Cookin' with Moxie

Ingredients:
  •  3 lbs pork chops (next time I will use a pork roast and cut into thick pieces)
  • Coarse salt and freshly ground black pepper
  • 2 tbsp olive oil
  • 1 large onion, diced
  • 6 cloves garlic minced
  • 4 cups apple cider
  • 1 bottle dark beer (I used Dead Frog Brewery's Nut Brown Ale)
  • 6 sprigs fresh thyme
  • 6 sandwich buns
  • 1 cup light mayonnaise
  • 1/4 cup apple cider vinegar
  • 1 tbsp celery salt
  • 1/2 tbsp spicy brown mustard
  • 1/2 tbsp dijon mustard
  • 1 bag prepared coleslaw mix
  • 3 granny smith apples, shredded
  • BBQ sauce
Method:
  1. Sprinkle pork generously on all sides with salt and pepper. In a large heavy bottomed, deep skillet, over medium high heat, add the olive oil and sear the chops on all sides. Remove to a plate while searing batches of the pork until all pork has been browned (work in batches to prevent over crowding the pan - overcrowding the pan results in decreasing the temperature of the pan and then boiling your pork instead of searing. We want to sear to ensure that we develop those delicious caremlization flavours!!).
  2. Turn the heat down to medium and add the onions. Sweat for five minutes, then add the garlic and sweat for five more minutes. Deglaze the pan with the apple cider and the beer. Scraping the brown bits from the bottom of the pan. Add pork chops and any juices that have accumulated back to the pan. Add the thyme. Cover and bring to a simmer. Simmer for 1 1/2 hours or until the pork is falling apart. Remove the pork from the liquid with a slotted spoon and shred with two forks.
  3. While the pork is cooking, make the coleslaw. Whisk together the mayo, cider vinegar, celery salt, and both mustards. Taste and season with salt and pepper if desired. Add coleslaw mix and shredded apples. Toss thoroughly.
  4. To assemble the sammies, place a generous scoop of coleslaw on one side of the bun, place a generous scoop of the shredded pork on the other side of the bun. Then drizzle the pork side of the bun generously with your favorite bbq sauce. Enjoy a sloppy, but delicious dinner!
So, pretty easy, just takes a bit of time. Make this one on a weekend or better yet, make it while you're still on Christmas vacation! :)

Happy Cooking my Friends!
 

26.12.11

Eggnog French Toast

Got leftover eggnog from the holidays? Make eggnog French toast! It's easy, quick and delicious. Your family will love having a hot breaky and you can use it up if you're sick of drinking it!
My sister discovered Southern Comfort eggnog in the US last time she was across the border - it puts all the Canadian eggnog I've tasted to shame. It is soooo smooth, creamy and flavourful. So, if you live close enough to the border, buy this special treat for this recipe - it will make a big difference in taste.

Eggnog French Toast
Recipe by Erin Reimer & Leslie Froese

Ingredients:
  • 4 eggs, lightly beaten
  • 1/2 - 3/4 cup eggnog (Southern Comfort eggnog if available)
  • 1/4 - 1/2 cup of 1% milk
  • 1 tsp vanilla
  • 1/2 tsp cinnamon
  • 1/8 tsp freshly ground nutmeg
  • 12 slices white bread
Method:
  1. Preheat griddle pan on the stove on medium-low heat (grease if using anything other than non-stick pan).
  2. Mix eggs and eggnog. Add milk to thin mixture out to desired consistency, adding up to 1/2 cup. Stir in vanilla, cinnamon and nutmeg.
  3. Dip slices of bread into mixture quickly, coating both sides, but not soaking through with mixture. Fry coated slices on both sides until nicely browned. Top with butter, icing sugar and syrup. Serves 5 people.

My Mom and I came up with this recipe this morning for breakfast and it was a big hit with our family. If you try it out, let me know what you think. Hope you're having a fabulous holiday with friends and family. I don't have to go back to work until the new year, so I'm enjoying my time of immensely.


Merry Christmas friends & Happy Baking!