Pages

30.12.11

Lemon Cheesecake Mousse Tart


I just love being on vacation - I actually have time for blogging and cooking and baking! Its so enjoyable and I feel like I'm a far better blog owner when I'm not just trying to get a post up for the sake of posting.  I've taken some time off between Christmas and New Years and it has been really nice - my family is staying with us so I've had a chance to "show off" with some delicious meals and some new recipes. This lemon cheesecake mousse tart from Anna Olson's cookbook In the Kitchen with Anna is a great dessert for occasions like this - where you want people to ohhh and ahhhh over the dessert and rave about it for a while. Its so delicious and really very simple to whip up. And of course, I have to mention how few ingredients this recipe has in it - you'll probably have a lot of them on hand already.


Lemon Cheesecake Mousse Tart
Recipe adapted from In the Kitchen with Anna

Crust Ingredients:
  • 2 cups all purpose flour
  • 1/2 cup sugar
  • 1/2 tsp finely grated lemon zest
  • 1/4 tsp fine salt
  • 1 cup unsalted butter, cut into pieces and chilled
  • 1 large egg
  • 1 large egg yolk
Mousse Ingredients:
  • 1 1/2 cups whipping cream
  • 12 oz cream cheese, at room temperature
  • 2/3 cup sugar
  • 1 tbsp finely grated lemon zest
  • 1/2 cup lemon juice
  • dash vanilla extract
  • raspberries, for garnish
Method:
  1. For the crust, stir the flour, sugar, lemon zest and salt to combine. Pour into the food processor and  add butter. Pulse until the mixture has the texture of coarse meal. Add the egg and the yolk and process just until the dough comes together. Shape the dough into a disk and chill for at least an hour.
  2. On a lightly floured surfact, roll our dough to just less than 1/4 inch thick (this didn't work for me, so I just pressed the dough into the tart pan and up the sides). Sprinkle an 8 inch tart pan with a removable bottom lightly with flour and line with pastry. Trim the edges and chill for an hour.
  3. Preheat oven to 350F. Place tart shell on a baking sheet. Dock the bottom of the pastry with a fork, line the shell with foil and weigh down with dried beans, rice or pie weights. Bake for 15 minutes then remove the weights and bake for another 8-10 minutes, or until the centre of the tart shell appears dry and the edges are browned. Let cool while preparing the mousse.
  4. For the mousse, whip the cream to soft peas and chill. In a separate bowl beat the cream cheese until smooth and beat in the sugar and lemon zest, scraping down the sides of the bowl often. Beat in the lemon juice and vanilla. Fold in the whipped cream in two additions. Dollop the mouse (or pipe with a piping bag) into cooled shells. Garnish with fresh raspberries and chill until ready to serve. Gently remove outside ring and bottom of tart pan before plating.

You could also make 8 4-inch mini tarts instead of one big one if you want something cute for a dinner party. Hope you enjoy this recipe!! I'm heading off to enjoy my last weekend of freedom before I have to head back to work.

I've linked up this post with Whatcha Baking Wednesday over at CajunSugarPie.Com - head on over there to check out some more scrumptious dessert recipes to test out (or even just drool over if you're into that!).

Happy Baking my Friends!

29.12.11

Anna Olson's Back to Baking Book Tour & Cooking Class

 I recently had the pleasure of attending a cooking class at Well Seasoned in Langley, BC that was taught by Anna Olson herself!! Anna was touring around for the launch of her new cookbook Back to Baking and so she stopped in at Well Seasoned to demonstrate some of the recipes from her book for a small group of lucky people. This was seriously one of the most exciting and inspiring experiences I've ever had! And I got to sit right in the front row and chat with Anna on the break (yeah, I'm a baking nerd/ groupie)! So very exciting.

Anna's famous Raisin Butter Tarts

 This post just captures some of my favorite photos of the night, some baking tips I picked up and photos of the recipes she demonstrated for us. :) Hope you enjoy!


I learned that I have been committing a very, very bad baking sin during the cooking class!! I usually use salted butter in all of my baking because unsalted butter is so darn expensive up here (5-6 bucks per pound adds up pretty quick if you do as much baking as I do). But, Anna explained some really great information regarding why its important to use unsalted butter in your baking. Here are the facts:
  • Unsalted butter is fresher - salt is a preservative and therefore is added to butter to make it keep longer. Thus unsalted butter has a shorter shelf life and will always be fresher than salted butter.
  • Salt content in salted butter varies by brand and even by production batch. Therefore when you bake with salted butter, you don't really know how much salt is already in the butter and if you add any salt you run the risk of oversalting your baked goods. Consistency is key, and baking with salted butter will make it difficult to be consistent due to varied salt content.
  • Too much sodium is unhealthy - if you start with unsalted butter and add the desired amount of salt, you control how much sodium goes into your baking and therefore you control your sodium intake.
Those facts convinced me! Hope they convince you too. It sounds like unsalted butter is worth the extra money to me! :)
Raspberry & White Chocolate Rugelach

Yep, thats right, I got to sit this close to her!!


One other tidbit I took from Anna's class - tapered french rolling pins are ideal for rolling out pastry into round shapes. They're easier to work with and maneuver than the block rolling pins and the tapering allows you to put an angle on the pin while rolling that will enable you to make round shapes really nicely and easily. I will be doing a demonstration soon because I received a beautiful french rolling pin for Christmas from my brother-in-law. Stay tuned!!
Boozy apple crisp trifle

Low fat, low sugar pumpkin muffins

Anna Olson & Me
 Meeting Anna was such a pleasure - she was so personable and down to earth. I didn't really know what to expect when going to her class, but it was so great! Each time I open her cookbook I'm amazed at the quality of the recipes in the book and the variety of the recipes. She has things as easy as chocolate chip cookies and then you flip to the next section and its far more technical - think wedding cake dressed in fondant. This is a cookbook for all levels, so if you like to bake, head out and pick up one of these books for yourself!
So excited - I finally own an autographed cookbook!
Happy Baking my Friends!

28.12.11

Apple Cider Pork Chop Sammies with Apple Slaw


Yesterday I finally had the chance got motivated enough to go around and check out some of the Secret Recipe Club Group C reveals from the December reveal. Wow! There were some great posts - what a talented group of people. Some of my favorites were Saltine Cracker Toffee over at Allie's Clean Plate Club, Salmon Creme at the Kitchen Witch Blog, and the Chocolate Peppermint Brownie at Foodness Gracious. But I think my absolute favorite of the bunch was the Apple Cider Pork Chop Sammies with Apple Slaw over at Cookin with Moxie, in fact, I was so excited about these "sammies" that I just had to make them last night for dinner!

It was sooooo worth it! The house smelled amazing, they were quite easy, but the only thing they weren't was quick. The key to the deliciousness of these sammies is the slow simmering of the pork chops. I tweaked the recipe a bit, and I think I will tweak it a bit more next time I make it (because there will most definitely be a next time when I'm through with all these turkey leftovers!!). Here is the recipe, because I can tell you're dying to give it a try. I've noted the changes (though there aren't many) that I will make next time I make it in blue.

Apple Cider Pork Chop Sammies
Recipe adapted from Cookin' with Moxie

Ingredients:
  •  3 lbs pork chops (next time I will use a pork roast and cut into thick pieces)
  • Coarse salt and freshly ground black pepper
  • 2 tbsp olive oil
  • 1 large onion, diced
  • 6 cloves garlic minced
  • 4 cups apple cider
  • 1 bottle dark beer (I used Dead Frog Brewery's Nut Brown Ale)
  • 6 sprigs fresh thyme
  • 6 sandwich buns
  • 1 cup light mayonnaise
  • 1/4 cup apple cider vinegar
  • 1 tbsp celery salt
  • 1/2 tbsp spicy brown mustard
  • 1/2 tbsp dijon mustard
  • 1 bag prepared coleslaw mix
  • 3 granny smith apples, shredded
  • BBQ sauce
Method:
  1. Sprinkle pork generously on all sides with salt and pepper. In a large heavy bottomed, deep skillet, over medium high heat, add the olive oil and sear the chops on all sides. Remove to a plate while searing batches of the pork until all pork has been browned (work in batches to prevent over crowding the pan - overcrowding the pan results in decreasing the temperature of the pan and then boiling your pork instead of searing. We want to sear to ensure that we develop those delicious caremlization flavours!!).
  2. Turn the heat down to medium and add the onions. Sweat for five minutes, then add the garlic and sweat for five more minutes. Deglaze the pan with the apple cider and the beer. Scraping the brown bits from the bottom of the pan. Add pork chops and any juices that have accumulated back to the pan. Add the thyme. Cover and bring to a simmer. Simmer for 1 1/2 hours or until the pork is falling apart. Remove the pork from the liquid with a slotted spoon and shred with two forks.
  3. While the pork is cooking, make the coleslaw. Whisk together the mayo, cider vinegar, celery salt, and both mustards. Taste and season with salt and pepper if desired. Add coleslaw mix and shredded apples. Toss thoroughly.
  4. To assemble the sammies, place a generous scoop of coleslaw on one side of the bun, place a generous scoop of the shredded pork on the other side of the bun. Then drizzle the pork side of the bun generously with your favorite bbq sauce. Enjoy a sloppy, but delicious dinner!
So, pretty easy, just takes a bit of time. Make this one on a weekend or better yet, make it while you're still on Christmas vacation! :)

Happy Cooking my Friends!
 

26.12.11

Eggnog French Toast

Got leftover eggnog from the holidays? Make eggnog French toast! It's easy, quick and delicious. Your family will love having a hot breaky and you can use it up if you're sick of drinking it!
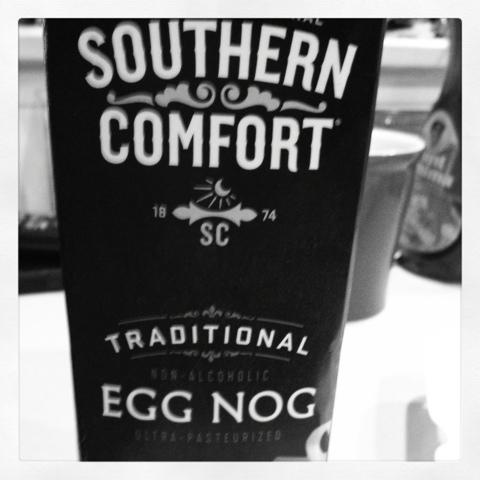
My sister discovered Southern Comfort eggnog in the US last time she was across the border - it puts all the Canadian eggnog I've tasted to shame. It is soooo smooth, creamy and flavourful. So, if you live close enough to the border, buy this special treat for this recipe - it will make a big difference in taste.

Eggnog French Toast
Recipe by Erin Reimer & Leslie Froese

Ingredients:
  • 4 eggs, lightly beaten
  • 1/2 - 3/4 cup eggnog (Southern Comfort eggnog if available)
  • 1/4 - 1/2 cup of 1% milk
  • 1 tsp vanilla
  • 1/2 tsp cinnamon
  • 1/8 tsp freshly ground nutmeg
  • 12 slices white bread
Method:
  1. Preheat griddle pan on the stove on medium-low heat (grease if using anything other than non-stick pan).
  2. Mix eggs and eggnog. Add milk to thin mixture out to desired consistency, adding up to 1/2 cup. Stir in vanilla, cinnamon and nutmeg.
  3. Dip slices of bread into mixture quickly, coating both sides, but not soaking through with mixture. Fry coated slices on both sides until nicely browned. Top with butter, icing sugar and syrup. Serves 5 people.

My Mom and I came up with this recipe this morning for breakfast and it was a big hit with our family. If you try it out, let me know what you think. Hope you're having a fabulous holiday with friends and family. I don't have to go back to work until the new year, so I'm enjoying my time of immensely.


Merry Christmas friends & Happy Baking!

24.12.11

Christmas Special: Gingerbread House Guest Post by Dana

Boy do I have a special treat for you! My good friend Dana (or D as I usually refer to her in my blog posts) has agreed to do a guest post on my blog featuring her beautiful gingerbread house. I'm so excited about this post because it has been over one year in the making! So without further delay, I'll turn it over to Dana to guide you through the creation of an absolutely stunning gingerbread house, so perfect for this Holiday Season.

Making a Gingerbread House

Hello fellow food enthusiasts! Well, its hours before Christmas and I hope you are all getting as excited as I am. I would like to say I big thank you to Erin for allowing me to post about one of my holiday traditions on her blog. Erin has done a fabulous job posting ideas for us all over the holiday season and has certainly had me in the mood to cook!

Making gingerbread houses was a childhood tradition of mine; something I did with my grandmother each year. She lived in England and I spent the majority of an eight hour plane ride designing blue prints deciding how this year’s house should look. As you can imagine, they got increasing more complicated to the point where it was taking two solid days to bake and construct. But really, this is the beauty of gingerbread houses, they can be as simple or as elaborate as you like. Not only that, but all mistakes can be hidden by another squeeze of royal icing so you really can’t go wrong. So here I attempt to show you a few steps on how to make your own house.
Step 1 – Design your house
The first step is designing your blueprint. A quick google search will yield lots of free patterns but each year I like to design my own. It’s a little like heading back to geometry class and feels good to stretch those muscles. Keep in mind, the larger the house, the more stressful assembly will be. Make paper cutouts of your pieces and use a knife to cut the cookies into the desired shapes. When they come out of the oven you will want to lay the pattern back on top and cut them again for good assembly.

Step 2 – Make and bake gingerbread
I have used a different gingerbread recipe in the pictures because I was trying something new but actually, I didn’t like it. I have used this recipe from Martha Stewart on numerous occasions and therefore I disclose it for you here. The amount you need will depend on how large your house is and I needed three batches for mine. Any extra makes great men or trees and whatever you wish to decorate and extra dough freezes beautifully.
Ingredients
  • 2 cups all-purpose flour (spooned and leveled), plus more for rolling
  • 2 teaspoons ground ginger
  • 1 teaspoon ground cinnamon
  • 1/2 teaspoon ground nutmeg
  • 1/4 teaspoon ground cloves
  • 1/4 teaspoon baking soda
  • 1/4 teaspoon salt
  • 1/2 cup (1 stick) unsalted butter, room temperature
  • 1/3 cup packed dark-brown sugar
  • 1/3 cup unsulfured molasses
  • 1 large egg
Directions
  1. In a medium bowl, whisk together flour, spices, baking soda, and salt; set aside. With an electric mixer, beat butter and brown sugar until smooth. Beat in molasses and egg. With mixer on low, add dry ingredients; mix just until a dough forms. Place dough on floured plastic wrap; pat into an 8-inch square. Wrap well; chill until firm, 1 to 2 hours.
  2. Preheat oven to 350 degrees farenheit. Divide dough in half. Working with one half at a time (rewrap and refrigerate other half), place dough on floured parchment or waxed paper; roll out 1/8 inch thick, turning, lifting, and flouring dough (and rolling pin) as needed.
  3. Loosen dough from paper. Cut out shapes, using the pattern you created and a few gingerbread men to stand outside, and transfer to baking sheets.
  4. Bake until firm and edges just begin to darken, 10 to 18 minutes, depending on size.
  5. Lay your pattern back on top of the cookie and re-trim it if it has changed size during the baking process.
  6. Cool completely on baking sheets.
Decorating and Assembly
I have decorated and assembled my house two ways. Once with the walls decorated and once without the walls decorated and the assembled. It doesn’t matter though, if you do wish to get incredibly intricate with your decorations (as I have been known to do), I would suggest decorating on a flat surface, letting them dry overnight and then assembling.  Either way, you will need lots of royal icing:
This recipe is fabulous from Anna Olson’s new book “Back to Baking”, my house was quite large, I needed four batches in the end.
Ingredients
  • 2 egg whites
  • 2 cups icing sugar (sifted) – If you have a Kitchenaid you can skip the sifting and beat with vigor!
  • 1 tablespoon white corn syrup
  • 1 teaspoon lemon juice
Directions
Whip the eggs whites just to loosen them add the remaining ingredients, beat on low at first and then on high for five minutes until light and fluffy. You will want to keep royal icing covered when not in use as it goes hard fast!
Something I tried this year (and it didn’t work) was to bake sugared glass into the windows but making a cutout in the dough and filling with coloured sugar.

It was disaster because the sugar granules did not melt and required me cooking the sugar over the gas flame of the stove top risking burning down the house. On the list of things to learn before next year is sugar craft but it turned out good enough for this year!

Step 3 – Decorate and assemble
So admittedly, this part can be a little stressful and the larger the house the more stressful this will be. I decided to go hog wild and my roof was the size of a whole sheet of paper but I went slow and it all worked out in the end. I even assembled it backward, had to take it apart and it still worked out, I repeat: all mistakes can be covered by another piping of icing sugar.
So begin by piping lines of icing on your chosen surface (I use a marble cutting board) to support the back inside walls and either hold them or support them until the icing becomes tacky enough to hold up the wall on its own (10 to 15 minutes). This year I even put a light in the house to highlight the sugar windows:


Once the walls are firm, you can add the roof and I use wine glasses to support it while it dries.
Once the house is standing it’s up to you to cover it in candy, icing sugar, icicles; let your imagination run wild. This year I made the roof tiles our of coloured royal icing as few days in advance and let them dry and glued them on the roof with icing sugar.
One of my favourite parts about the house is getting the whole family involved. I find that if you set out candy, baked cookies and icing bags filled with icing, they will come on their own volition and surprise you with creative juices. This year my family did all the men surrounding the house, my husband even made candy cane stands so that they could stand on their own.

In the end, I was pleased with the end result:


Like I say, this is something that can be fun for a few hours or consume you for days. Either way it’s a great project to get you in the mood for the Christmas season!!
Happy holidays everyone and thanks to Erin for having me!

Thanks Dana for the lovely post and the beautiful photos... maybe this will motivate me to try out making my own gingerbread house next year??!!

Happy Baking my Friends!

23.12.11

Red Wine Braised Short Ribs


I can't believe its almost Christmas!! Tomorrow is Christmas eve... wow has time ever flown by. It feels like 2011 just started and here we are finishing up the year already. In some ways its been a great year and in some ways its been really tough. I've learned a lot this year and really feel like my career has officially begun, but I've also had to work really hard to pass the tests and modules that are part of getting my CA designation. But with any luck, and some more hard work, I'm hoping to write my last exam in September 2012!!! I'm sure you've had many achievements and hurdles this year when you look back at the year... That is one of my favorite parts of this time of year. My other favorite part of this time of year is giving - giving loved ones gifts and seeing the looks of delight on their faces and giving my loved ones delicious and hearty meals.


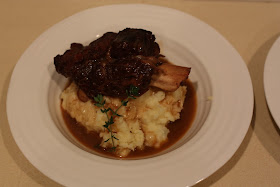
And this is one of those meals - hearty and prepared with time and love. Red Wine Braised Short Ribs with roasted garlic mashed potatoes. This is a very low maintenance meal - once you get the ribs browned, they just braise away over the afternoon with minimal work required right before serving. This makes them the perfect dinner party dish! Put em on in the morning and then forget about them until just before you serve. Bliss!!


Red Wine Braised Short Ribs
Recipe from Bon Appetit Magazine, October 2011

Ingredients:
  • 5 lb bone-in short ribs, cut crosswise into 2" pieces
  • kosher salt & freshly ground black pepper
  • 3 tbsp vegetable oil
  • 3 medium onions, roughly chopped
  • 3 medium carrots, coarsely chopped
  • 2 celery stalks, coarsely chopped
  • 3 tbsp all purpose flour
  • 1 tbsp tomato paste
  • 1 750 ml bottle dry red wine (preferably Cabernet Sauvignon)
  • 10 sprigs flat-leaf parsley
  • 8 sprigs thyme
  • 4 sprigs oregano
  • 2 sprigs rosemary
  • 2 dried bay leaves
  • 1 head of garlic, halved crosswise
  • 4 cups low salt beef stock
Method:
  1. Preheat oven to 350F. Season the short ribs with salt and pepper. Heat oil in a large Dutch oven over medium high heat. Working in two batches, brown short ribs on all sides, about 8 minutes per batch. Transfer short ribs to a plate. Pour off all but 3 tbsp drippings from pot.
  2. Add onions, carrots, and celery to pot and cook over medium high heat, stirring often, until onions are browned, about 5 minutes. Add flour and tomato paste, cook, stirring constantly, until well combined and deep red, 2-3 minutes. Stir in wine, then add short ribs with any accumulated juices. Bring to a boil, lower heat to medium and simmer until wine is reduced by about half, about 25 minutes. Add all herbs to pot along with garlic. Stir in stock. Bring to a boil, cover, and transfer to oven.
  3. Cook until short ribs are tender, 2 - 2 1/2 hours. Transfer short ribs to a platter. Strain sauce from pot into measuring cup. Spoon fat from surface of sauce and discard. Season sauce to taste with salt and pepper. Serve in shallow bowls over mashed potatoes with sauce spooned over.

 Nice and easy! The ribs get sooo tender they just fall off the bone, and with the red wine and the delicious fresh herbs the flavour is exquisite. I hope you get a chance to try out this recipe! Your family and friends will thank you.


Happy Cooking & Baking this Holiday Season my Friends! I hope you enjoy your time with family and friends. :)

19.12.11

SRC: Wives With Knives Lime Blueberry Scones

Hi All!  Hope your holiday preparations are going well. In addition to my usual holiday preparations, it is also time for December's Secret Recipe Club reveal for group C! Each month members are assigned another member's blog at random to choose a recipe from and make it and then on the reveal date, we reveal the recipe we selected and the blog we were assigned. It is a fun project, although, some months I feel more like stalker than blogger! All in good fun though. :)
Photo by Cathy at Wives with Knives (used with Cathy's permission)
This month I was assigned the blog Wives with Knives. And wow!! What a fabulous blog - so many beautiful pictures and delicious sounding recipes. My only regret is that December wasn't such a busy month for me - I would have loved to try a couple of recipes each week from this lovely blog. Cathy writes this lovely blog from Oregon (which also happens to be one of mine and my hubby's favorite vacation spots). She has lovely recipes - a good mix of sweet and savory, beautiful scenic adventure posts, and lots of interesting farmers market posts as well. It is a great mix that is sure to capitivate all readers who happen to drop by - if you haven't already happened upon her blog, do so ASAP! You are bound to find all kinds of inspiration there. :)


So - sad news - I took photos of these delicious scones that I made and my computer crashed and I lost my photos. I was near tears so hubby volunteered to do some recovery procedures with my dinosaur of a lap top tomorrow to see what he can rummage up. So, please keep your fingers crossed. I've shared a picture of my friend's lovely Christmas cards that she makes (see my previous post regarding Handmade by Sabana). I will update this post with food pics if hubby can recover, or when I have a chance to reperform the recipe later this week. Apologies to those of you visual foodies!!!  **UPDATE: I received a very kind email from Cathy at Wives with Knives with an offer that I could use one of her photos in order to get into the SRC list for the month. So, thanks Cathy for being so kind to me! :) :)

**UPDATE #2: I wasn't able to recover these photos, but I did rebake the recipe and get some of my own pictures. :) These scones were definitely appreciated a second time by my family! Mine aren't as pretty as Cathy's, but they definitely tasted delicious.

Here is the lovely recipe - I've only made some minor modifications to the recipe - mainly due to what I had on hand. :) This seems like a pretty versatile recipe, so feel free to play around with it.

Lime Blueberry Scones
Recipe minimally adapted from Wives with Knives

Ingredients:
  • 2 cups flour
  • 1 tbsp baking powder
  • 1/2 tsp salt
  • 2 tbsp sugar
  • 2 tsp lime zest
  • 5 tbsp butter, cold and cut into small cubes
  • 1 cup buttermilk
  • 1 1/2 cup frozen blueberries, thawed
Method:
  1. Preheat oven to 400 F. Sift dry ingredients into the bowl of a large food processor. Add lime zest and pulse to combine. Add butter and pulse until mixture resembles coarse crumbs. Pour in the buttermilk and pulse until mixture comes together. Pour mixture out onto counter and mix in the blueberries gently, folding and refolding the dough a couple of times to gently work the berries in without mashing them. Pat the dough into a square and cut into 12 squares.
  2. Place the scones on a baking tray lined with a piece of parchment paper. Brush with a bit of buttermilk and sprinkle with some sugar. Bake 15-20 minutes or until golden brown.

I hope you enjoy these scones, despite the lack of pictures. Please keep your fingers crossed for good ideas for recovery of lost pictures. Or if you have any suggestions, please feel free to pass them my way. Hoping for the best... or maybe this is just a hint telling me I need to make these again... they were pretty darn good.

Happy Reveal Day fellow group C'ers. Can't wait to check out your creations.

18.12.11

Christmas Feature: Handmade by Sabana

 I've been meaning to share this with you for a while now, but as per usual, I am so stinkin' busy that I haven't managed to get enough time to finish this post. So without further delay, I would like to introduce my friend's card & paper craft business Handmade by Sabana. Sabana makes all kinds of beautiful cards for any occasion, but this post features her Christmas collection. You can customize the cards you order to be exactly how you want them - for example, I loved the card above, but wanted a different colour ribbon, so Sabana changed the card and made me a dozen exactly how I wanted them!!


So if you're looking for some beautiful cards that are made with love that you can give to someone you care about, look no further! You can place orders with Sabana by messaging her on her facebook page, or emailing her at sabanaeaston[at]hotmail[dot]com.


 You can also find her cards featured at Jinshei Healing Centre. So if you live closeby, do stop by and check out her selection of cards there.

Sabana makes some beautiful 3-D cards

3-D card close-up - look at the amazing detail!

Gift tags - add them to gift boxes, homemade gifts, or presents under your tree


Small gift boxes - perfect for housing homemade confections


I hope you enjoy this selection of Christmas cards! They're beautifully done and really reasonably priced given the amount of time and materials that go into them. Support local businesses and place your order today!

Happy Holidays Friends!